
The usual advice for a roof leak, find the damaged shingle and smear on roof cement, skips the most important step: proving where the water entered. If you're staring at a ceiling stain after a Kansas City storm, start with the water's path, not a tube of sealant. A lasting fix has to stop the entry, address soaked materials, and survive the next rain.
Why a Ceiling Stain Points Past the Shingle
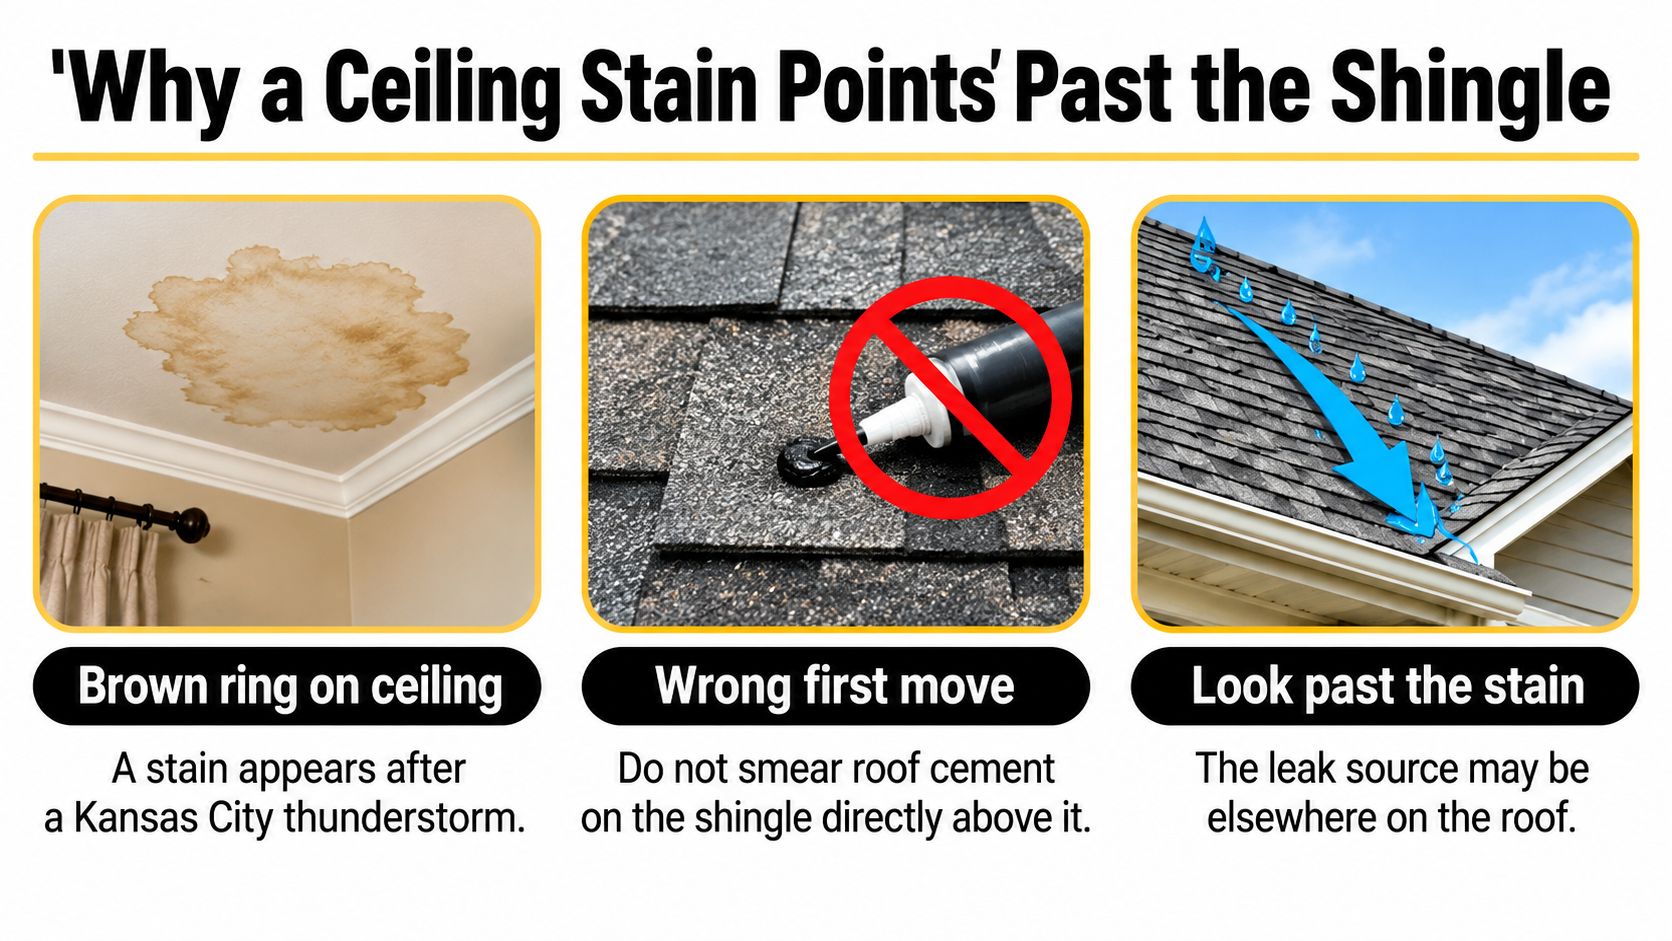
Say a brown ring appears on your bedroom ceiling after a thunderstorm. The natural instinct is to locate the shingle directly above it and patch that spot. But the stain marks where water escaped through the ceiling, not necessarily where it entered the roof.
Water can follow the underside of decking, run along a rafter, or soak through insulation before dropping indoors. By the time you notice discoloration, the affected area may include damp drywall, wet insulation, stained wood, and damaged belongings.
The broader stakes extend beyond roofing. The Insurance Institute for Business & Home Safety's interior-water white paper discusses water damage as a property-loss problem involving building materials and contents, a useful reason to investigate rather than repaint.
Before reaching for a ladder:
- Photograph the evidence. Capture the ceiling stain, surrounding room, and any safely accessible attic damage with dates attached.
- Record the conditions. Note whether water appeared during gusting rain, a prolonged soak, snowmelt, or dry weather.
- Protect your footing. Stay off wet or icy roofing, and don't enter an attic without secure access and visible structural walking surfaces.
This diagram illustrates why the first patch can miss the actual opening.
Practical rule: A convincing repair leaves a dry roof assembly after rain, not just a ceiling stain hidden beneath fresh paint.
How to Trace the Leak to Its Source
Where the drip is coming from
| Indoor clue | Likely path | First check |
|---|---|---|
| Drip only in wind-driven rain | Lifted shingle or open flashing lap | Attic tracks upslope of the stain, then edges and step flashing |
| Stain after a long rain with little wind | Valley, worn underlayment, or gutter backup | Valleys, eaves, and wet insulation along the wall |
| Drip during snowmelt or after ice | Ice dam at the eave | Eave edge, insulation depth, and soffit vents |
| Wet ceiling on a dry day | Plumbing leak or attic condensation | Pipes, bath fans, and attic humidity before any shingle |
| Stain far from pipes or penetrations | Sideways travel on the deck | Water tracks running across rafters, not straight up |
| Drip at a chimney, skylight, or wall | Failed counterflashing or curb | Metal laps integrated with the shingles, not a surface smear |
These clues narrow the inspection; they don't establish a diagnosis. For example, a stain beside a chimney could come from its flashing, an opening farther upslope, or an adjacent wall detail.
Follow the evidence from inside to outside
Separate an active leak from an old stain. Photograph the stain's edges and check whether the area becomes damp during the next weather event. Don't assume an old brown mark means water is still entering, or that a dry surface means the cavity behind it is dry.
Inspect the attic safely. Use a flashlight to examine decking, rafters, fasteners, and insulation. Look for shiny water trails, damp wood, and insulation that's darker or heavier than the surrounding material. Walk only on suitable structural supports or an established walkway, never ceiling drywall.
Map the wet area. Use recognizable reference points, such as a vent pipe or exterior wall, to relate the attic evidence to the roof outside. A pin-type moisture meter can help compare suspect wood with nearby dry wood, but don't treat an isolated reading as proof of the entry point.
Inspect outside without walking the roof. From the ground, use binoculars to examine vents, valleys, skylights, chimneys, roof-to-wall joints, and displaced shingles above and beside the wet zone. Keep ladder inspections within safe reach; don't lean sideways to improve the view.
Test only a specific suspected opening. Have a roofer apply hose water gently to the lowest suspect area while a helper watches inside, then move upslope systematically. Don't spray upward beneath shingles or soak several details simultaneously. For additional explanation of this diagnostic approach, RestoTek TX's guide to water testing to pinpoint roof leaks provides useful context.
Check nonroof sources. If moisture appears without rain, inspect plumbing, bath-fan ducting, and condensation conditions before authorizing roofing work. Oregon State University's mold-control inspection checklist treats roof leaks and other moisture sources as problems that must be identified and corrected.
Decide what can dry and what needs removal
Stop the incoming water before closing the assembly. Remove saturated insulation that remains compressed or contaminated rather than assuming airflow will restore it. Blackened decking needs assessment; discoloration alone doesn't prove decay, but soft, crumbling wood requires replacement.
Penn State's guidance on moisture and building renovation emphasizes correcting bulk-water sources, including leaks and clogged gutters, before covering or upgrading assemblies. Check gutter blockage and discharge too, or an otherwise repaired roof edge may get wet again.
Interior caulk and stain-blocking paint aren't roof repairs. Use them only after the source is corrected and the underlying materials are suitably dry.
How to Stop Water Until the Repair
Temporary protection should buy time for a proper repair, not become an indefinite roofing system. Work from inside first, and treat electrical hazards and unstable ceilings as reasons to keep people out of the affected room.
Make the room safe before touching the roof
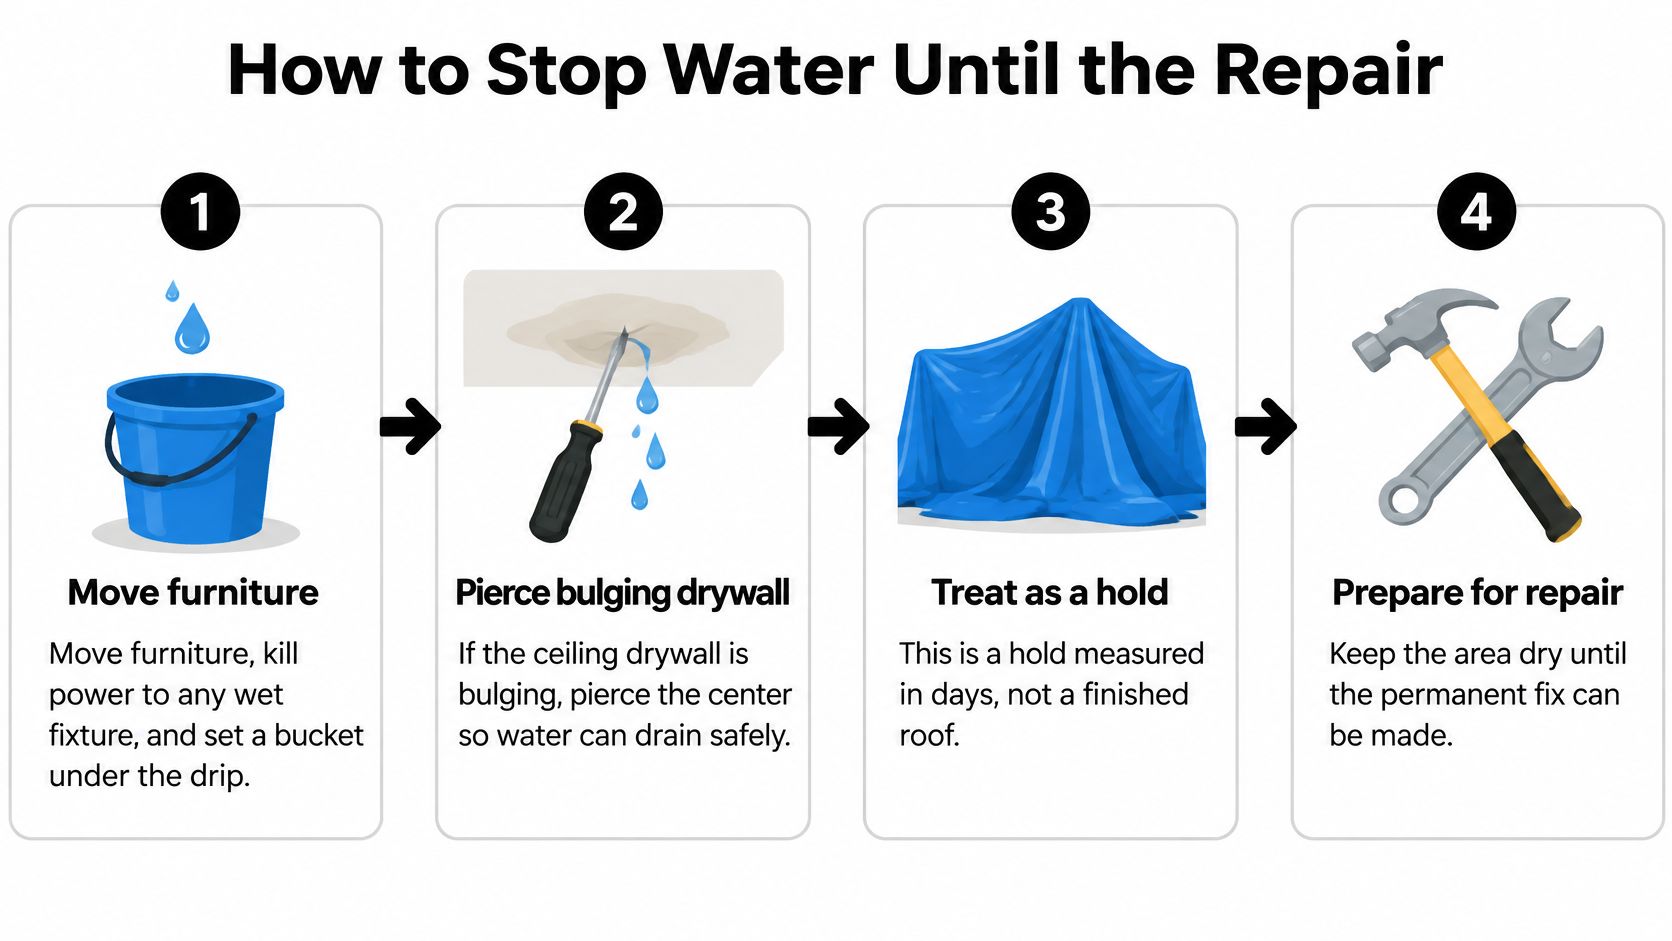
Move furniture and contain the drip. Remove rugs, electronics, and valuables. Place a bucket or collection tray beneath falling water, with towels around it to catch splashes.
Isolate electrical hazards safely. If water reaches a light fixture, outlet, or wiring, don't touch the wet equipment. Shut off the affected circuit only from a dry, safely accessible panel, and arrange electrical assessment. If the panel or your approach to it is wet, stay away.
Treat bulging drywall as unstable. Don't stand beneath it, press on it, or climb a stepladder under the bulge. A small, isolated water pocket may be drained through a controlled opening by someone who can confirm electrical safety and work from a protected position. Broad sagging, cracking, or uncertain conditions call for professional removal, not a homeowner puncturing the ceiling.
Document before covering. Photograph the interior damage and visible exterior conditions from safe positions. Include storm-related dents on gutters, siding, or screens where present, without marking or altering them.
The temporary sequence keeps protection separate from the permanent repair.
Use containment without creating another hazard
An attic catchment can intercept drips if there's safe access and sound support. Use a supported tray or plastic arranged to drain into a container, away from wiring. Don't lay plastic where it hides unsafe footing, traps moisture against wood, or directs water into another ceiling cavity.
Exterior tarping is better left to an equipped crew. A tarp needs an upslope arrangement that prevents water from running beneath it, secure edges, and anchorage into sound material. A loose sheet thrown over the visible damage can flap, collect water, or tear away.
Use the emergency roof-tarping guidance to understand this temporary measure before arranging help. A second person and a dry roof don't replace fall protection or roofing experience.
For an isolated missing shingle, a roofer may use a compatible temporary membrane tucked beneath the course above. Don't apply an exposed adhesive patch indiscriminately, or pour roof cement into valleys and flashing joints.
A successful hold reduces incoming water while leaving a clear, documented route to the permanent repair.
Before morning, check whether the container is filling more slowly and whether the wet area has stopped spreading. Don't remove protection because the rain stopped. For the interior work that follows, drywall repair advice from CS1 Real Interiors offers context for assessing damaged drywall rather than painting over it.
Permanent Fixes for Common Leak Points
Roof cement can slow a drip, but it can't rebuild a missing flashing lap. Permanent work restores the roof's drainage arrangement, with upper layers shedding water onto lower layers instead of depending on an exposed bead of sealant.
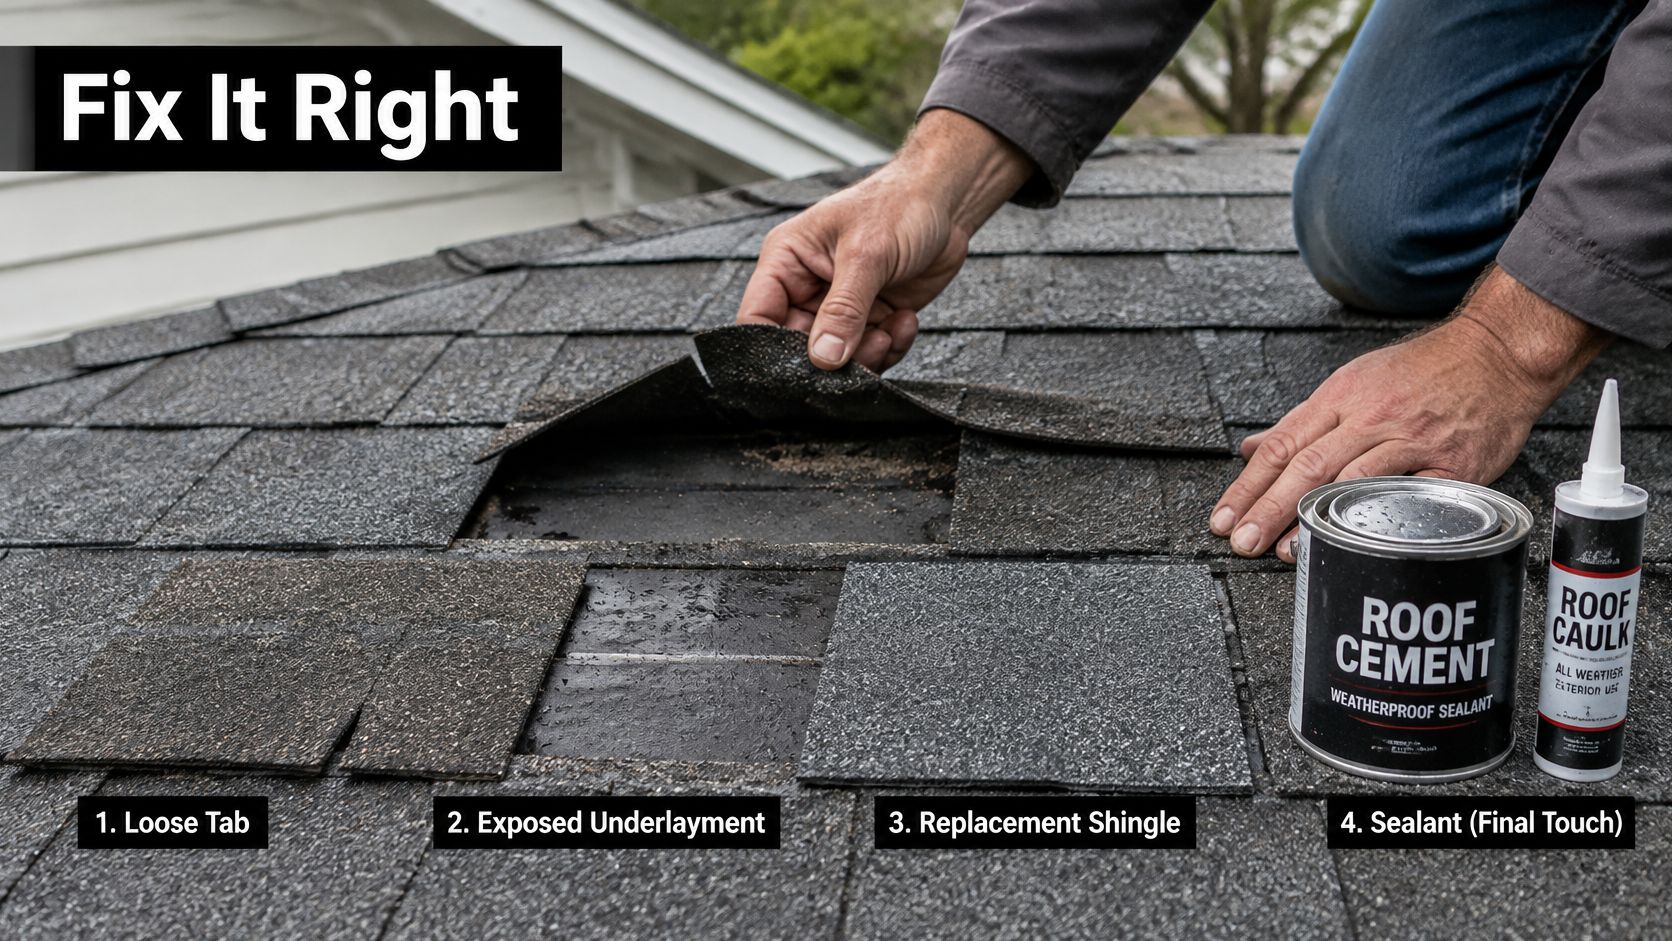
The image below shows shingle work, but replacing the damaged component matters more than coating its surface.
Repair the substrate, then restore the layers
For wind-damaged asphalt shingles, remove damaged pieces without tearing surrounding courses. Match the replacement's dimensions and exposure, slide it into the correct course, and fasten through the designated nailing zone. Face-nailing the exposed surface creates another penetration rather than recreating the original assembly.
At a pipe boot, replace a cracked collar or failed flashing assembly with a compatible component sized for the pipe. The flange must integrate with the shingles so its upslope portion is beneath the roofing and its downslope portion drains onto it. A ring of caulk around deteriorated rubber doesn't restore the boot.
For chimneys, skylights, and roof-to-wall joints, inspect beneath the visible metal. Remove defective flashing, replace unsound decking, and rebuild step flashing and counterflashing or the appropriate curb detail. Masonry counterflashing may require a properly formed reglet; other wall systems need a compatible connection behind their water-control layer.
PNNL's Building America Solution Center recommends inspecting existing roof penetrations and correcting missing or defective flashing. Its underlying principle is mechanical integration with the surrounding roof covering, not surface sealing alone.
For a closer explanation of these transitions, review roof flashing repair details. Where a specified assembly uses an end-cap component, you can browse boxed end cap flashing from Contractor's Den to understand the product category, but confirm profile, dimensions, and metal compatibility before purchasing.
This demonstration provides additional visual context for roof-repair work.
Match the correction to the assembly
A valley repair begins with clearing debris and examining the actual valley construction. Restore damaged metal, membrane, or shingle courses according to that roof's design. Filling the channel with mastic can obstruct the very drainage route it needs.
An ice-dam repair may require eave membrane work alongside attic air sealing, insulation corrections, and ventilation assessment. Another surface shingle won't correct warm air escaping into the attic.
Older specialty roofs deserve compatible repairs. The National Park Service's historic-roofing guidance notes that some roofs made with top-quality slate and flashing can last approximately 40–60 years with minimal maintenance. Age alone therefore doesn't justify covering slate, tile, or metal details with cement.
Ask for a written scope that separates:
- Roof covering. Matching shingles or compatible specialty materials.
- Flashing components. Pipe boots, step flashing, counterflashing, and required terminations.
- Concealed work. Deck replacement, underlayment, and self-adhered membrane where appropriate.
- Verification. Controlled testing, attic inspection, and photographs of completed details.
Stop localized work if opening the roof reveals widespread soft decking. The repair scope needs reassessment before anyone covers it.
Repair Replace or File the Claim
| Option | Published national cost context | What it means for your decision |
|---|---|---|
| Roof repair | Average residential repairs reached $4,699 in 2025, according to Insurance Business's reporting of Verisk figures. | A broad benchmark, not a quote for a pipe boot or flashing repair. |
| Roof replacement | The same reporting put average residential replacement at $17,631 in 2025. | Compare a replacement scope against the roof's overall condition, not just the visible stain. |
| Insurance claim | Your policy determines the deductible, valuation terms, and exclusions. | A claim is a possible payment route, not a repair method or guarantee of coverage. |
Those averages do not price a Kansas City house. Roof geometry, access, material, concealed damage, and how much roofing must be removed can change the written estimate substantially. Two roofs with the same square footage can carry very different bids if one has three layers to tear off and a soft deck section underneath. Request itemized labor and materials rather than treating a national average as a ceiling or a floor.
Choose the scope before the payment route
Repair is the stronger choice when the defect is local and the surrounding system is serviceable. A failed pipe boot, a short run of incorrectly installed flashing, or isolated storm damage can often be corrected without disturbing sound roof areas. The proposal should name the traced entry point, not the ceiling stain, and explain how the new material ties into the existing courses.
Replacement becomes more reasonable when failures are widespread. Recurring leaks in separate locations, extensive material deterioration, failing underlayment, and multiple areas of unsound decking deserve a whole-roof assessment. Neither "it's old" nor "we can patch anything" is a sufficient explanation on its own.
A claim deserves consideration when there is evidence of a potentially covered event. Photograph damage before temporary work obscures it, record the storm date and observed wind direction, and retain mitigation receipts. Dents on gutters or screens help document exposure, but they do not independently establish that the roof requires replacement.
Wind and hail account for a major share of insured homeowner property losses nationwide, which is why adjusters read storm documentation carefully. That national pattern says nothing about whether your particular damage is covered. Your photographs, your storm-date records, and the contractor's written findings carry that weight.
Ask policy questions before assuming reimbursement
Use the insurer's answers to separate your likely out-of-pocket cost from the contractor's repair price:
- Deductible. Does a separate wind or hail deductible apply?
- Valuation. Does the policy use actual cash value or replacement cost for this roof?
- Depreciation. Is any withheld amount recoverable, and what documentation is required?
- Matching. How does the policy address discontinued shingles or material mismatch?
- Exclusions. What provisions apply to wear, deterioration, installation defects, or delayed mitigation?
The roof-leak insurance claim guide can help organize the questions and records for that conversation. Keep the contractor's condition assessment separate from the insurer's coverage decision.
Decision check: Choose the work that corrects the documented damage, then determine whether the policy contributes to that work.
Do not postpone protection while deciding whether to claim. A repairable opening can still soak interior materials while estimates and coverage questions remain unresolved.
Hand the Roof to a Crew
The right moment to stop DIY isn't after you've exhausted every tube of sealant. It's when diagnosing or reaching the defect requires exposure to a hazard, or when the damaged assembly extends beyond a straightforward, accessible repair.
Conditions that end a homeowner repair attempt
- Uncertain footing. Steep slopes, wet shingles, ice, wind, and unsafe ladder access require appropriate professional equipment and procedures.
- Unsound structure. Soft decking, sagging roof areas, or damaged rafters need structural assessment before further access.
- Electrical involvement. Water at wiring, fixtures, or electrical equipment requires isolation and electrical evaluation.
- A returning leak. Continued water entry after a documented flashing correction calls for a broader investigation, not another surface coating.
- Damage across roof areas. Suspected hail damage on multiple slopes or widespread concealed moisture needs a coordinated inspection.
A dry-looking ceiling isn't an adequate handoff condition. Tell the crew what changed during the leak, what temporary work was done, and which materials remain wet.
Bring evidence that shortens the investigation
Prepare dated photographs of the ceiling and accessible attic areas. Include any controlled-test notes identifying the wetted roof zone, the sequence of testing, and when dripping started or stopped. If wet materials were removed, retain photographs showing their original location and condition.
Keep storm information, temporary-repair invoices, and earlier repair proposals together. For a small commercial building, add a simple location sketch so the inspector can relate an interior room or tenant space to the roof above it.
Ask for a documented explanation of the entry point, concealed damage, proposed repair, and method of checking the finished work. That gives you something concrete to evaluate instead of a bid that merely says “seal leak.”
For Kansas City homeowners and property managers, our team at Two States Exteriors LLC offers emergency roofing services and roof insurance claims services for hail and storm damage. We operate 24/7, so an active leak doesn't have to wait for ordinary office hours before you request help. Keep people away from unsafe areas while arranging the inspection.
Two States Exteriors LLC provides leak repairs, roof replacement, and storm-damage claim support to address both the opening and the work needed afterward. Visit Two States Exteriors LLC to request an inspection, and have your ceiling photos, storm details, and temporary-repair records ready so the investigation starts with evidence rather than a guess.