
A Kansas City homeowner can go to bed under a clear sky and wake up after hail, straight-line wind, or a hard freeze has tested every weak point in the roof. The frustrating part is that the roof may look fine from the driveway while damaged flashing, lifted shingles, or compromised ventilation prepare the way for a leak.
Residential roof maintenance works best as a routine, not a reaction. Ground-level inspections, clear drainage, storm photographs, and timely repairs help you catch small defects before water reaches insulation, drywall, framing, or personal property. In the Kansas City Metro, that discipline also gives you a clearer record when an insurer needs to distinguish sudden storm damage from long-term deterioration.
Why Residential Roof Maintenance Matters More in Kansas City
Kansas City roofs deal with several kinds of stress in the same year. Hail can bruise or strip asphalt shingles, strong wind can lift tabs and loosen metal components, and repeated temperature changes make roofing materials expand and contract. Freeze-thaw cycles are especially hard on small cracks, exposed fasteners, flashing edges, and areas where water can collect.
A roof doesn't need a dramatic hole to start causing trouble. A lifted shingle can admit wind-driven rain. A clogged valley can redirect water beneath the roof covering. A poorly ventilated attic can keep heat and moisture trapped below the deck, accelerating deterioration that isn't visible from the yard.
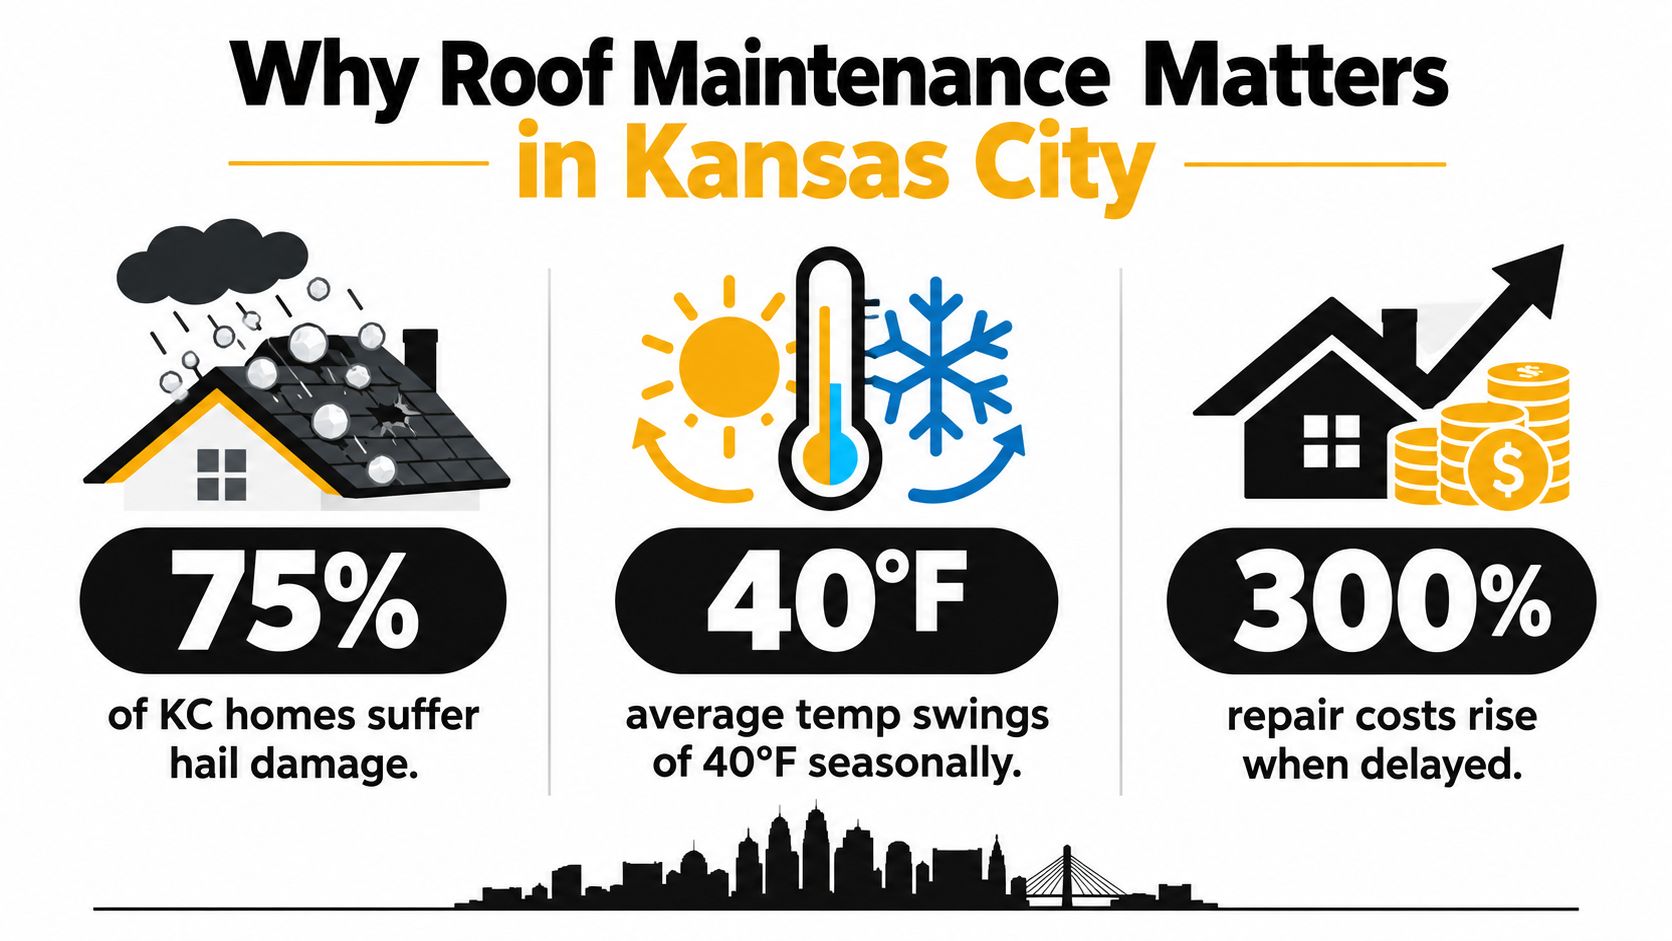
Why waiting for a ceiling stain fails
A ceiling stain is evidence that water has already traveled through part of the roofing system. By that point, the visible mark may sit far from the entry point, and the actual problem could involve flashing, underlayment, decking, insulation, or interior finishes.
Lifecycle planning gives property owners a useful way to think about upkeep. A roofing study cited by facility managers places a typical required roof service life at 23 to 32 years, depending on building type, and identifies planned maintenance budgets commonly set at 2% to 4% of capital replacement value (roof lifecycle research). Those figures aren't a promise for every residential roof, but they reinforce a practical point: inspections, drainage work, flashing repairs, and minor corrections are part of protecting the asset.
Kansas City rule: After severe weather, don't wait for water inside the house before checking the roof. The best time to document a defect is when it's still a defect, not after it becomes interior damage.
Planned care also supports service life. A government-referenced roofing example compares a non-maintained roof lasting 12 to 15 years with a maintained roof reasonably expected to last 20 years, a difference of 5 to 8 years depending on the starting point (roof maintenance lifecycle summary). Kansas City's hail, wind, ultraviolet exposure, and freeze-thaw conditions make that maintenance mindset particularly valuable.
How to Inspect Your Roof Visually
After a Kansas City hailstorm, severe wind event, or freeze-thaw spell, begin at ground level. You can identify many changes without climbing a pitched roof, and wet, icy, steep, or wind-damaged surfaces are unsafe to walk.

A safe inspection sequence
Bring binoculars, a phone camera with optical zoom, a notepad, and a flashlight for accessible attic areas. Walk around the property and view every roof slope from multiple angles. After hail, look for bruising and granules near downspout outlets or on the ground. Those observations can support an insurance claim, especially when paired with dated photographs.
- Scan the shingle field. Look for missing, cracked, curled, lifted, or uneven shingles. Hail impacts may appear as irregular dark bruises, while freeze-thaw movement can worsen existing cracks and lifted edges.
- Study the roof edges. Check eaves, rakes, drip edges, and gutter lines for sagging, loose material, exposed underlayment, or falling-branch damage.
- Examine flashing. Inspect chimneys, wall intersections, skylights, dormers, and plumbing penetrations. Lifted, rusted, separated, or unsealed flashing needs professional attention.
- Check valleys and drainage paths. Valleys concentrate runoff. Leaves, sticks, and packed debris can force water beneath the roof covering during heavy Midwest rain.
- Review ventilation components. Look for damaged vents, blocked soffits, and missing caps. These conditions can contribute to heat and moisture problems. Use this Kansas City residential roof inspection checklist to organize observations before requesting repairs.
Record condition, not only obvious damage. Take wide photographs that identify the roof slope, followed by close images of each defect. Note the date, slope direction, recent weather, and whether the condition appears new or previously documented. Store photos by season and year, and keep inspection reports, estimates, and invoices in the same folder.
A professional roof inspection guide can help homeowners understand what a visual review should cover. A trained inspector can also evaluate concealed moisture, fastening problems, and areas that require safe roof access.
From a safe attic access point, look for unwanted daylight, damp insulation, water marks, mold-like growth, or staining around penetrations. These signs may appear before damage reaches a ceiling. An attic check supports, but does not replace, a roof inspection.
A short video can also help you understand how inspectors evaluate common roof conditions:
Essential Maintenance Tasks You Can Handle
After a Kansas City hailstorm, homeowners often find leaves packed into gutters, branches near roof edges, and loose debris around drainage paths. Several low-risk tasks are manageable from the ground or from a properly positioned ladder. The goal is to keep water moving away from the house, document visible conditions, and avoid turning routine maintenance into storm-related damage.
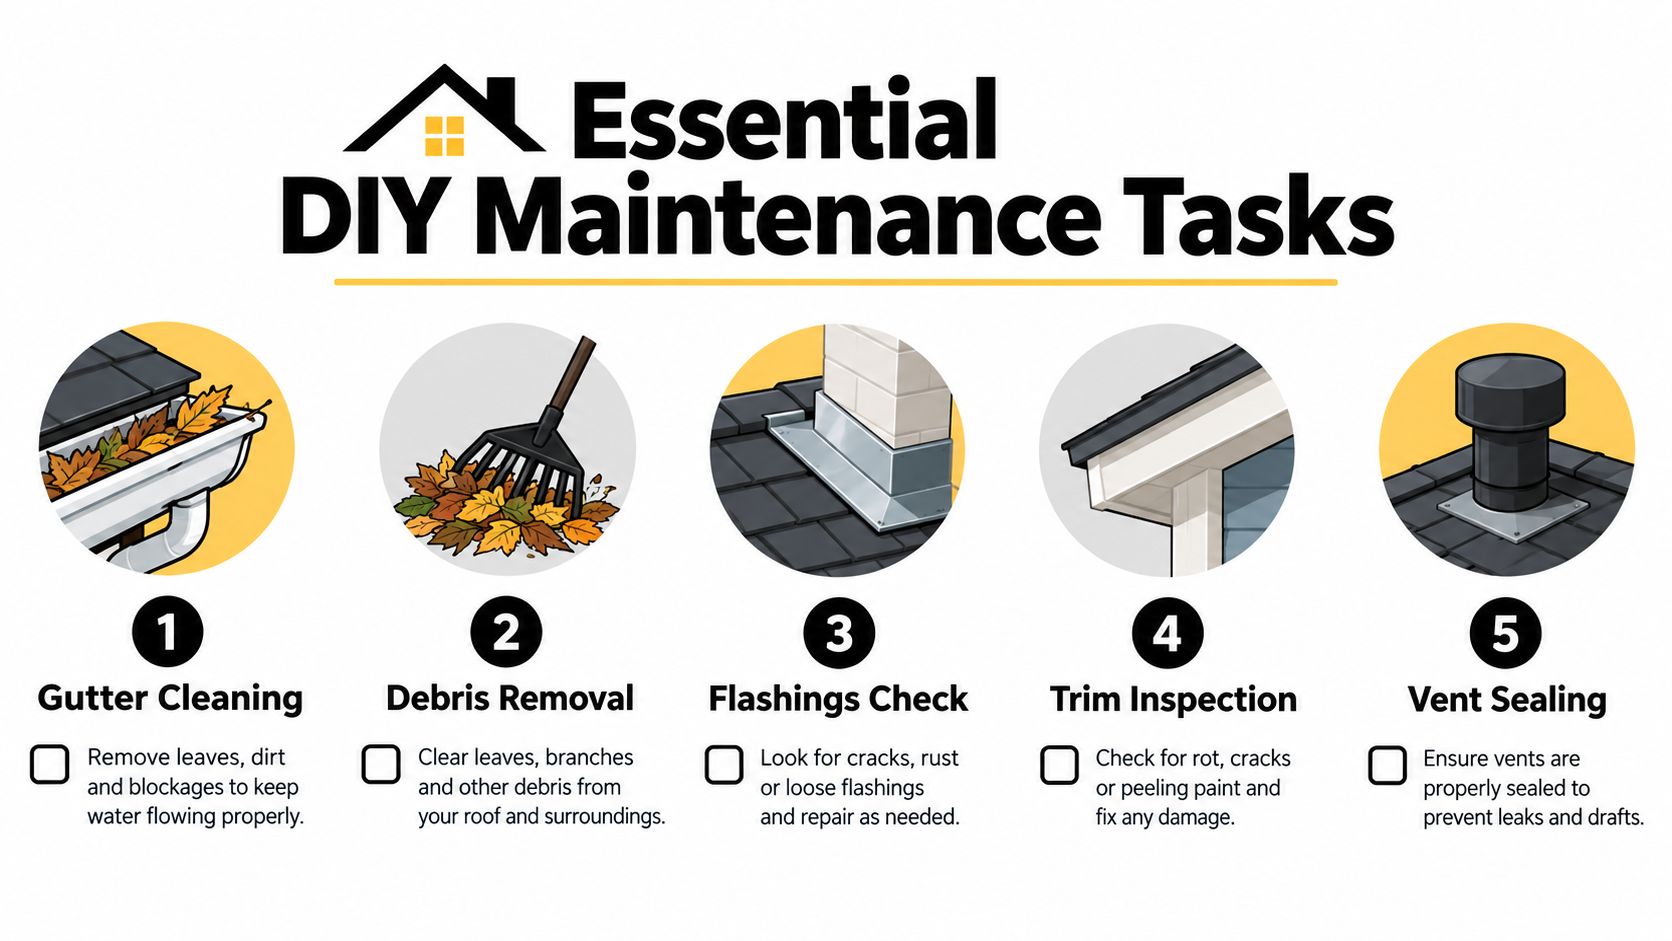
Keep drainage open
Clean gutters and downspouts from a stable ladder while wearing gloves and eye protection. Have another adult steady the ladder, work only in dry conditions, and avoid leaning sideways. Remove leaves by hand or with a gutter tool, flush the downspout with a hose, and confirm that water discharges well away from the foundation.
Overflow at the fascia can contribute to rot, staining, and moisture intrusion. Use this guide to cleaning gutters safely before starting, particularly after heavy rain or fall leaf buildup. Freeze-thaw cycles can also expose weak joints, so check for separated seams or sagging sections once water begins flowing.
Remove accessible debris
Clear leaves and small branches from ground-level roof edges, gutters, and reachable drainage areas. Keep pressure washers and metal tools away from shingles. Pressure and abrasion can strip protective granules, disturb seals, and make hail damage harder to assess later.
A steep valley or fragile roof surface is not a safe DIY work area. Leave lodged debris in place and call a professional. Cracked shingles or a fall can cost far more than removing one branch safely.
Handle observation, not complex repair
From the ground, photograph missing shingles, exposed flashing, or a loose vent cap. Shingle replacement, penetration resealing, and ventilation changes require correct materials and installation methods, especially after Kansas City wind and hail. Record the condition before making any repair request, then keep receipts and completed-work photographs with your roof files.
Trim branches that could rub against the roof or drop during severe storms. Use an insured tree professional for large, high, or tensioned limbs. Photograph the roof area before and after trimming so the record shows both the original condition and the work completed.
Granule loss deserves attention, but it does not identify its own cause. Hail impact, aging, poor drainage, and normal wear can produce different patterns that are difficult to distinguish from the ground. A qualified roofer should assess widespread loss or damage concentrated below roof valleys and downspouts.
Practical boundary: If a task requires walking on the roof, disturbing flashing, diagnosing hidden moisture, or working near electrical equipment, hire someone equipped to do it safely.
Documentation Strategies for Insurance and Maintenance Tracking
Good records won't turn excluded damage into covered damage, and they won't replace the terms of your policy. They can, however, help establish the roof's condition before a storm and show that you responded promptly afterward.
Kansas City homeowners should maintain one simple roof file, either digitally or on paper. Use dated photographs, inspection reports, repair invoices, product information, and notes about major weather events. Insurers are tightening practices in hail and wind regions, while deductibles and coverage questions can make storm claims more difficult to resolve, according to roofing industry outlook reporting.
A maintenance log that stays useful
Record each inspection or task with the following details:
- Date and conditions: Note the inspection date and whether the roof was checked after hail, high wind, heavy rain, or a freeze.
- Location: Identify the slope, roof section, chimney side, valley, gutter run, or penetration shown in each photograph.
- Observation: Describe what you saw without guessing at the cause. “Three lifted shingle tabs on the west slope” is more useful than “storm destroyed roof.”
- Action taken: Record cleaning, temporary protection, professional inspection, repair, or a decision to monitor.
- Supporting documents: Save estimates, invoices, contractor credentials, inspection reports, and insurer correspondence in the same folder.
Photograph before conditions change
Take wide establishing shots first, then close-ups with a common object for scale. Photograph the entire elevation, roof accessories, gutters, downspouts, attic symptoms, and interior areas if water appears. Don't discard damaged materials before the insurer or contractor has had an opportunity to inspect unless leaving them in place creates a safety risk.
After a storm, photograph fallen branches, dents in soft metal, displaced vent components, and scattered shingle granules. Avoid making a permanent repair before documenting the condition, but use temporary protection when needed to prevent additional damage. Keep receipts for emergency work and notify your insurer according to the policy's requirements.
For a clearer understanding of claim stages, keep your records aligned with the roof insurance claims process. A consistent file also helps a roofer compare new storm evidence with older maintenance photographs instead of relying on memory.
Knowing When to Call Professional Roofers
DIY maintenance and professional roofing serve different purposes. Cleaning a gutter from a secure ladder is one task. Determining whether hail bruised shingles, flashing failed, or moisture reached the deck is another.
Homeowner tasks versus contractor work
| Suitable for careful DIY work | Better handled by a professional |
|---|---|
| Ground-level observation with binoculars | Walking a steep, wet, or damaged roof |
| Removing gutter debris from a stable ladder | Diagnosing concealed moisture |
| Photographing damage and recording locations | Repairing flashing, penetrations, or structural components |
| Trimming small, accessible branches | Evaluating widespread hail or wind damage |
| Checking whether downspouts discharge properly | Deciding between repair and replacement |
Call promptly when you see active interior leaking, a sagging roofline, exposed decking, extensive missing shingles, separated flashing, damaged vents, or evidence of water in the attic. A roof that has taken direct hail or wind impact also deserves a professional assessment even when no leak is visible.

What a worthwhile inspection includes
A useful inspection isn't a quick glance followed by a replacement pitch. The contractor should identify the roof covering, inspect shingles or panels, examine flashing and penetrations, review ventilation and drainage, document defects with photographs, and explain limitations. Ask for a written report that separates observed storm damage, maintenance concerns, recommended repairs, and items that can be monitored.
Annual professional inspections can be a sensible investment. One industry summary reports typical fees of $200 to $400, along with claims that homeowners scheduling annual inspections spent 70% less on roof repairs over a 10-year period and extended roof life by up to 5 years (roof inspection facts and costs). Treat those figures as a reported benchmark, not a guarantee, because roof design, workmanship, weather exposure, and prior condition vary.
Get proof of licensing where applicable, liability and workers' compensation insurance, and a detailed scope. Be cautious about storm chasers demanding immediate signatures, vague promises about insurance approval, or recommendations unsupported by photographs. In the Kansas City area, Two States Exteriors LLC offers residential roof inspections, repairs, replacements, and storm-damage claim support as one local option for homeowners comparing contractors.
Seasonal Maintenance Calendar for Kansas City Homeowners
Kansas City roof care should follow weather, not a rigid date on the calendar. Spring reveals winter wear, late spring and summer storms create new damage, fall prepares drainage for freezing conditions, and winter calls for monitoring rather than risky roof work.
Spring
Walk the perimeter after winter weather and after the first severe storms. Use binoculars to check for lifted shingles, loose flashing, dented vents, damaged gutters, and debris in valleys. Clean drainage paths, inspect the attic for stains or damp insulation, and photograph the roof before summer weather changes the evidence.
Summer
Check the roof after hail and high wind, even when the ceiling is dry. Keep gutters flowing, watch for granule accumulation, and inspect roof penetrations and ventilation components from safe locations. Schedule professional work during a dry spell rather than attempting repairs on hot, unstable, or storm-damaged surfaces.
Fall
Remove leaves from gutters and accessible drainage areas before freezing weather. Look for sagging gutter sections, loose downspouts, branches that can strike the roof, and flashing that has separated. Arrange professional attention for steep valleys, damaged chimney flashing, or any defect you can't safely reach.
Winter
Monitor rather than climb. Check interior ceilings and attic areas after heavy precipitation, watch for new drafts or stains, and keep ladders and roof tools away from icy surfaces. If water enters the home, contain it indoors, photograph the affected areas, and contact a qualified roofer and insurer promptly.
A Kansas City maintenance routine doesn't need to be complicated. Put two full inspections on the calendar, add a documented check after every significant storm, and deal with small drainage or flashing problems before the next freeze-thaw cycle. For a local assessment, repair plan, or storm-damage review, visit Two States Exteriors LLC, where the team provides residential roofing inspections, repairs, replacements, and insurance-claim support across the Kansas City Metro.


