
A Kansas City storm can turn a small roof detail into a serious building problem. After wind-driven rain, homeowners often find a ceiling stain near a chimney, damp attic insulation beside a sidewall, or water marks that appear nowhere near the roof's obvious damage. The shingles may still look serviceable, but failed flashing can let water travel beneath them and into the wall or roof assembly.
Learning how to replace flashing on a roof means understanding how water moves, not just covering a gap with roofing cement. Flashing has to connect with shingles, underlayment, siding, masonry, and gutters so every layer sheds water toward the exterior. The following guidance focuses on the details that matter in Midwest weather, including when a repair is reasonable, when replacement is warranted, and how storm damage can affect an insurance claim.
Understanding Roof Flashing and Its Importance
A hard Kansas City rain exposes weak roof transitions quickly. Water reaches the places where a sloped roof meets a wall, chimney, skylight, or valley, then wind pushes it sideways and upward against seams that ordinary shingles can't protect alone. If a flashing edge is loose or a layer is installed backward, water can enter behind the cladding even while the main roof surface appears intact.
Roof flashing is a foundational water-management component, not merely a cosmetic trim piece. Weather-protection provisions in the International Building Code require flashing to prevent moisture from entering walls and roofs. Counterflashing has served the same basic purpose for generations. The Institute for Building Enclosure Education cites an 1886 definition describing counterflashing as material placed between brick courses and turned down over base flashing in its historical discussion of counterflashing.
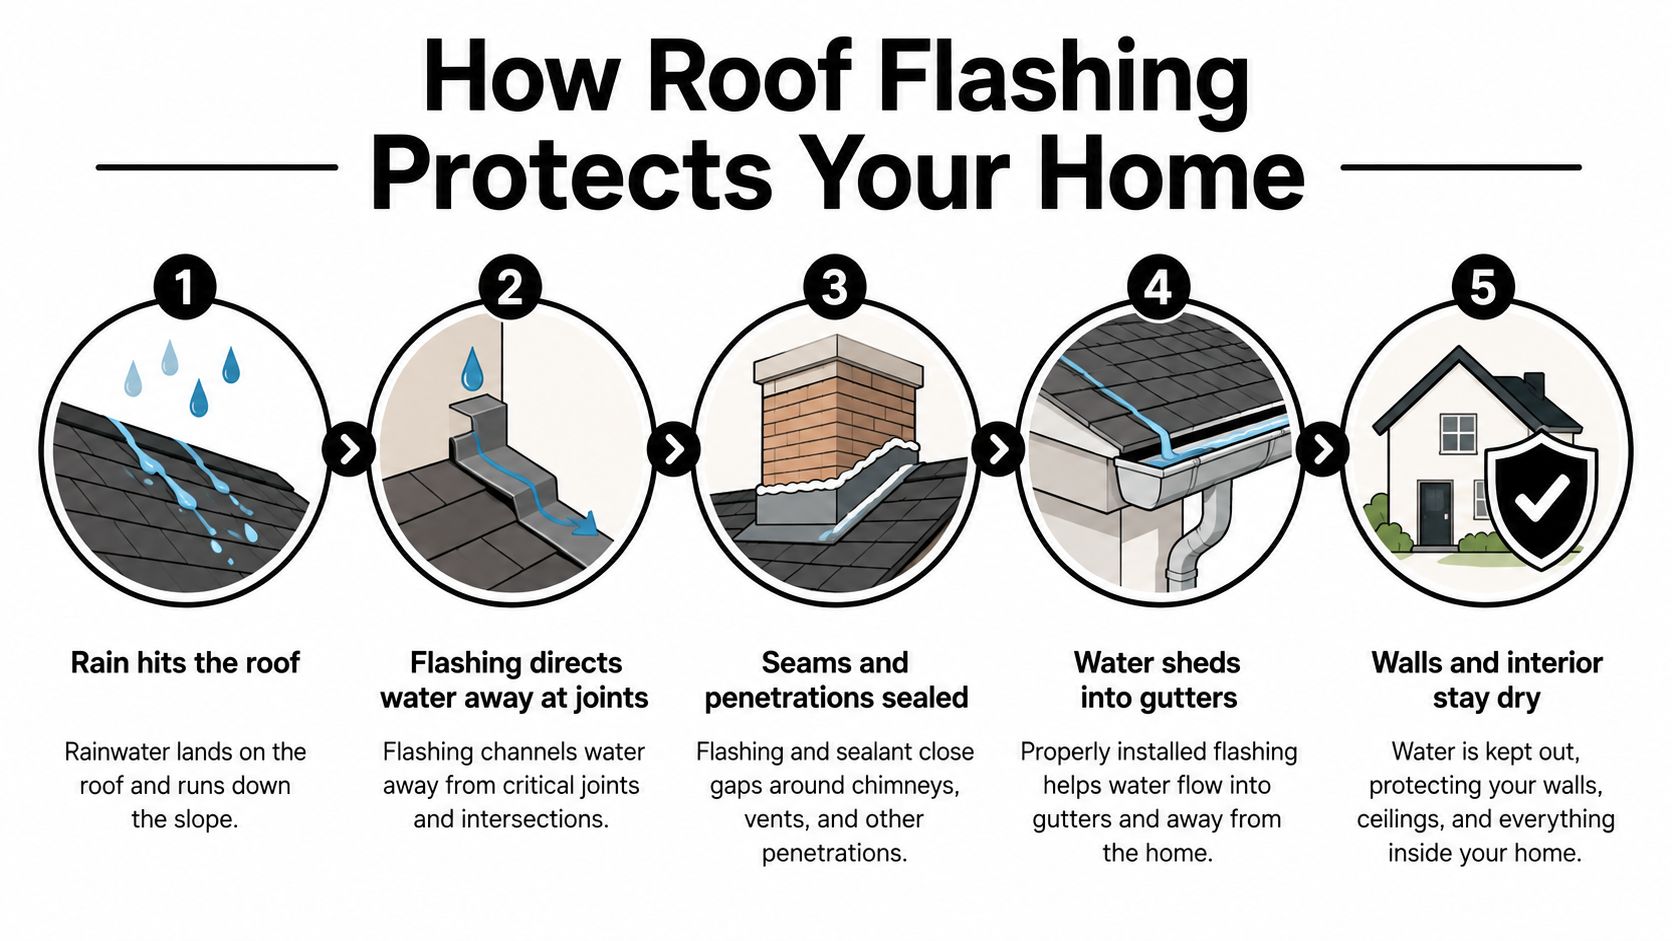
The amount of water involved makes small defects consequential. The U.S. Department of Energy's Building America Solution Center explains that 1 inch of rainfall can place approximately 1,240 gallons of water on a 2,000-square-foot roof, as documented by the Institute for Building Enclosure Education. That runoff concentrates at valleys, eaves, chimneys, sidewalls, and other transitions, so a narrow opening can expose a surprisingly large area to moisture.
What flashing actually does
A sound assembly uses layered metal or membrane components to move water outward. Base flashing protects the lower transition, counterflashing covers the upper edge where appropriate, and step flashing overlaps in a shingle-like pattern along roof-wall intersections. Kick-out flashing then directs water into the gutter rather than allowing it to run behind siding.
Kansas City homes also face changing temperatures, strong winds, hail, and rain that arrives from the side instead of falling straight down. Those conditions punish exposed fasteners, open seams, corroded metal, and missing diverters. A practical inspection should look for perforation, deformation, failed laps, missing kick-out flashing, and poor integration with the wall weather-resistant barrier, not just visible rust.
For a homeowner evaluating a roof leak, this guide to flashing on a roof provides useful terminology. The important decision is whether the defect affects only a sealant joint or whether the drainage-plane assembly itself has failed.
Essential Tools and Safety Precautions
Flashing replacement starts with access and preparation, not with a caulk gun. A homeowner needs to expose enough of the assembly to see how the old metal connects to the roof and wall. If the roof is steep, wet, icy, or difficult to access, the safest choice is to stop before removing anything.
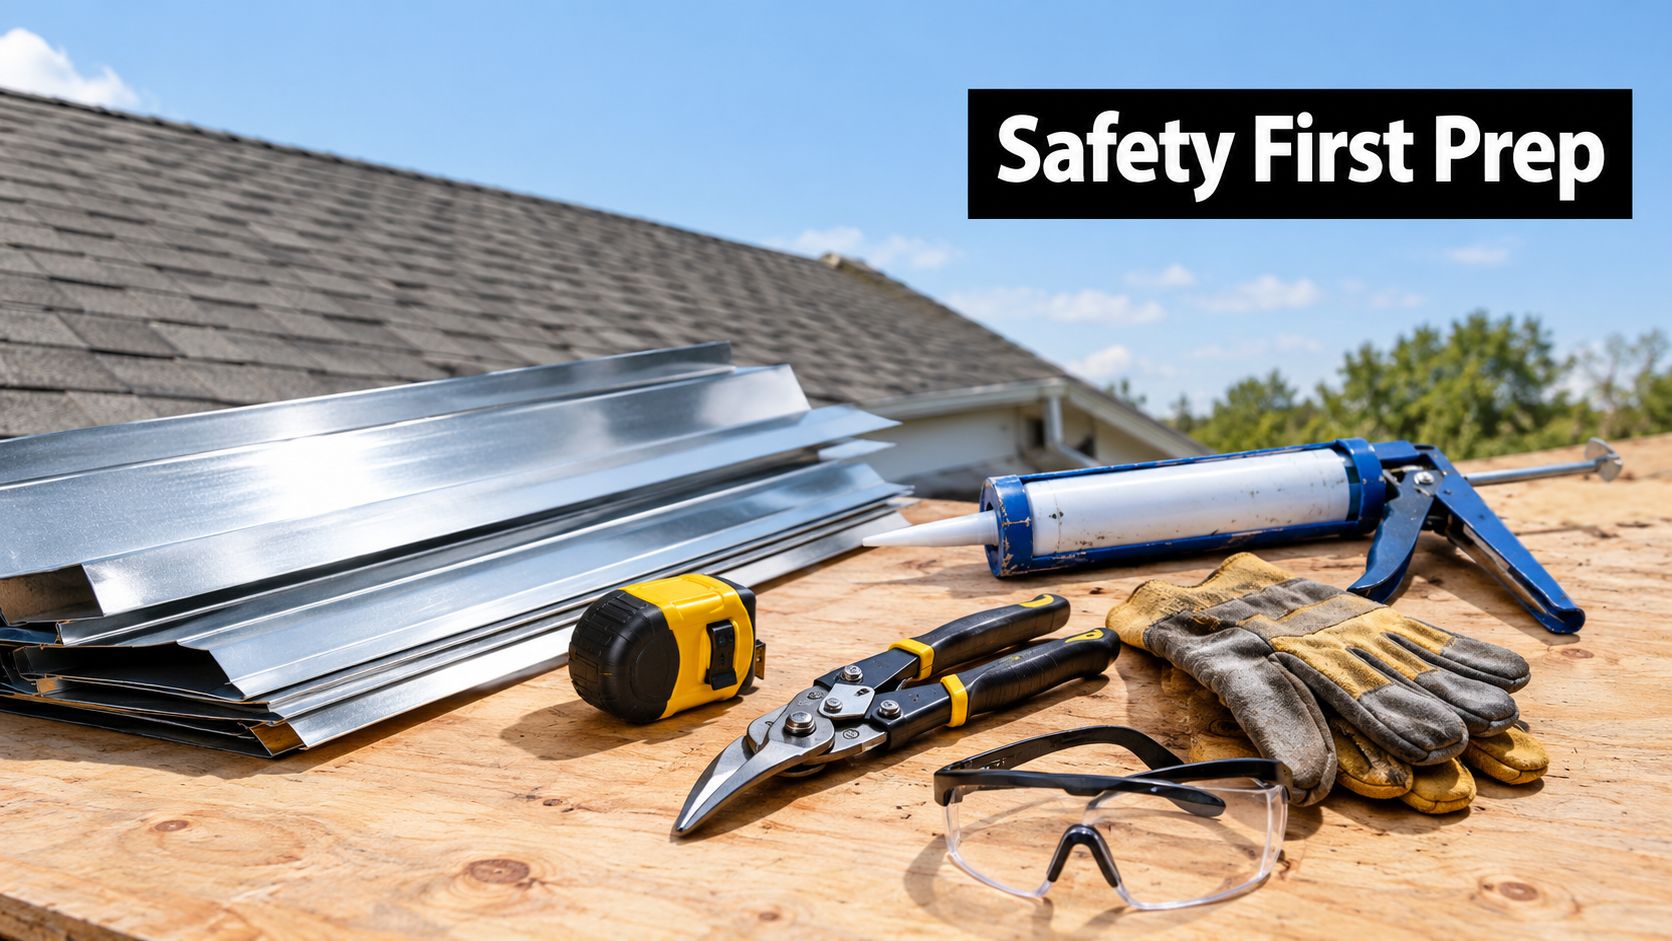
Materials that support drainage
Gather corrosion-resistant flashing matched to the roof detail, replacement underlayment, compatible roofing sealant, corrosion-resistant fasteners, and replacement shingles if existing pieces won't lift cleanly. For asphalt-shingle roof-wall intersections, benchmark guidance calls for metal at least 0.019 inches thick, commonly identified as 26-gauge galvanized sheet, with each step-flashing piece extending at least 4 inches vertically up the wall and 4 inches horizontally across the roof deck. Confirm the final specification against local code and the shingle manufacturer's instructions through the National Roofing Contractors Association guidance.
Useful hand tools include:
- Pry bar: Lift shingles and remove fasteners without tearing the roof deck.
- Tin snips: Cut sheet metal cleanly. Wear gloves because cut edges are sharp.
- Utility knife: Trim underlayment and roofing materials with controlled cuts.
- Tape measure and straightedge: Check dimensions, laps, and clearances.
- Wire brush and scraper: Remove loose debris and failed surface material.
- Caulk gun: Apply compatible sealant only where the design calls for it.
- Safety glasses and work gloves: Protect eyes from metal fragments and hands from edges.
- Ladder and roof-access equipment: Use a stable ladder on firm, level ground, with proper extension and securing practices.
A roofing equipment list can help identify missing tools before work begins. Tools don't compensate for unsafe conditions, however. Wear non-slip footwear, keep the roof surface dry, avoid working alone, and use properly installed fall protection where the roof pitch or height requires it. Don't step on brittle shingles, skylights, or loose metal.
Safety rule: If you can't maintain three points of contact and stable footing, don't attempt the roof work. A flashing repair isn't worth a fall.
Step-by-Step Removal and Installation
A durable roof-wall repair is a drainage-plane reconstruction, not a sealant patch. The work has to expose the relevant layers, correct damaged framing or sheathing, and rebuild the laps in the direction water travels.
Remove enough material to see the failure
Start by documenting the area from the ground, attic, and roof if it can be accessed safely. Photograph rust, open seams, displaced metal, damaged shingles, interior staining, and nearby wall or chimney conditions before changing anything. Then lift the shingles and remove enough siding to expose the house wrap or building paper near the transition.
Work carefully with a flat pry bar. Remove nails holding the damaged flashing, preserving adjacent materials only when they remain sound and can be integrated into the new work. Buried flashing often can't be evaluated from the surface, so leaving old metal underneath new shingles can preserve the original failure.
Inspect the roof sheathing, wall sheathing, framing, overhang, and insulation. Rot or insect damage must be corrected before new flashing is installed. A new metal layer can't restore strength to a deteriorated substrate.
Rebuild the layers in water-shedding order
The PNNL roof-wall intersection guide recommends a sequence that connects roof and wall control layers:
- Install a fully adhered air-control transition membrane from the roof sheathing onto the wall sheathing. Extend it at least 2 inches above the future step flashing.
- Install underlayment and wrap it at least 8 inches up the sidewall.
- Place corrosion-resistant step flashing in shingle fashion.
- Lap the wall weather-resistant barrier over the flashing so water remains outside the assembly.
- Reinstall siding with at least 1.5 inches of clearance above the shingles.
- Finish the eave with weather-lapped kick-out flashing that sends runoff into the gutter.
Each upper piece must overlap the piece below. This positive shingle-lapping rule matters more than a heavy bead of caulk because water should drain across the assembly, not depend on an exposed sealant joint to remain intact.
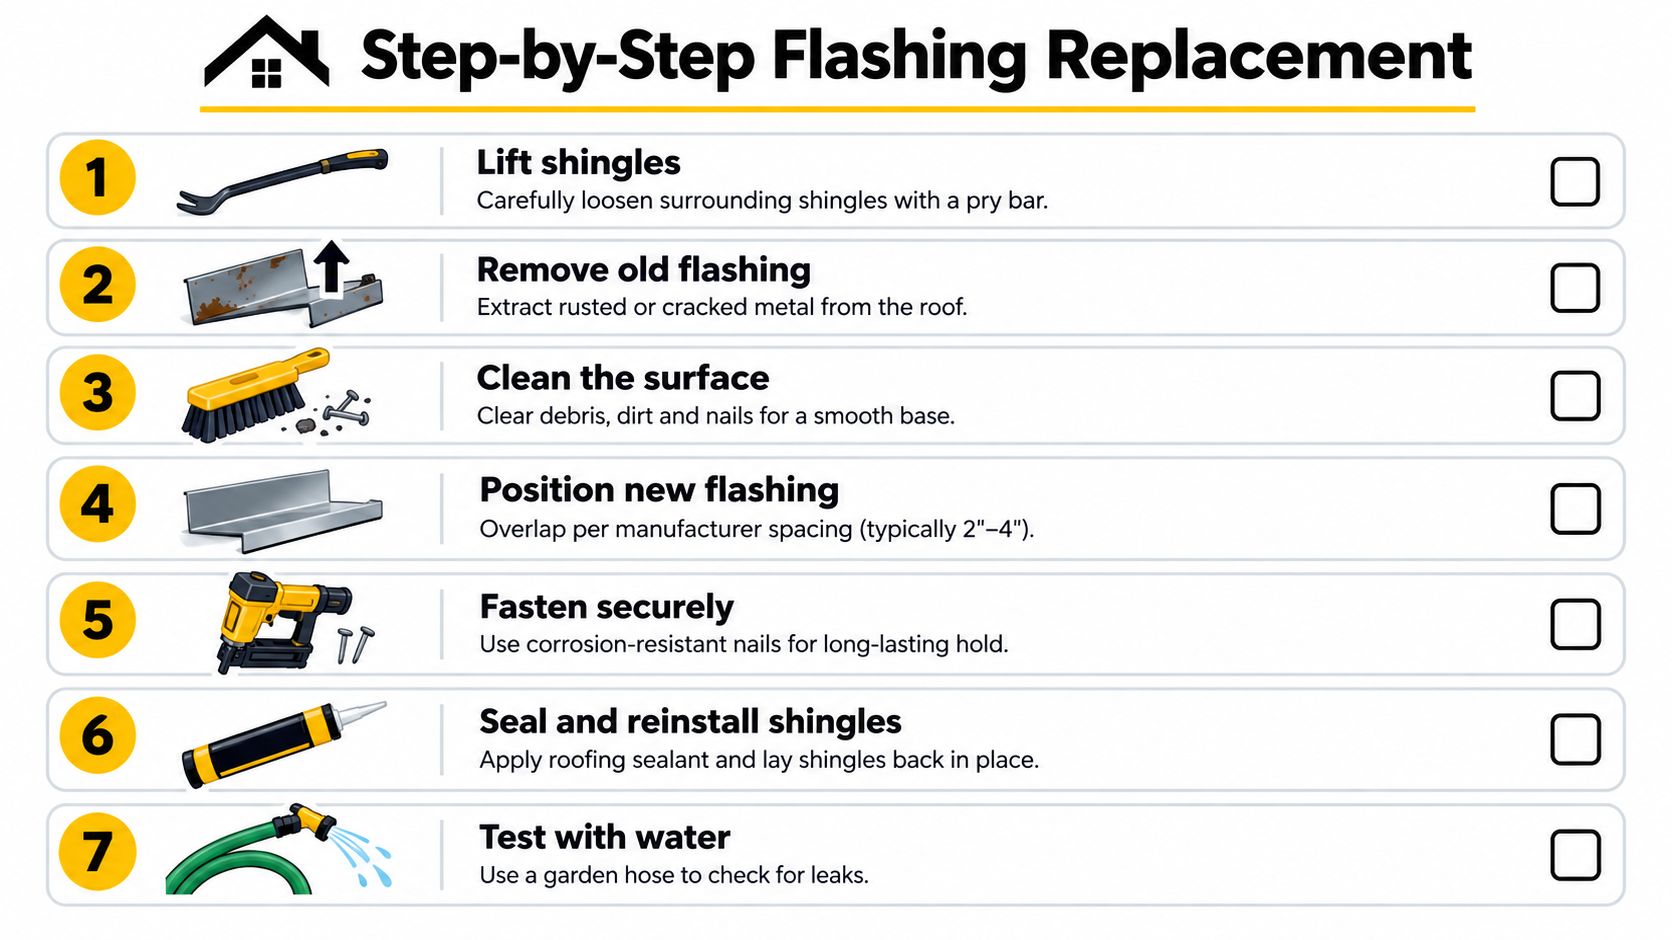
Use fasteners where the approved detail permits them, keeping exposed horizontal fasteners out of the drainage path. Apply sealant at specified joints, terminations, or masonry interfaces, but don't use it to hide an incorrect lap. Reinstall shingles so they lie flat and preserve the manufacturer's installation pattern.
A controlled water test can help identify an installation problem, but don't flood the roof immediately or spray upward beneath laps. Test from the lowest area upward in short stages, while someone checks the attic and interior for moisture.
If the repair involves a chimney, embedded counterflashing, extensive siding removal, or damaged framing, the assembly may require trade-specific work beyond a simple homeowner repair.
Flashing Solutions for Common Roof Penetrations
A chimney leak, a split plumbing boot, or water staining below a sidewall can have different causes even when the symptom looks similar. Each penetration needs a drainage detail that fits the roof covering, wall assembly, and local weather. Kansas City roofs also face wind-driven rain, hail, ice, and rapid temperature changes, so a detail that merely sheds light rain may fail during the next Midwest storm. Poor flashing can complicate an insurance claim when visible patching obscures the original damage or shows that the roof was not restored to a sound condition.
Use the following details as a field reference:
| Penetration Type | Recommended Flashing Type | Key Installation Detail |
|---|---|---|
| Chimney | Base flashing with counterflashing | Integrate base flashing with the roof covering and secure counterflashing into the masonry or an approved joint. Inspect open seams, failed fasteners, and deteriorated masonry interfaces before closing the work. |
| Plumbing vent | Replacement vent flashing or pipe boot | Match the boot to the pipe and roof system. Check the collar and surrounding shingles. A cracked boot usually requires replacement rather than surface sealant. |
| Skylight | Manufacturer-specific curb or perimeter flashing | Keep the designed drainage path open around the skylight. Do not cover weep paths or bury the original flashing beneath new shingles. |
| Roof-wall intersection | Step flashing with wall WRB integration | Install pieces in shingle fashion, place the wall weather barrier over the upper edge, and maintain the specified siding clearance. Review what step flashing on a roof does before altering this junction. |
| Valley | Valley metal or membrane detail suited to the roof system | Keep concentrated runoff moving through the valley. Avoid fasteners, debris, or underlapped materials that create a water trap. |
| Eave or sidewall termination | Drip edge with kick-out diverter where required | Direct water into the gutter at the eave and away from the wall. Without a kick-out, runoff can enter behind siding even when the step flashing appears complete. |
Match the metal to the detail: use at least 26-gauge galvanized steel or an equivalent corrosion-resistant product where local code and the roofing system require it. Confirm the roof pitch, manufacturer instructions, and material compatibility before installation. Copper, aluminum, galvanized steel, masonry, sealants, and fasteners can react differently when placed together.
A visible metal strip does not prove that the roof drains correctly. The flashing must connect with the surrounding shingles, underlayment, wall weather-resistive barrier, siding, and gutter path. Photograph concealed conditions and completed transitions for project records. That documentation can help clarify what was repaired if storm damage later leads to an insurance review.
Common Mistakes to Avoid
The most persistent mistake is treating flashing as a leak plug. A homeowner sees an open seam, applies roofing cement, and assumes the problem is solved. Sealant can be appropriate when the flashing is sound and the joint itself has failed, but it won't replace corroded metal, correct an underlap, restore missing kick-out flashing, or repair rotten sheathing.
Why surface repairs fail
Water follows the path created by the layers. If the upper piece ends behind the lower piece, the assembly directs water into the wall regardless of how much sealant covers the visible edge. Fastening through an exposed horizontal surface can also create a new entry point, especially when wind-driven rain reaches the fastener.
Avoid these common shortcuts:
- Buried old flashing: New shingles over deteriorated metal leave the original failure hidden.
- Underlapped pieces: Water can run behind the lower layer instead of over it.
- Blocked weep paths: Covering through-wall flashing or weep holes traps moisture in masonry and cladding.
- Missing kick-out flashing: Roof runoff can discharge directly behind siding at the eave.
- Tight siding termination: Siding installed too close to shingles can hold moisture and interfere with drainage.
- Mixed metals: Incompatible materials can accelerate corrosion at the connection.
- Uninspected sheathing: New flashing installed over rot doesn't create a durable roof-wall connection.
Drainage principle: Sealant should support a properly layered assembly. It shouldn't be the assembly.
Material selection also involves a real service-life trade-off. A commonly cited comparison places aluminum flashing at roughly 15 to 20 years and copper flashing at approximately 50 to 100 years, although thickness, detailing, climate, corrosion exposure, and maintenance affect actual performance. The roof flashing repair guidance from The Roofing Brief discusses why a longer-lived material can reduce future tear-offs at vulnerable details, while also noting that installation quality remains decisive.
The same guidance identifies flashing as a major source of roof leakage and reports that roofs average about half of their designed service life, while water intrusion accounts for roughly 40% of building-related problems and more than 70% of construction litigation. Those figures support a practical decision: when shingles are already being removed, inspect concealed flashing rather than assuming visible metal is reusable.
When to Call a Professional Roofer
A capable homeowner may handle a small, accessible repair when the roof is low-slope, the flashing is clearly exposed, the substrate is sound, and the replacement detail is straightforward. The work becomes a professional project when removal reveals concealed damage or when the flashing connects to masonry, siding, chimney systems, or a complex roof intersection.
Current residential-code guidance calls for existing flashing, edging, outlets, vents, and similar components to be replaced when they're rusted, damaged, or deteriorated, then reconstructed according to approved manufacturer instructions. That doesn't mean every flashing component must be replaced merely because shingles are being replaced. Condition, accessibility, code requirements, and the roof assembly determine the proper scope, as outlined in the Residential Roof Assemblies guidance.
Use this decision checklist
A DIY repair may be reasonable when:
- The access is safe: You can work without unstable ladders, wet surfaces, or unprotected fall exposure.
- The damage is localized: The metal is visible, the substrate is sound, and the repair doesn't require masonry or extensive siding removal.
- The roof detail is understood: You can identify the drainage path and rebuild the laps in the correct direction.
- The materials are compatible: Replacement metal, fasteners, sealant, shingles, and underlayment work together.
Call a professional roofer when:
- The roof has storm damage: Hail can dent or puncture flashing and damage exterior components even when shingle damage is subtle. Document dents, lifted metal, displaced counterflashing, exposed fasteners, interior staining, and the storm date before making alterations.
- An insurance claim is involved: Coverage depends on the policy, documented cause of loss, adjuster findings, exclusions, depreciation, and whether adjacent materials must be replaced for a code-compliant repair. Hail accounts for roughly half to 80% of homeowners' claims from severe convective storms, according to reporting that cites insurance-industry data in this NPR report on Midwest storm insurance.
- The assembly is concealed: Embedded chimney counterflashing, wall WRB, rotten sheathing, and damaged framing require controlled removal and reconstruction.
- The leak persists: Repeated staining after resealing suggests the water path hasn't been diagnosed or the flashing assembly is defective.
- You need documentation: A professional inspection with photographs and measurements can distinguish localized repair from broader replacement and support a claim record.
In the Kansas City Metro, Two States Exteriors LLC offers roof repair and replacement planning, storm inspections, and insurance-claim support for flashing-related damage. Visit Two States Exteriors LLC to request an inspection that evaluates the flashing, surrounding roof layers, and the evidence needed for a durable repair.


