
The most common advice about installing siding on a house starts with choosing a material and snapping a level starter line. That's too late in the job. Siding is the last layer of a water-management assembly, and even expensive panels won't protect rotten sheathing or a window opening that drains into the wall.
Start by deciding where water will go when it gets behind the cladding. Then inspect, repair, wrap and flash the wall before hanging anything. That's the difference between a cosmetic replacement and an exterior that protects the house.
Installation Sequence at a Glance
The wall behind the siding decides whether the installation lasts. The sequence below applies whether you're hiring a crew or doing the work yourself. Use it to judge progress by completed details, not by how quickly the house changes color.
Siding is a common exterior system, not a niche upgrade. The U.S. Energy Information Administration's residential housing-stock table reports 48.12 million housing units using aluminum, fiber cement, vinyl or steel siding as their primary outside-wall material. Those materials don't share a fastening method, but they all need a sound wall and a reliable drainage path.
Seven-phase siding installation sequence
| Phase | Core task | Done when |
|---|---|---|
| Inspect the wall | Probe sheathing and framing; mark every soft spot | No soft or damp area is left unmarked |
| Repair the substrate | Replace rotted sheathing and repair damaged framing | Sound, dry wood supports every panel location |
| Install the water-resistive barrier | Lap the barrier shingle-style to the specified overlap | Every lap sheds water downward |
| Flash openings and transitions | Integrate sill, jamb and head flashing; add roof-wall kick-outs | Water is routed outward at every opening |
| Set the starter and corners | Install a level starter strip, corner posts and receiving channels | Starter lines align across adjoining elevations |
| Hang the panels | Work bottom-up using the material's fastening system | Vinyl can move; other claddings meet their attachment requirements |
| Trim and final check | Complete finish trim and specified sealant work | Joints fit correctly and drainage paths remain open |
Window accessories deserve attention before panels arrive. Breaking Glass Co.’s explanation can help you avoid J-channel mistakes around new windows, particularly the mistake of treating a receiving channel as waterproof flashing.
Job-planning rule: Print this sequence and approve each row before covering the work with the next layer.
On a repair-heavy house, preparation can take longer than hanging panels. Budget time for that hidden work rather than pressuring the installer to cover it quickly.
Choose the Right Siding Material for Your Climate
Start with the hazards your house faces in practice. For a Kansas City-area property, consider hail and wind exposure, wet freeze-thaw conditions, and strong sun on south- and west-facing walls before choosing a color.
Compare actual samples against the existing roof, masonry and window trim.
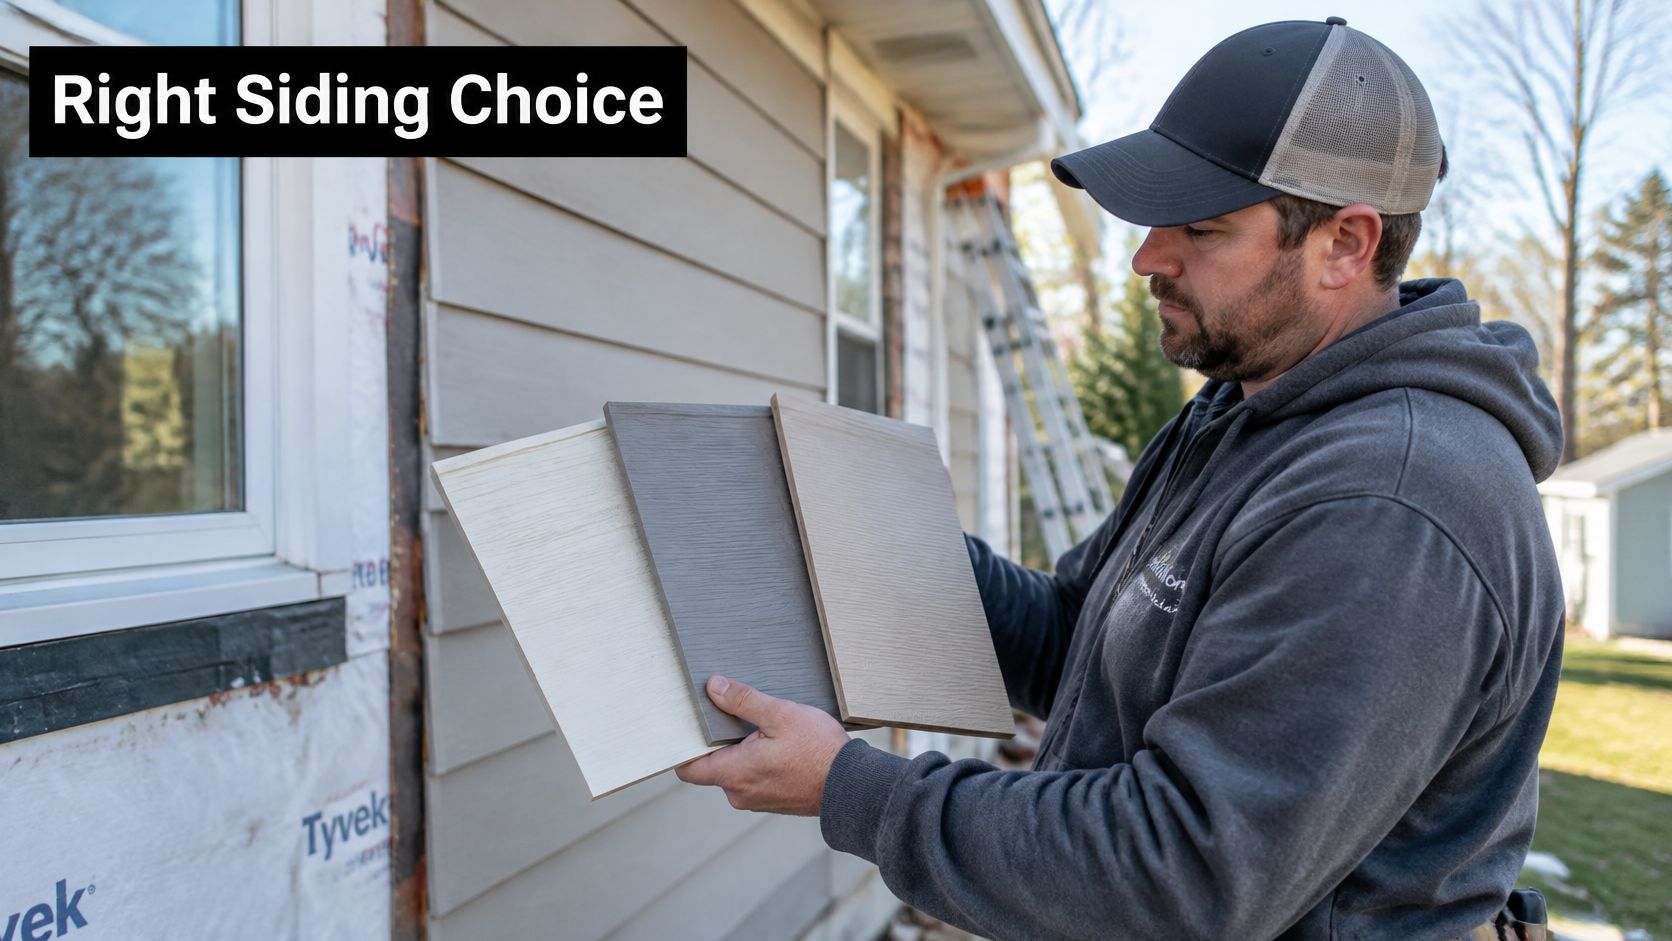
Siding materials compared by install, upkeep and hazard fit
| Material | Install difficulty | Upkeep | Hazard strengths and weaknesses |
|---|---|---|---|
| Vinyl | Easy to moderate; approachable for a capable DIYer | Periodic washing and damage checks | Economical; can crack under hail or distort near heat |
| Fiber cement | Hard; heavy boards and cutting-dust controls favor professional installation | Finish inspections and repainting according to the coating system | Noncombustible; impact performance is product-specific |
| Aluminum | Moderate; careful handling and trim fabrication | Clean and inspect the finish | Noncombustible; susceptible to hail dents |
| Steel | Usually a professional installation | Inspect coatings, scratches and cut edges | Noncombustible and strong; dents and damaged coatings still need attention |
| Engineered wood | Moderate; cut-edge treatment and clearances matter | Paint and sealant renewal | Moisture damage becomes a concern when protective details fail |
Don't treat durability as a single rating. The Insurance Institute for Business & Home Safety research agenda describes hail research involving significant horizontal velocity and examines wildfire protection as a combination of exterior features. Resistance to hail impact isn't the same as resistance to embers or wind-driven rain.
For a closer look at board weight, finish care and installation limitations, compare these fiber cement siding pros and cons. Don't buy on a material name alone; compare the specific product and approved installation assembly.
Labor can change the apparent bargain. A lower-priced panel requiring extensive trim fabrication, staging or substrate correction may produce a higher installed total than expected. Dataintelo reports that residential applications represented 62.5% of the global siding-installation-services market in 2025, but that broad market figure isn't a local labor-price guide.
Watch panel handling and installation details with your chosen product's instructions alongside you.
List your main hazards, eliminate unsuitable products, and ask your insurer what documentation it recognizes before assuming a product earns a premium credit.
Measure, Budget and Permit Before You Buy
Measure each elevation separately, including gables and recessed walls. Calculate gross wall area, subtract openings, then work out the actual panel layout. Narrow returns, short pieces above windows and awkward corner cuts can consume material that a simple area calculation misses.
Use this checklist to organize the takeoff, then confirm the waste allowance against your layout rather than treating a preset percentage as universal.
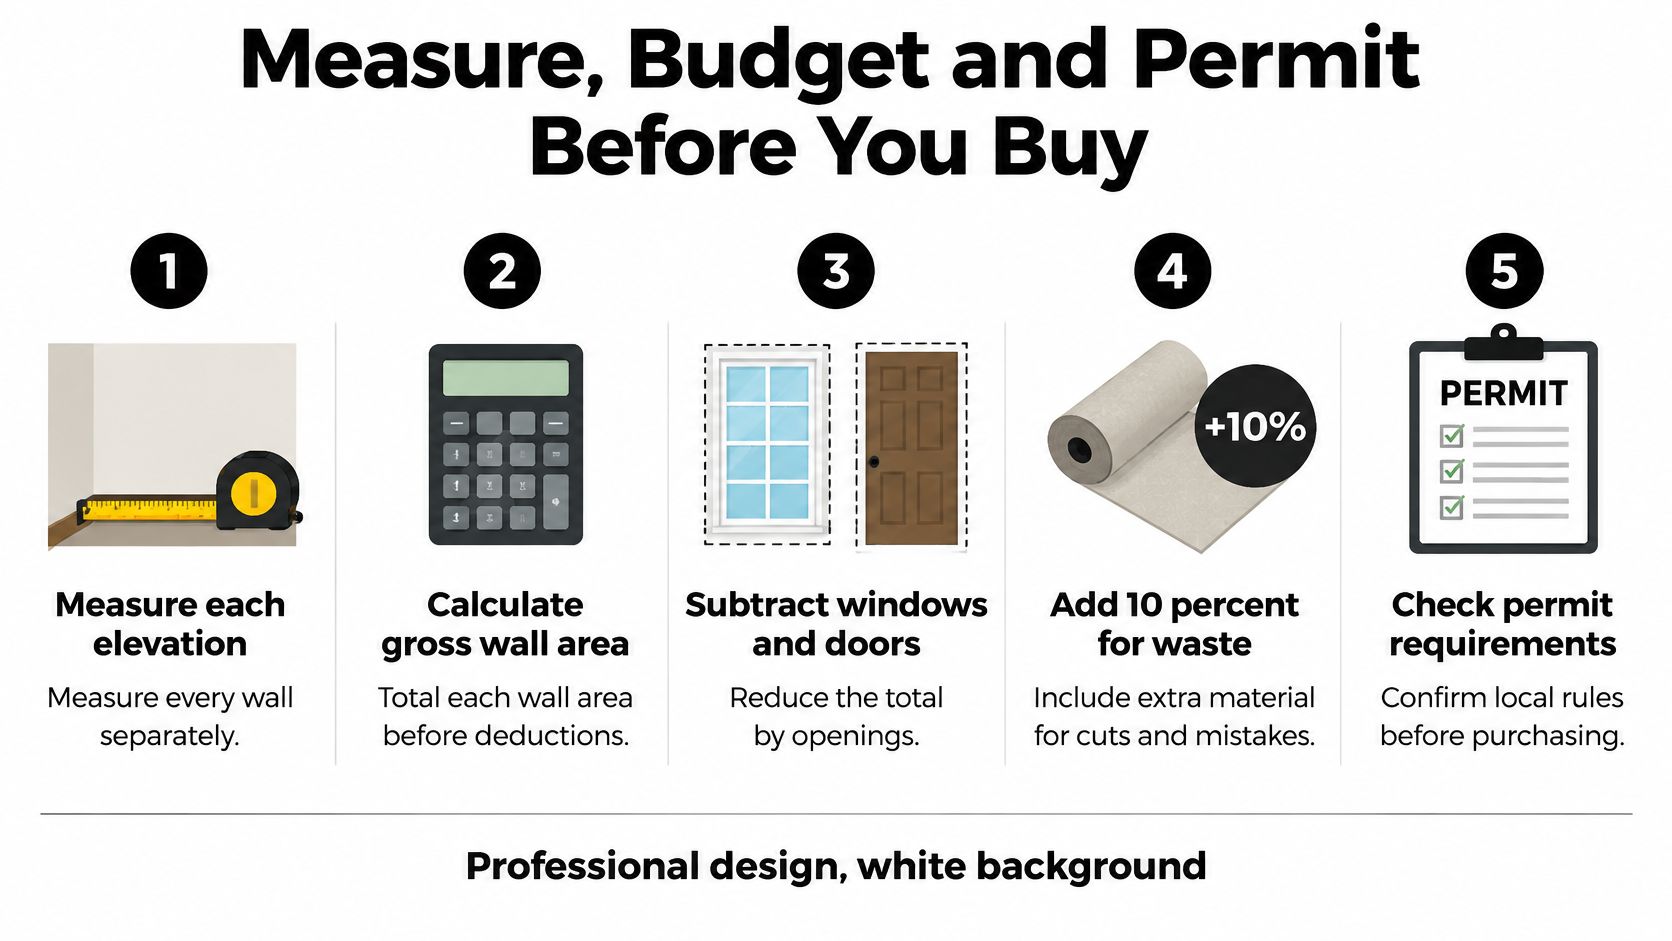
Clear the paperwork and purchasing decisions
- Confirm permits and approvals. Give your city or county the actual scope, including sheathing repairs and barrier replacement. Obtain any required HOA material and color approval before ordering.
- Preserve storm evidence. Photograph each elevation, close-up damage and interior staining before tear-off. Record when the damage occurred and retain removed material when the adjuster requests it.
- Check hazardous materials. Older paint and some legacy siding products need assessment before cutting or demolition. Don't identify lead or asbestos by appearance.
- Compare complete scopes. Request separate line items for removal, disposal, substrate repairs, barrier, flashing, trim, panels and warranty terms.
A low bid isn't proof of poor work. An omitted flashing allowance is a specific problem you can identify before signing.
Use an exterior siding replacement cost breakdown to organize your questions, not as a substitute for inspecting the wall.
Before buying, assemble a long level, straightedge, chalk line, utility knife, trim snips, hammer or depth-controlled nailer, and suitable access equipment. Check the product's temperature limits and arrange temporary weather protection. Don't strip more wall than you can protect before rain, and don't assume a ladder alone provides a safe working platform.
Prep the Wall and Flash the Openings
Keep ladders, long trim pieces and tools away from overhead electrical conductors. Have the utility address unsafe service-line conflicts, and use an appropriate fall-protection system at exposed roof edges. If access requires leaning across a roof or moving around energized equipment, stop and arrange professional access.
The water-control objective is straightforward: catch water outside the sheathing and give it a continuous route back outdoors.
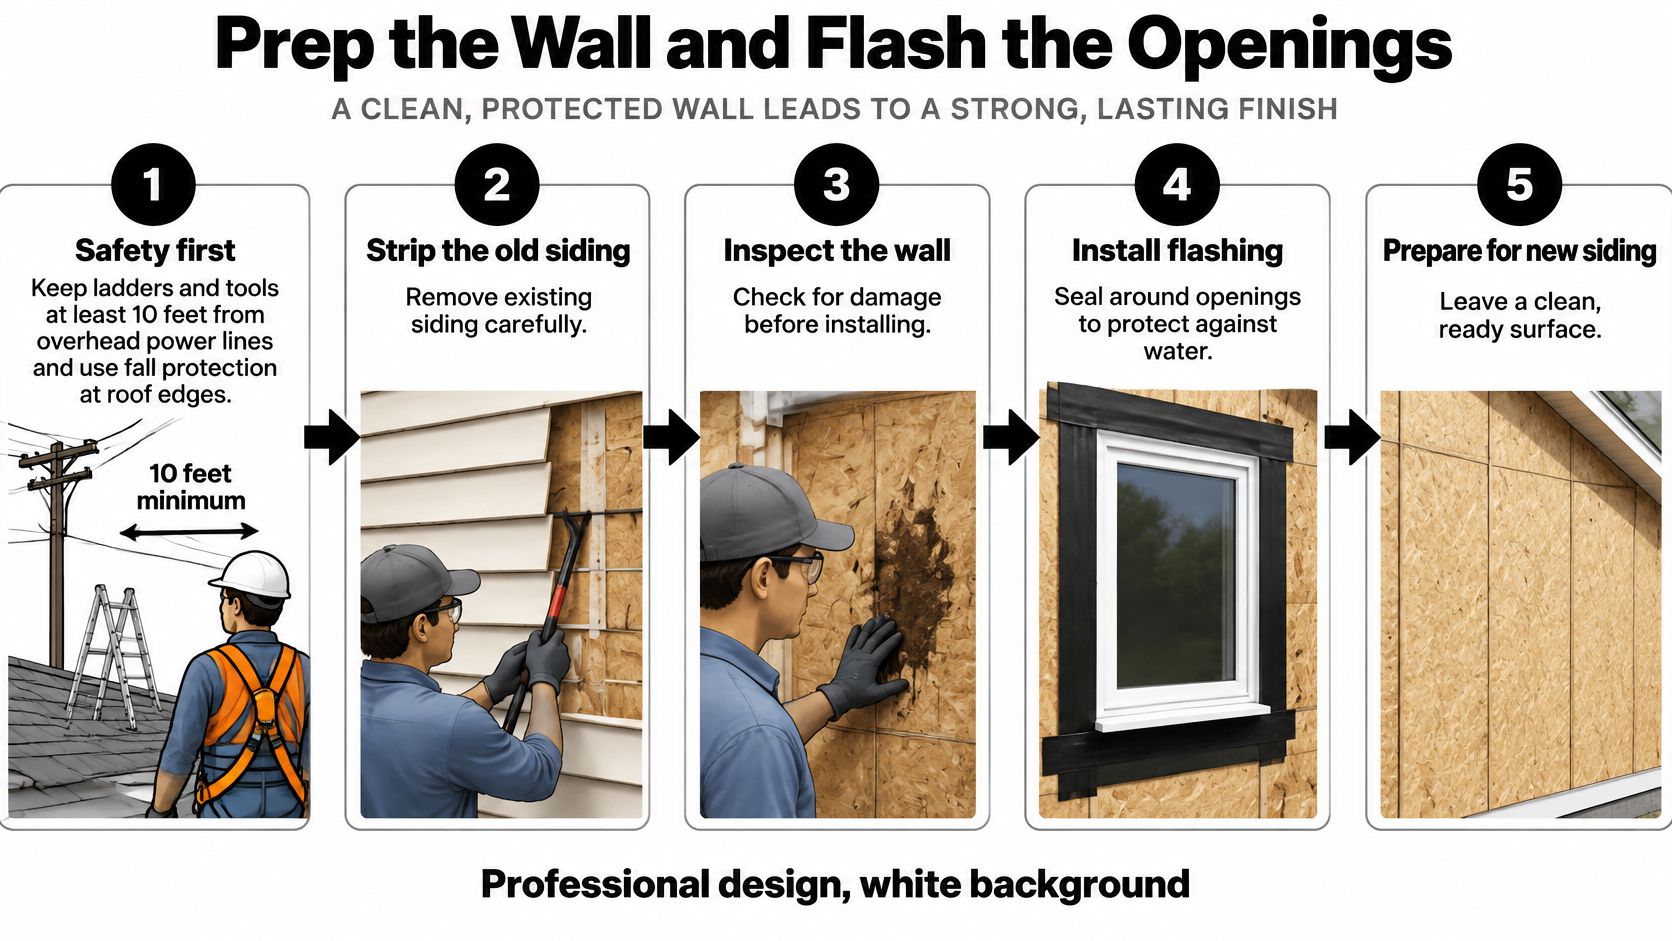
Open the wall before deciding what to cover
- Strip and inspect. Remove the old cladding carefully, then probe suspect sheathing with a screwdriver. Pay attention below windows, beside decks and under roof-wall intersections. Dark staining alone doesn't prove rot, but softness and persistent dampness require investigation.
- Replace deteriorated sheathing and repair damaged framing. Find the moisture source before closing the wall; new plywood over an active leak only resets the repair clock. Structural decay calls for qualified evaluation.
- Install the water-resistive barrier from the bottom upward. The International Building Code exterior-wall provisions provide a common benchmark of at least 2 inches of horizontal overlap and 6 inches of vertical overlap, with flashing integrated to direct water outward. Confirm the locally adopted code and the selected barrier system's requirements rather than treating this reference as a universal specification.
- Flash openings in drainage order. For an opening being rebuilt, establish the sill-pan detail first, overlap it with jamb flashing, then integrate head flashing beneath the barrier above. On retained windows, use an approved retrofit detail; don't improvise a sealed pocket around inaccessible flanges.
- Connect roof and wall drainage. Install kick-out flashing where roof runoff must leave the wall and enter the gutter. Coordinate it with step flashing and the barrier instead of covering the junction with caulk.
Provide drying space and document the result
Consider a drainage mat, textured wrap or designed furring system where the assembly needs separation behind the cladding. Building Science Corporation's wall guidance recommends a ventilated, drained cavity, including furring strips at least 3/16 inch thick. Furring also changes trim depth and fastener requirements, so plan it before ordering accessories.
Photograph opening corners, roof transitions, penetrations and the wall base before covering them. A reverse lap can funnel water behind otherwise neat-looking work. The ready sign is sound, dry substrate and a continuous outward drainage route, not merely a wall covered with wrap.
How to Hang Vinyl and Fiber Cement Panels
- Establish the starter line. Snap a chalk line and check it with a long level or laser. Use the planned wall-base elevation, not a crooked deck or an uneven foundation ledge, as your reference.
- Install the starter, corner posts and receiving trim with the product's required clearances. Check corner posts for plumb. Tight accessory joints can restrict movement before the field panels are installed.
- Lock the first vinyl course into the starter. Begin at the planned bottom corner and engage the locking edge fully without stretching the panel upward. Pulling hard to straighten a course introduces tension rather than correcting the layout.
- Center vinyl fasteners in the slots and leave their heads slightly proud. Don't clamp the nailing hem against the wall. Check that the panel moves laterally before adding another course.
- Work upward and check alignment. Stagger joints according to the product instructions and avoid conspicuous stacks beside the front entry. Don't face-nail a loose panel as a shortcut; use the approved locking or finishing detail.
- Handle fiber cement as a different system. Support long boards, use a siding gauge for consistent exposure, and follow the prescribed fastening pattern. Use approved shears or score-and-snap methods where suitable; powered cutting needs the manufacturer's silica-dust controls and appropriate protective equipment.
Vinyl siding fastener and spacing benchmarks
The following reference values come from the Florida Residential Code wall-covering provisions. They're reference benchmarks, not a Kansas City project specification; verify local requirements, wind exposure and the product's approved fastening schedule.
| Requirement | Benchmark | Why it matters |
|---|---|---|
| Fastener shank | 0.120 in (3 mm) | Provides the specified fastener size; use corrosion-resistant material |
| Fastener head | 0.313 in (8 mm) | Retains the slotted hem without clamping it tight |
| Maximum spacing, horizontal siding | 16 in (406 mm) | Controls unsupported attachment intervals |
| Maximum spacing, vertical siding | 12 in (305 mm) | Meets the reference attachment pattern |
| Penetration into sheathing and framing | 1 1/4 in (32 mm) minimum over wood | Provides required embedment into the supporting assembly |
Don't transfer these vinyl values to fiber cement. Neasden Hardware's guide to fibre cement board types and sizes helps distinguish board formats, but the chosen exterior siding product's instructions must determine fastening, joint treatment and cutting methods.
Course check: Vinyl should remain free to move, with panel ends concealed by receiving trim and expansion space preserved behind it.
Fiber cement should sit straight without crushed fastener locations, unsupported joints or damaged edges. Neither material should be forced into alignment by overtightening fasteners.
Trim, Final Check and Leak Diagnosis
Finish the remaining trim after the panels, but don't postpone accessories that must receive the siding. J-channel, corner posts and opening flashings generally belong earlier in the installation. Complete the top-course retention detail with the specified finish trim rather than relying on an exposed nail or bead of sealant.
Walk the perimeter and look from below as well as straight on. Check roof and deck clearances, panel engagement, accessory joints and open drainage exits. Caulk only the joints identified by the system instructions.
Read symptoms without guessing at the repair
- Staining below a window: Investigate the sill drainage and jamb-to-sill connections, then trace upward. The entry point may be above the visible stain, so don't assume the nearest exterior seam caused it.
- Buckling at a corner: Check trapped panel ends and tight fasteners before adding nails. Heat distortion or an uneven substrate can produce similar symptoms.
- Water appearing after cleaning: Review washing direction and pressure. The siding cleaning advice from Cultivate House Detailing is useful before treating the new exterior with a pressure washer.
Repeat the inspection after the first heavy rain. Record dates, weather conditions and photographs, especially when storm damage or an insurance claim is involved. If dampness persists, investigate the entry route before sealing more exterior joints.
Decide Whether to Hire a Siding Contractor
A capable homeowner can handle a straightforward, accessible vinyl wall over sound sheathing. DIY stops making sense when safe access, concealed decay or complicated flashing exceeds your skills. Fiber cement and steel also demand handling, cutting and attachment practices that can make a professional crew worth the expense.
Hire for the wall assembly, not just the panel brand. Compare written scopes line by line, checking repair allowances, barrier details, flashing, disposal and warranty exclusions. Verify licensing where required, insurance and bonding; manufacturer credentials should match the work being proposed.
For homeowners comparing local siding replacement options, we provide free on-site inspections and detailed project plans, with a No Money Upfront policy. Two States Exteriors LLC is a GAF Certified Contractor, but that roofing credential shouldn't be mistaken for siding-specific product certification.
An unusually low total deserves questions, not automatic rejection. Identify what's missing and get the answer in writing before work starts.
Hire a professional when you can't safely expose, repair and verify the wall behind the finish. Saving on panel labor isn't a saving if you have to remove it again.
Two States Exteriors LLC offers siding installation in Holton, KS and Kansas City, KS. Visit Two States Exteriors LLC to request a free on-site inspection and discuss the wall repairs, water-management details and siding options your house needs before installation begins.