
You're standing in the driveway, looking at a two-tone brick facade that came with the house. One section is dark red, another is pale, and a patch near the addition doesn't match anything else. Paint seems like the cleanest answer, but exterior brick isn't siding. The wrong coating can hide water problems, trap moisture, and leave you with peeling paint or damaged brick beneath it.
The right way to paint exterior brick starts with a decision that has nothing to do with color. Can this wall dry safely after it gets wet? If the answer isn't clear, put the paint chips away and inspect the masonry first. Kansas City's rain, humidity, and winter freeze-thaw cycles make moisture management more important than a flawless finish on the day the project is completed.
Deciding Whether Your Brick Should Be Painted at All
A homeowner may decide to paint because the brick looks dated, mismatched, or just wrong for the rest of the exterior. That can be a reasonable choice when the masonry is stable, the wall is dry, and the goal is a cohesive change rather than a cover-up. Painting can unify brick added during an old renovation, conceal unattractive color variation, and give the home a different exterior character.
The decision becomes risky when the brick is already absorbing water or losing its surface. Spalling, persistent efflorescence, soft mortar, interior dampness, and failed flashing are repair issues, not paint-preparation issues. A coating won't stop water from entering through an open joint or defective roof-to-wall detail. It can make the problem harder to see while deterioration continues underneath.
Situations where painting can make sense
Painting is worth considering when the brick faces remain intact, the mortar joints are sound, and inspection doesn't reveal an active source of moisture. A sound wall can often carry a carefully selected masonry coating, provided the coating allows the assembly to dry and the surface is properly prepared.
It also makes sense when the owner understands the trade-off. Painted brick offers a controlled color change, but it creates a long-term maintenance obligation. Returning to a natural-brick appearance usually isn't practical without aggressive removal methods that may damage the face of the brick.
Practical rule: If you're hoping paint will solve a moisture problem, don't paint yet. Find the water source first.
A historic facade deserves extra caution. Local preservation requirements may limit changes, and older brick may have been designed to manage moisture differently from modern masonry. Leaving sound historic brick unpainted can be safer than applying a coating that changes its drying behavior.
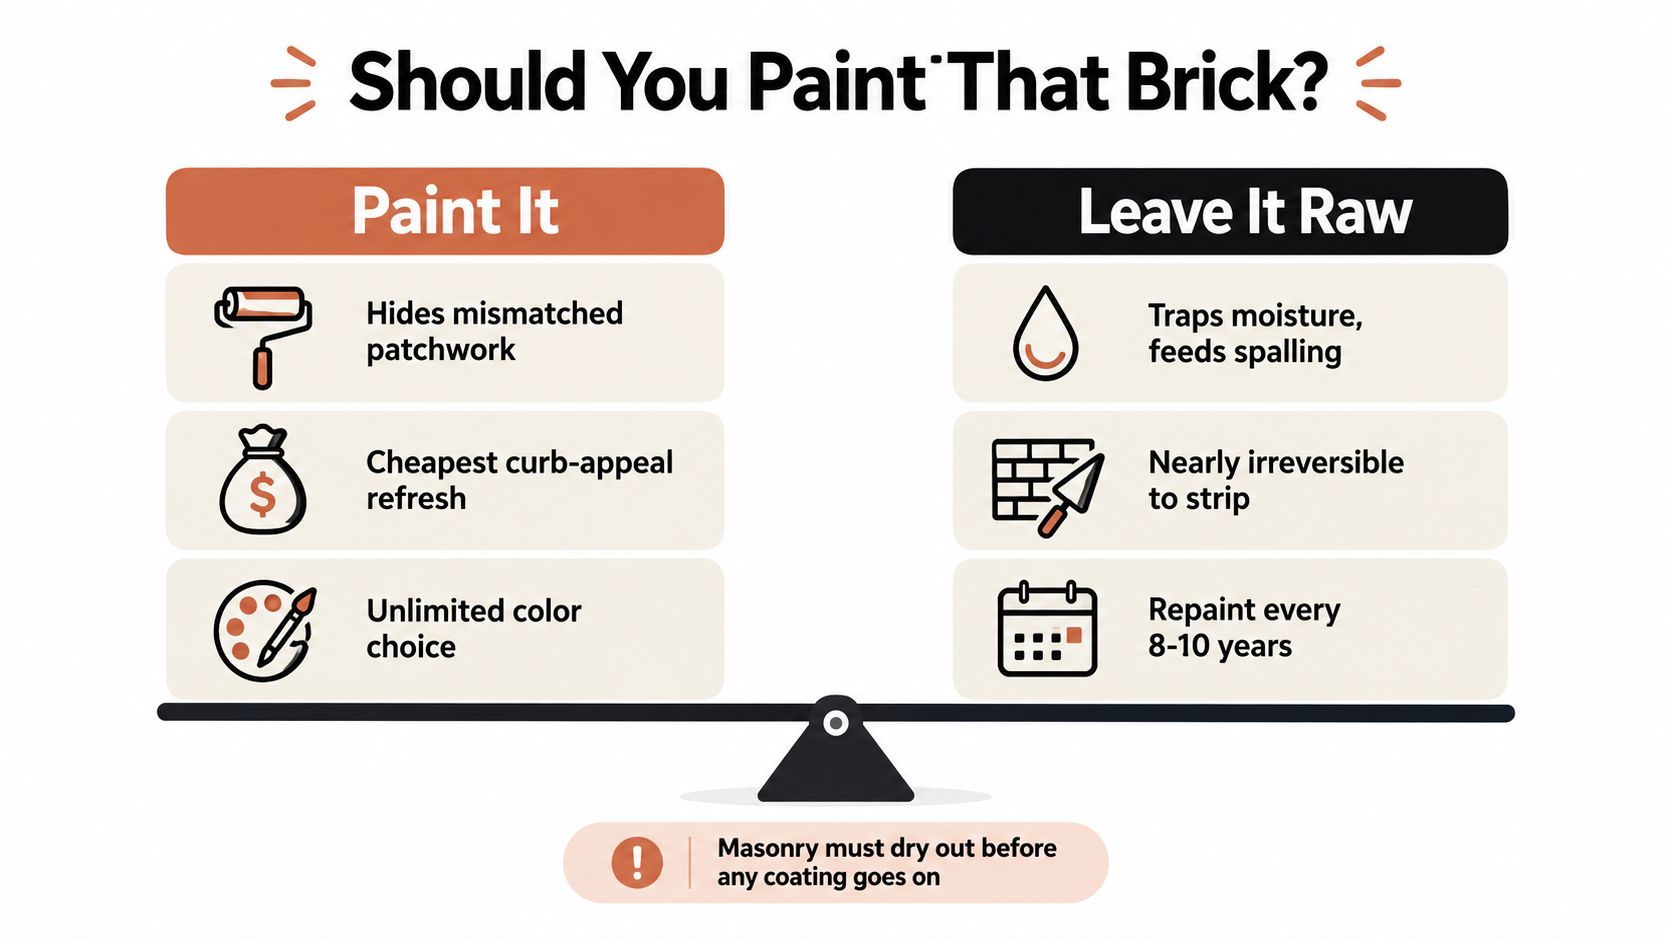
Before committing, compare paint with less permanent ways to improve the facade. Sometimes coordinating the siding, trim, shutters, or mortar color provides the visual improvement without coating the brick. You can also review broader curb appeal improvements before making a decision that's difficult to reverse.
The rest of this guide assumes you've decided that painting is appropriate. The wall still needs to pass a detailed inspection before you buy primer or schedule a washing day.
Inspecting the Wall Before You Pick Up a Brush
A professional doesn't begin with a color consultation. The first visit starts with a slow walk around the building, preferably after wet weather has made problem areas easier to identify. Look at the entire wall system, not just the brick faces.
Start with signs of moving water
Efflorescence is the white, powdery material that appears when moisture carries soluble salts toward the surface. Brushing it away may improve the appearance temporarily, but recurring efflorescence means water is still traveling through the masonry.
Inspect below rooflines, around windows, beneath step ledges, and where different materials meet. Check gutters and downspouts for overflow marks, then examine flashing at wall tops, window heads, roof intersections, and ledges. Water that gets behind the coating can push paint away from the brick and keep the wall wet from the back.
Trace cracks rather than dismissing them as cosmetic. Stair-step cracking through mortar joints can indicate movement, while cracks through brick units deserve a closer masonry assessment. A small surface defect and an active structural movement pattern shouldn't receive the same repair.
Test the masonry by hand
Press firmly on mortar joints with a screwdriver or similar probe. If the joint crumbles, recedes, or feels unusually soft, painting over it only hides a weak substrate. The joint needs repair before primer.
Tap suspect bricks and compare their sound with nearby sound units. Hollow or dull areas can indicate separation or freeze-thaw damage, though tapping alone isn't a final diagnosis. Look for faces that are flaking, layered, cracked, or powdery. A coating can't restore a brick face that has already lost its durable outer surface.
Use a moisture meter across multiple courses and elevations rather than taking one reading near the easiest-to-reach area. Map the results alongside visible staining and interior observations. Basement dampness, window condensation, or staining on the inside of an exterior wall may point to the same water path.
Your inspection should end with a written go-or-no-go list:
- Moisture source: Identify leaks, failed flashing, drainage defects, and recurring efflorescence.
- Masonry condition: Record spalling, cracked units, open joints, and unstable areas.
- Existing coating: Note chalking, peeling, incompatible paint, and areas with poor adhesion.
- Drying condition: Confirm that the wall can dry and that drainage openings remain functional.
- Repair scope: List repointing, brick replacement, flashing work, and cleaning separately from painting.
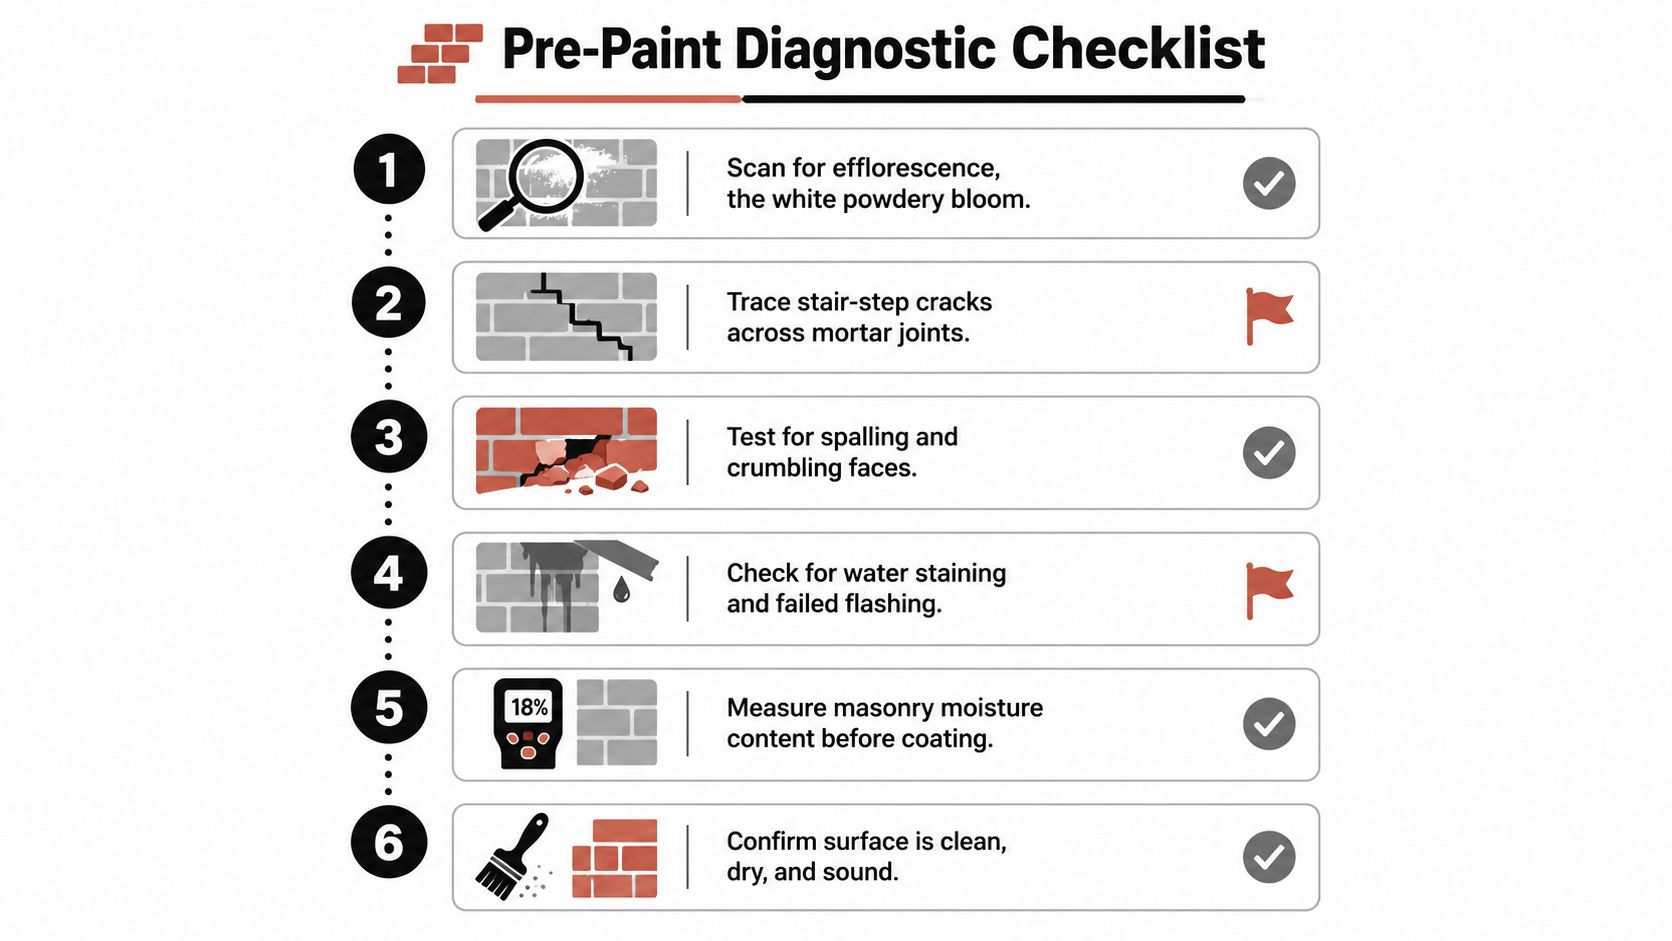
If the wall fails any major check, delay the coating. A dry-looking surface isn't necessarily a dry wall, and a clean-looking joint isn't necessarily a sound joint.
Cleaning, Repointing, and Getting the Wall Truly Dry
Preparation has to follow the condition of the wall. Start with dry methods before introducing water. Use a stiff natural- or synthetic-bristle brush to remove loose dirt, dust, cobwebs, and flaking debris, then vacuum the joints and ledges where practical.
For bonded grime, use a masonry-appropriate cleaner with a stiff brush or a low-pressure garden sprayer. High-pressure washing can force water into the wall, erode softer brick faces, and open vulnerable mortar joints. More pressure isn't better preparation when the substrate itself can be damaged.
Biological growth needs separate treatment. A properly diluted sodium hypochlorite solution can be used where appropriate for the masonry and surrounding landscaping, followed by thorough rinsing. Protect plants, metal fixtures, glass, and finished surfaces, and follow the cleaner manufacturer's directions. Don't leave residue behind, because cleaner residue can interfere with adhesion.
Repair the joints after cleaning
Cleaning exposes the defects that paint would otherwise conceal. Remove loose or failing mortar to a consistent sound depth, then repoint with a compatible mortar matched to the existing brick and joint. The replacement mortar should suit the original masonry in strength, texture, color, and movement behavior.
Tool the new joints so they shed water instead of creating ledges and pockets. Repair cracks, replace badly damaged brick, and correct defects around openings before considering primer. If flashing or gutters are sending water onto the wall, fix those systems before the final cleaning.
The wall must then dry completely. Shaded elevations, thick walls, and masonry that absorbed substantial rinse water can need substantially longer than a sunny, exposed face. Don't rely only on touch. Use the moisture requirements in the coating manufacturer's technical data and verify several representative areas with a moisture meter.
Drying is part of the repair. Coating a damp wall doesn't preserve the preparation work. It hides the remaining moisture until the finish begins to blister or peel.
A useful preparation sequence is:
- Dry brush and vacuum loose material.
- Clean with the least aggressive method that produces a sound surface.
- Treat biological growth where necessary and rinse thoroughly.
- Repoint failed joints and repair brick, flashing, gutters, and drainage details.
- Allow the wall to dry under stable conditions.
- Recheck for salts, damp areas, chalking, and loose material before priming.
The house-painting preparation process follows the same principle: surface preparation controls the result. If the wall remains damp or unstable, stop there. Paint is the last operation, not the first repair.
Choosing a Paint System by Permeance, Not by Color
The word “breathable” doesn't tell you enough. Ask for the tested water-vapor permeance of the complete system, including primer and finish. The Brick Industry Association divides materials into practical ranges, with vapor-impermeable products measuring 0.1 perm or less, semi-impermeable products measuring more than 0.1 to 1.0 perm, semi-permeable products measuring more than 1.0 to 10 perms, and vapor-permeable products exceeding 10 perms. See the Association's technical guidance on changing the appearance of brick masonry before choosing a system.
Building Science Corporation identifies coatings below 10 perms as more prone to blistering and peeling on reservoir claddings, while describing approximately 10 to 20 perms as a preferred range for outward drying on suitable assemblies. That doesn't mean every wall should receive the same product. Exposure, existing paint, brick porosity, wall construction, and moisture direction all affect the decision.
Compare the chemistry with the wall
| Coating Type | Permeance (perms) | Typical DFT (mils) | Best Use | Watch Out For |
|---|---|---|---|---|
| Acrylic elastomeric | Varies by product and film build | Varies by product | Walls where flexibility is needed and the assembly can tolerate the system | Thick, low-perm films can slow drying and trap moisture |
| Acrylic flat or satin | Often semi-permeable, but verify the technical data sheet | Varies by product | Sound, prepared brick where a uniform color and masonry compatibility are confirmed | The label alone doesn't prove adequate vapor movement |
| Silicate or mineral-based coating | Varies by formulation and substrate | Varies by product | Compatible mineral masonry where the manufacturer specifies the system | Poor compatibility with existing coatings or unsuitable substrates |
The table's blanks are intentional. Don't accept a generic claim based on the word “masonry” or “breathable.” Request the technical data sheet, confirm the tested permeance, and check whether the value applies to the primer and finish together.
Acrylic latex is commonly described as semi-permeable, but its actual rating varies by manufacturer. A low-permeance elastomeric product may look highly water-resistant on day one, yet perform poorly if the brick routinely wets from behind. A mineral or silicate system may be vapor-conscious, but it still has to be compatible with the existing surface and the desired appearance.
For product-selection examples, review exterior paint brand options only after you understand the wall's moisture profile. In a freeze-thaw climate, prioritize drying and compatibility over maximum film thickness or the most impermeable finish available.
Priming and Applying the Finish Coats
Once the brick is clean, repaired, dry, and compatible with the selected coating, protect the work area. Mask windows, doors, fixtures, walks, plants, and adjacent siding. Keep weep holes, movement joints, flashing edges, and drainage openings clear. Never allow primer or finish paint to bridge a detail that needs to drain or move.
Porous or chalky brick generally needs a compatible masonry primer. The primer should consolidate the surface without creating a vapor barrier that conflicts with the finish. Apply it at the manufacturer's specified spread rate, and work it into the profile rather than leaving the mortar joints lightly covered.
Match the tool to the texture
A sprayer can place material quickly across rough brick, but spraying alone often leaves pinholes and shallow coverage in the mortar profile. Back-roll or back-brush while the coating is workable to press the material into the irregular surface.
A roller with a substantial nap works well on rough brick faces. A block brush remains useful around joints, corners, recessed areas, and repairs where a roller skips. The goal isn't merely to make the wall look covered. It's to create an even, continuous film without flooding joints or filling drainage details.
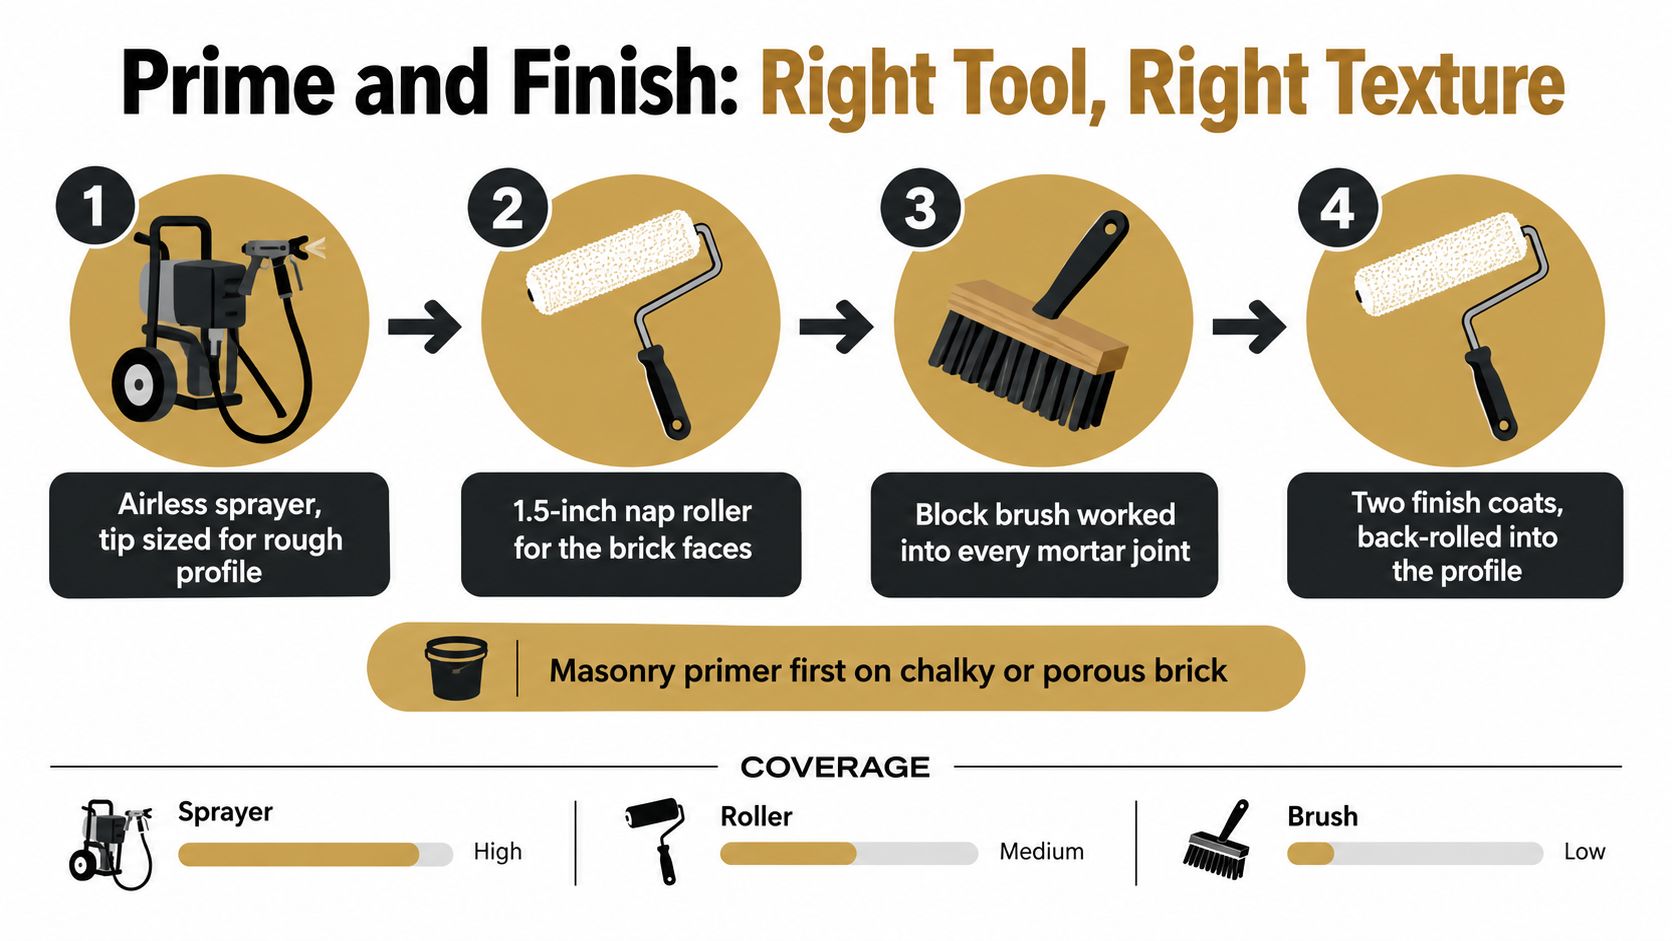
Apply finish coats uniformly and maintain a wet edge. Work in manageable elevations and stop at natural breaks, such as corners or architectural transitions. Hot sun, wind, and absorbent brick can shorten the working time, so avoid starting a wall you can't finish without creating lap marks.
Follow the product's temperature, humidity, substrate-moisture, and recoat requirements. The Brick Industry Association's guidance identifies approximately 40°F as the typical minimum air, material, and surface temperature for applying treatments under ASTM D6237 guidance, while the actual paint manufacturer may require a different range. Don't paint frozen masonry, and don't coat when rain, condensation, or freezing conditions are likely during curing. The relevant technical background is covered in the Association's masonry coating guidance.
Use two consistent finish coats when the product system calls for them. Inspect the first coat in changing light before recoating. Look for holidays, pinholes, thin mortar coverage, uneven absorption, and visible repairs. Correct those defects before the second coat instead of assuming the next pass will hide them.
A practical final check includes:
- Coverage: Confirm the actual spread rate against the technical data sheet.
- Recoat timing: Wait for the stated cure condition, not just a dry-to-touch surface.
- Weather: Check for rain, dew, condensation, and temperature changes during curing.
- Details: Confirm that weeps, joints, flashing edges, and drainage paths remain open.
- Finish: Walk the wall from several angles and inspect it in both direct and indirect light.
For a visual demonstration of spraying, rolling, and brushing techniques, use this exterior brick painting video:
Common Mistakes That Cause Peeling and Blistering
Most failed brick-painting jobs I'm called to inspect don't fail because the homeowner chose the wrong shade. They fail because someone treated preparation as a quick wash followed by a race to the roller.
The first mistake is skipping the moisture investigation. Efflorescence gets brushed away, the wall looks cleaner, and paint goes on over the same water path. It later returns through the coating, often with bubbling or pale staining. The field test was simple: inspect the source, map damp zones, and wait until the wall is demonstrably dry.
The next mistake is painting over weak material. Chalky old paint, loose coatings, crumbling mortar, and spalled brick don't become sound because they're covered. Scrape and probe the surface, test adhesion where an existing coating remains, and stabilize the substrate before applying a new system.
Shortcuts that create visible failures
Repainting before the previous coat has cured can cause intercoat adhesion problems. A surface may feel dry while the film beneath remains soft. Follow the product's recoat conditions and allow the wall to release moisture between operations.
Ignoring efflorescence is another common error. Salts are a symptom of water movement, not ordinary dirt. If they keep returning after cleaning, the project needs a drainage or masonry investigation rather than another coat of paint.
Caulking weep holes shut creates a drainage failure. Those openings may be visually inconvenient, but blocking them can prevent water from leaving the wall assembly. Mask around them and keep them functional.
A cosmetic failure is a maintenance issue. A damaged brick face, open joint, or persistent wet wall is a masonry issue. Don't treat both with the same patch-and-paint repair.
When paint peels in isolated areas over otherwise sound brick, spot repair may be appropriate after the cause is corrected. Widespread failure usually means the project needs broader removal, adhesion testing, and a revised coating system. Spare time and careful drying will save more work than a fast start.
When to Hire a Pro Instead of DIY
DIY painting is reasonable for a small, accessible wall that has already passed inspection. A full exterior is different. The decision to hire a contractor isn't only about whether you can operate a sprayer. It's about whether you can diagnose the wall, control the preparation, select a compatible system, and manage the weather window.
Stop the DIY plan when moisture or efflorescence remains active after cleaning. Recurrent salts, staining below rooflines, interior dampness, and failed flashing all call for diagnosis before coating. The same applies to mortar joints that are widely recessed or failing, cracks that run through brick units, and extensive paint failure on a previously coated facade.
Height changes the risk as well. Work beyond a standard two-story reach requires safe access, stable platforms, and a plan for protecting people and property below. Historic or regulated facades add another layer because the wrong coating can affect the appearance and drying behavior of the masonry.
A qualified contractor should be able to explain more than the color and brand. Ask how the crew will clean the brick without damaging it, how repairs will be handled, how moisture will be checked, and how the proposed primer and finish will work together. The contractor should also identify what won't be painted, including drainage openings and movement details.
Questions that expose a weak proposal
Request local references for comparable masonry work and ask how the finish has performed over time. Have the contractor identify the proposed product system and provide its technical data, including permeance where available. The bid should separate preparation, masonry repair, primer, finish coats, access, and cleanup so you can see what happens if the wall needs additional work.
Don't accept a warranty as a substitute for a sound diagnosis. No universal success rate applies to exterior brick painting because durability depends on exposure, substrate condition, moisture movement, and coating compatibility. A documented inspection and a representative adhesion and appearance test are more useful quality controls than a broad promise.
For Kansas City homeowners, a contractor with exterior painting and masonry-preparation experience can also coordinate related repairs, such as gutters, roof transitions, and siding interfaces. Two States Exteriors LLC offers exterior painting that includes surface cleaning, paint removal, joint sealing, spot repair, masking, protection, application, and touch-up as part of an exterior project.
If your Kansas City brick needs more than a color change, Two States Exteriors LLC can inspect the exterior, identify moisture and masonry concerns, and provide a clear plan for preparation and painting. Schedule an on-site assessment before coating the wall so repairs, primer, finish coats, and drainage details are handled in the right order.


