
A Kansas City storm has moved on, but the morning brings its own questions: shingles on the lawn, a dented gutter, and a faint water stain spreading across the ceiling. You may be wondering whether the damage is covered, whether to call a roofer or your insurer first, and how to avoid paying for work that the claim should address.
The practical answer is to move promptly without disturbing evidence. Make the property safe, document what you can see from the ground, and notify your insurer. Then read your policy closely: the first payment may not be the final amount, and the difference between actual-cash-value and replacement-cost coverage can shape what you need to pay while repairs are underway.
The First 48 Hours After Storm Damage
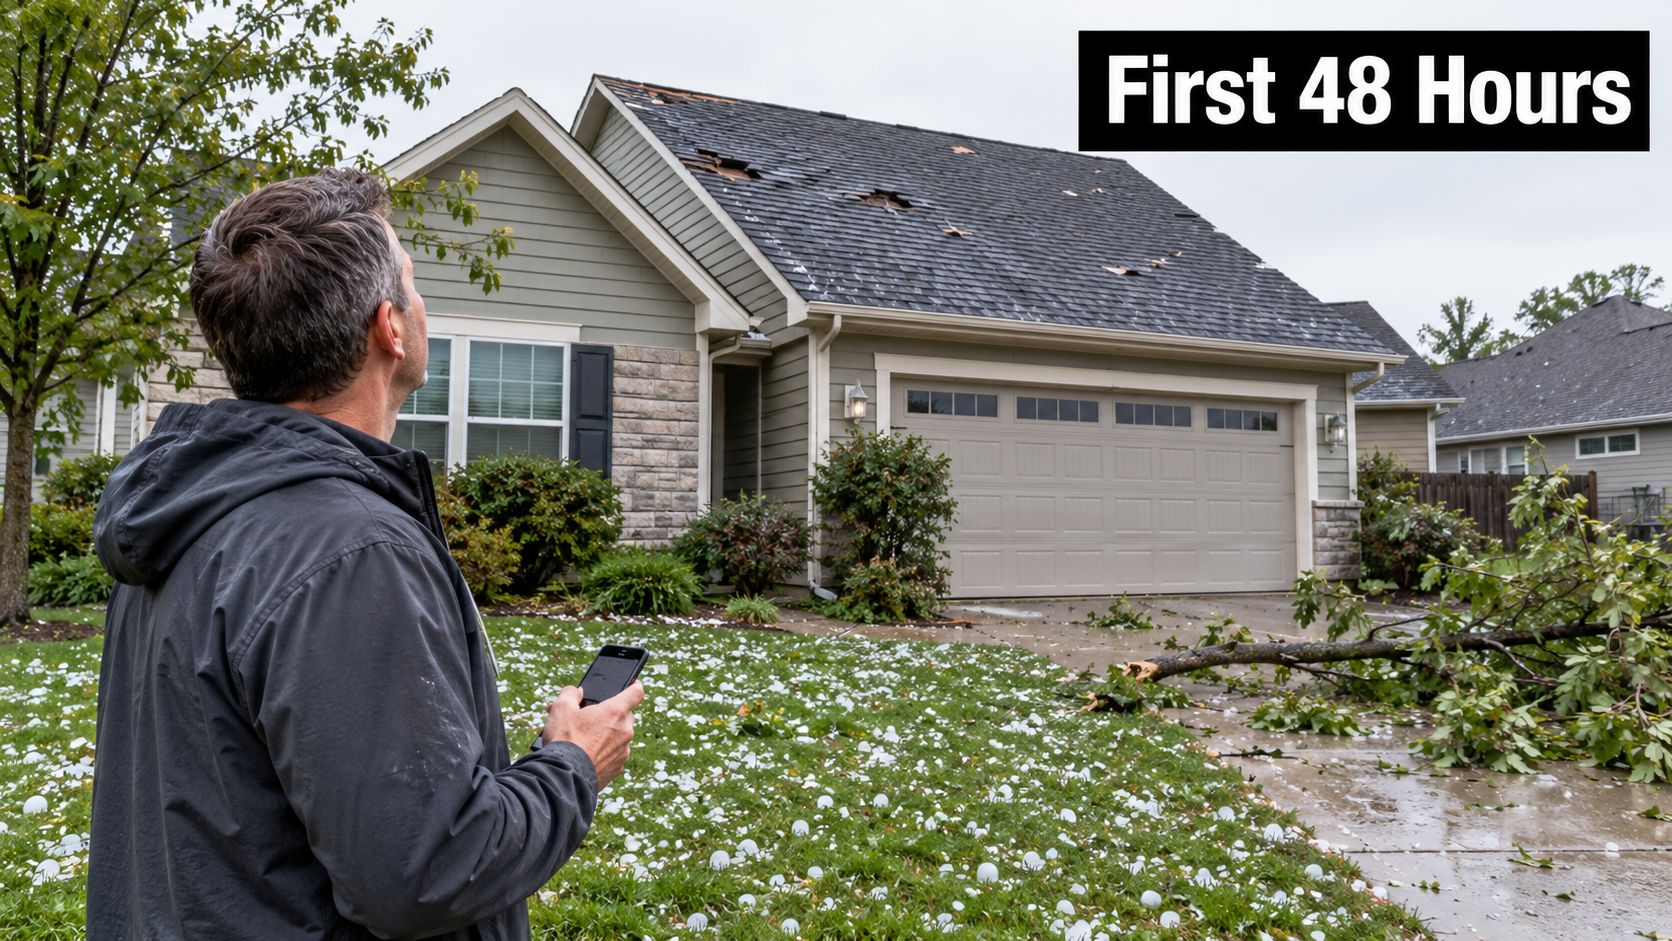
The morning after a Kansas City hail or windstorm can look deceptively ordinary. You might find a shingle beside the driveway, a downspout dented by hail, or a neighbor's roof covered with a tarp. Your own roof may look intact from the ground, even as water starts to mark a bedroom ceiling. Don't climb up to investigate. A wet or storm-damaged roof can be slippery, and walking on it can create more damage or put you at risk.
Wind and hail are common reasons homeowners need to understand the claim process. The Insurance Information Institute reports that 5.8% of insured homes had a claim from 2018 through 2022, and wind and hail affected 2.8%, making them the most frequent major property-loss category in the United States (Insurance Information Institute homeowners insurance data). Those figures describe national patterns, not whether your damage is covered. Your policy and the cause of damage determine that.
Make the home safe, then preserve the evidence
Start inside. If you see an active leak, move furniture and valuables away, put a bucket under dripping water, and take photos of the affected ceiling and belongings. Check the attic only if it's safe to enter, and avoid areas with sagging ceilings or exposed wiring. From the ground, photograph loose shingles, fallen branches, damaged gutters, and any other visible changes.
The first priority is to prevent additional damage. If the storm has opened the roof, arrange temporary protection, such as tarping, but don't begin permanent replacement before the insurer has had a chance to inspect unless an emergency requires faster action. Keep receipts and photograph the condition before and after temporary work. For urgent leak protection, emergency roof tarping in Kansas City can limit further exposure while preserving a record of the damage.
Practical rule: Act quickly to protect the house, but don't make the evidence disappear. Take photos before moving debris or covering an opening whenever it's safe to do so.
Move too slowly, and water can damage ceilings, insulation, and contents. Move too fast, and permanent work or discarded materials can make it harder to evaluate what the storm caused. The next steps are about building a clear record while protecting the home.
Documenting Damage Like an Adjuster
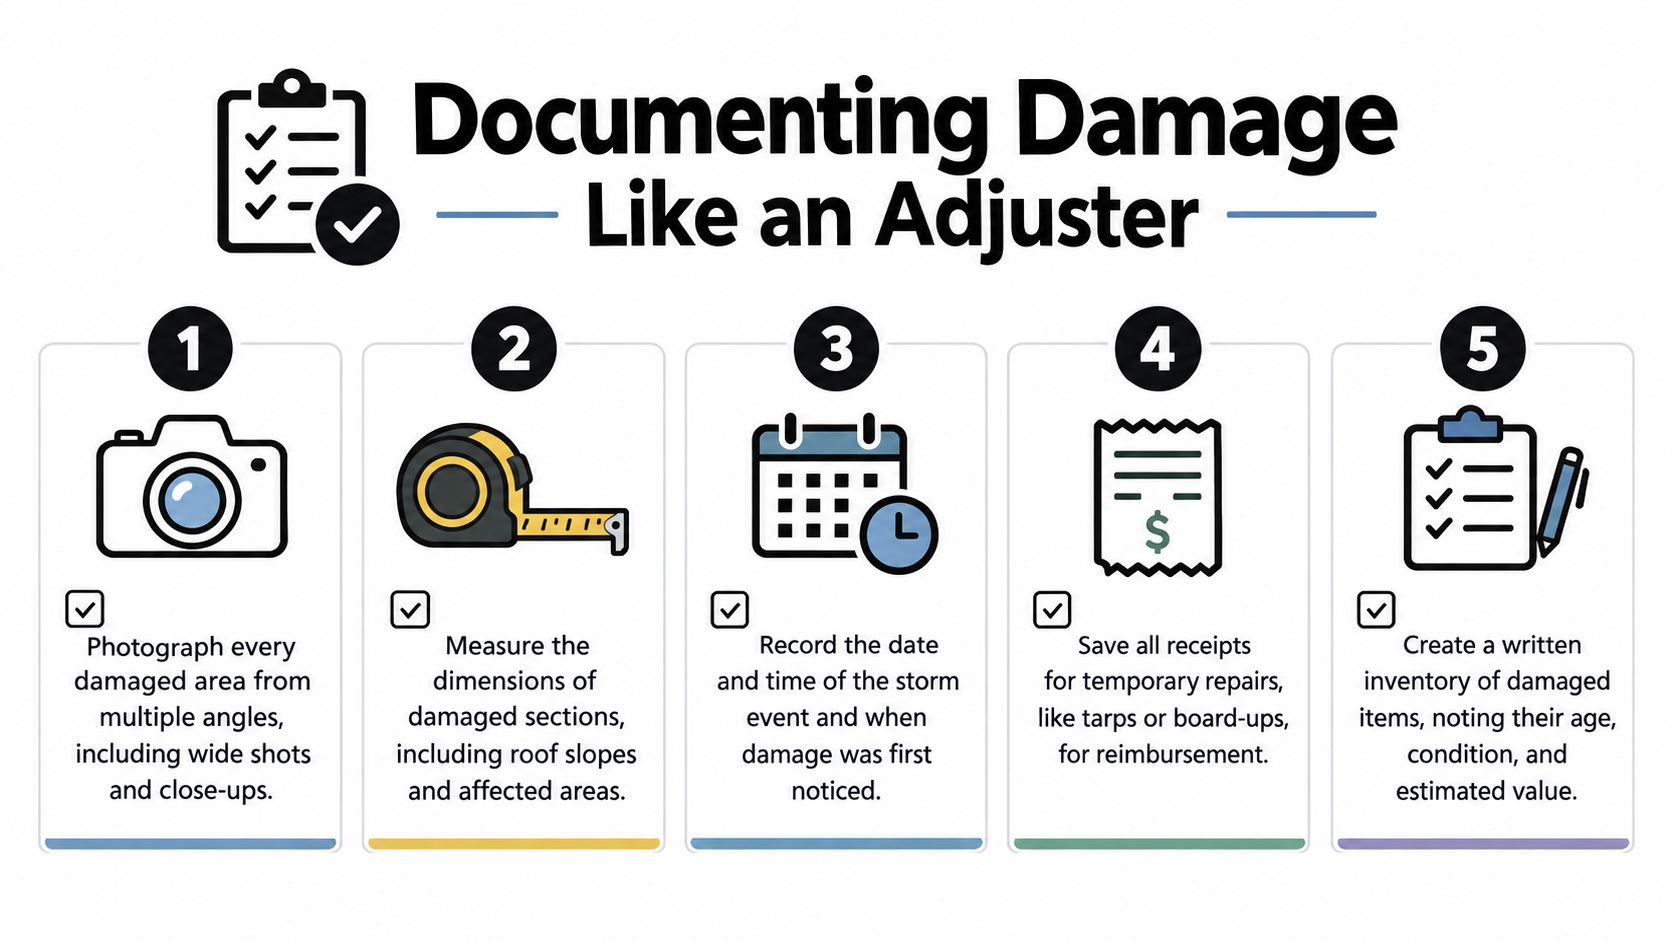
A useful claim file lets someone who wasn't there understand what happened, where the damage is, and what you did to prevent it from getting worse. Use your phone to capture the home before cleanup or repairs change the scene. Take both wide shots that show location and close-ups that reveal details. Don't put yourself on the roof to get a better angle.
Build a photo and video record
Photograph each side of the house, roof edges visible from the ground, gutters, downspouts, siding, and any fallen branches or roofing pieces. Indoors, record ceiling stains, wet walls, attic moisture, damaged insulation, and affected belongings. A slow, dated video walkthrough can connect those close-ups to the room or exterior area where you found them.
Record the storm date and when you first noticed damage. If you have pre-storm photos in a phone gallery, cloud backup, or real-estate listing, save copies. They may help show the roof's condition before the event. If damaged shingles or other materials have already come loose, photograph them and keep them somewhere safe until the adjuster has inspected, rather than sending them straight to the dumpster.
The National Association of Insurance Commissioners recommends prompt reporting, a complete inventory of damaged property, pre-loss photos when available, and receipts for repair or replacement items (NAIC homeowners-claim guidance). Make the inventory detailed enough to identify what was affected and what action you took. A list that says “water damage” leaves unanswered questions; a record that notes the room, surface, belongings, and photos gives the insurer something concrete to review.
Start a paper trail at first notice
When you contact the insurer or agent, write down the date, time, representative's name, and instructions. Ask for a claim number and record any deadline, inspection appointment, or authorization for temporary work. Save emails, texts, contractor inspection photos, estimates, and receipts in one folder, with a digital backup.
Your file should also include the policy declarations page, adjuster's information, weather-event evidence if available, the insurer's estimate, and any documents related to emergency repairs. These records help you compare what the adjuster observed with what the contractor documented. They also make it easier to explain the timeline if the scope or payment is later disputed.
Reading Your Policy Before You Call the Insurer
Your roof's repair cost and your insurance payment aren't necessarily the same amount. Before you agree to a repair plan, find the declarations page and check the deductible, coverage type, and any roof-specific endorsements. Those terms can affect the first payment, what you may receive after repairs, and which roof conditions the policy treats differently.
ACV and RCV determine how depreciation works
Actual cash value (ACV) coverage subtracts depreciation from the covered loss. Replacement cost value (RCV) coverage generally pays the cost to repair or replace covered damage without subtracting depreciation, subject to the policy terms. An RCV policy may still issue an initial payment based on ACV, holding back recoverable depreciation until you complete the work and provide proof. That's the two-payment trap: the first check can fall short of the amount needed to finish the roof, and the withheld amount isn't released just because the project is planned.
The NAIC explains that, under ACV, a 20-year-old roof with an approximately 25-year useful life might receive only about 20% of replacement cost before other policy terms apply (NAIC post-disaster claims guide). That example isn't a prediction of your settlement. Roof condition, policy language, deductible, exclusions, and the insurer's assessment all matter.
| Feature | ACV policy | RCV policy |
|---|---|---|
| Depreciation | Deducted from the covered value | Generally not deducted from the final covered replacement cost |
| Initial payment | Reflects depreciation and the policy's other terms | May be based on ACV, with recoverable depreciation held back |
| After repairs | Usually doesn't include a recoverable depreciation release | The withheld amount may be released after proof of completed work |
| Cash-flow consideration | The payment may be well below replacement cost | You may need to cover costs until the holdback is reimbursed |
Check the details, not just the coverage label
Look for a separate wind or hail deductible, roof age limitations, settlement terms, and endorsements that modify roof coverage. Ask your agent or insurer to explain anything unclear before you authorize work. The question many owners forget to ask is whether depreciation is recoverable, what documentation triggers its release, and what completion deadline applies.
A deductible comes out of the claim calculation according to your policy. Compare it with the insurer's estimate and the contractor's scope before treating the settlement as a project budget. For a plain-language overview of common coverage terms, see this guide to what homeowners insurance may cover. Don't assume a roof replacement is covered just because the roof is damaged. Coverage depends on the cause, evidence, exclusions, and policy provisions.
Filing the Claim and Working With the Adjuster
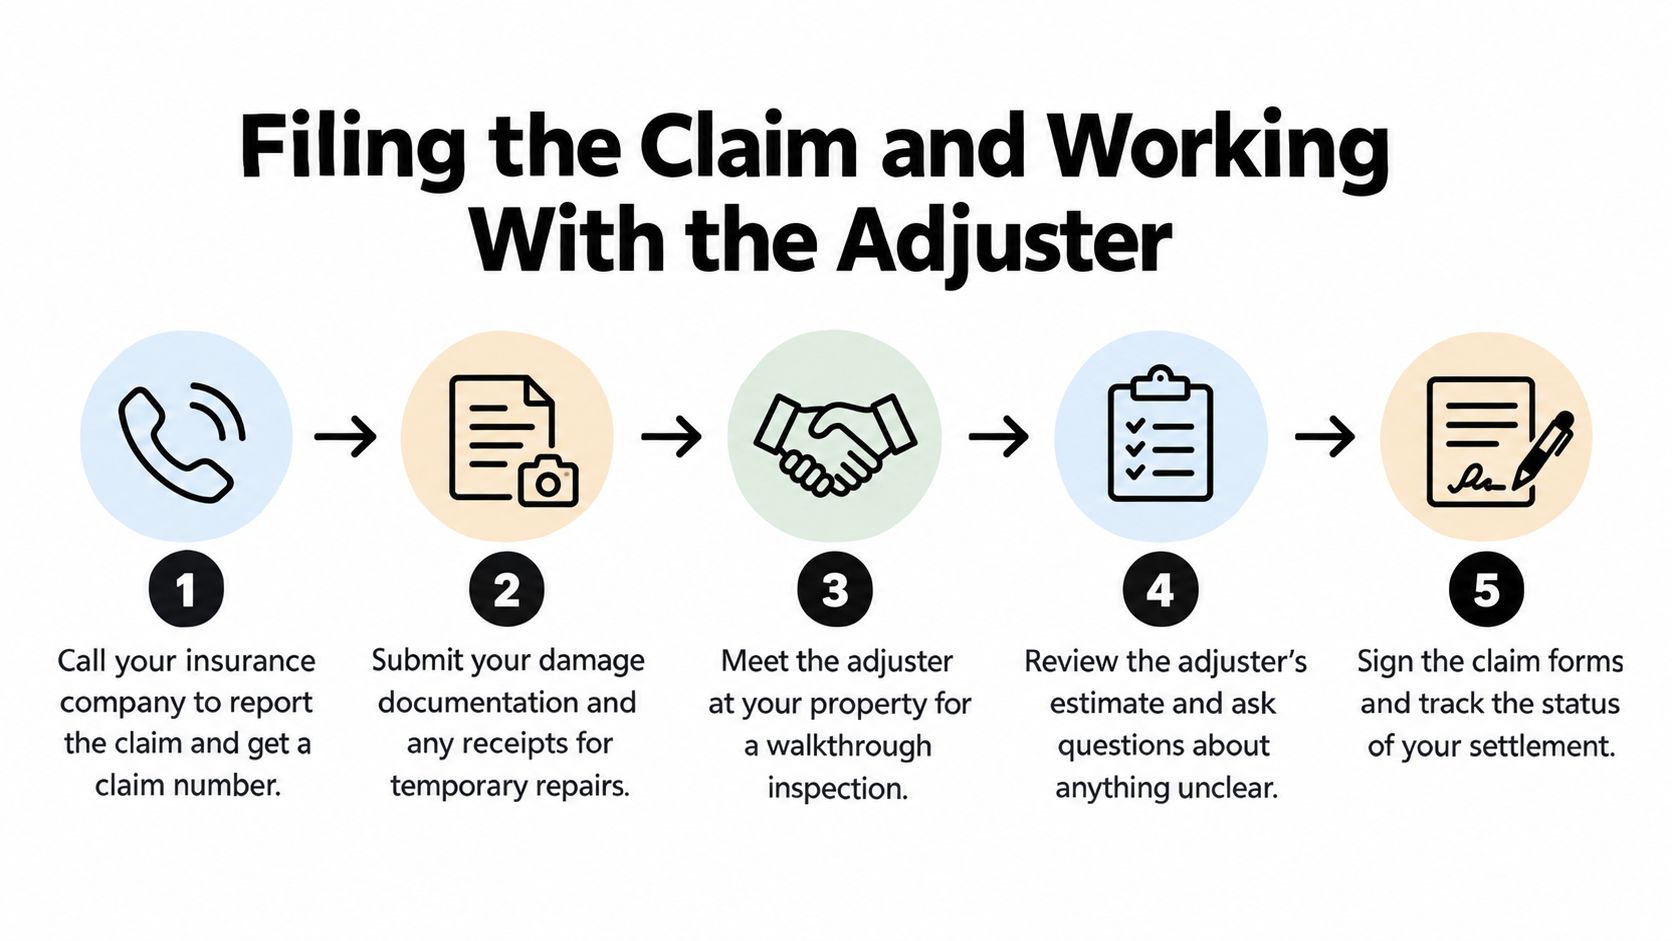
Once you've documented the visible damage and checked the key policy terms, contact your insurer promptly. Have your policy number, property address, loss date, contact details, concise description of the suspected storm damage, and temporary-repair receipts ready. Describe what you observed without guessing at the technical cause. Ask for a claim number, the adjuster's contact information, and guidance on authorized temporary repairs.
Prepare for the inspection
Before the adjuster arrives, organize your photos, inventory, call log, and repair receipts. If a roofing contractor has inspected the property, have the dated photos and written findings ready. Your role is to make it easy to compare the storm-related evidence with the insurer's assessment, not to pressure the adjuster into a particular decision.
Walk the property with the adjuster if possible. Point out where you found shingles, any interior leak, and damage to gutters, siding, flashing, or detached structures. Ask what areas were inspected and whether the report will include the roof and related damage. Keep the conversation factual. A dented gutter or a missing shingle may help identify an affected area, but the adjuster still has to assess whether the damage is covered under your policy.
After the inspection, request the written estimate and report. Review the line items against the damage file and ask for clarification where the scope doesn't match the observed conditions. If you disagree, put the question in writing and attach the specific photos or contractor findings that support it.
At the inspection: Ask how the estimate treats depreciation, whether it's recoverable, and what proof the insurer needs to release any withheld amount.
FEMA advises insured disaster survivors to notify their insurer and file a claim before seeking FEMA assistance, because FEMA generally can't pay costs already covered by insurance. In applicable disaster situations, FEMA says applicants should contact its helpline if an insurance settlement is delayed more than 30 days after filing (FEMA guidance on submitting insurance documents). That guidance doesn't replace the deadlines in your insurance policy or state law.
When the Settlement Is Too Low, Delayed, or Denied
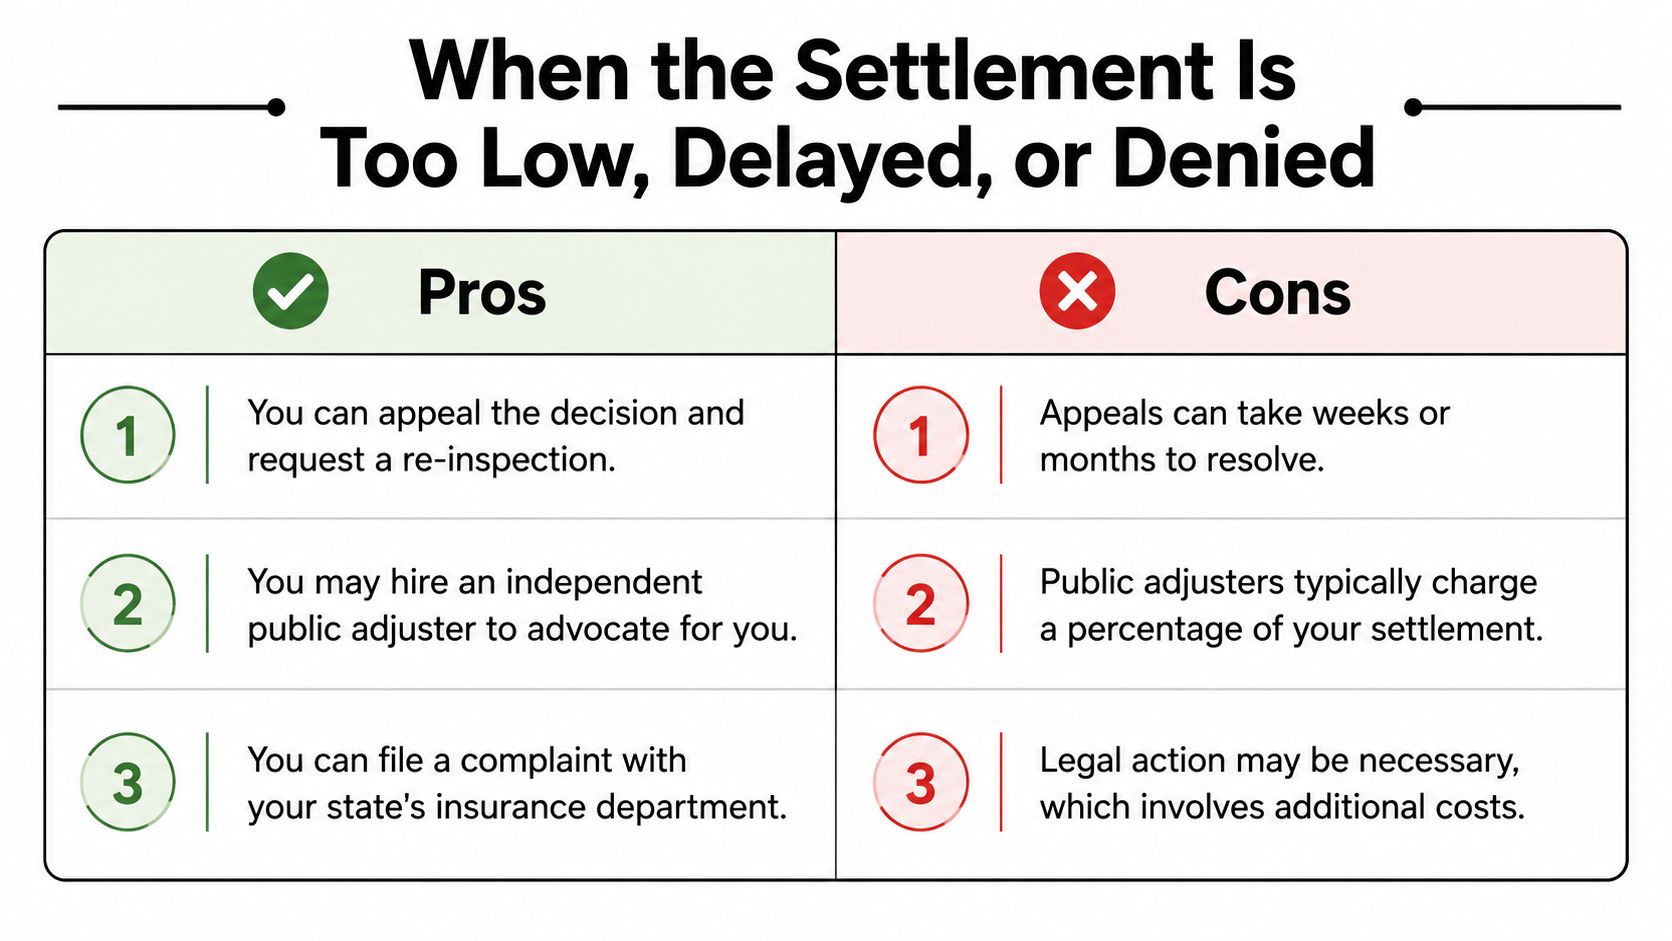
A quick estimate isn't the same as a final answer, and a settlement check isn't automatically a complete roofing budget. If the insurer's scope leaves out damage you documented, or the insurer denies the claim, ask for the decision and explanation in writing. A verbal summary won't show which policy language or inspection findings drove the outcome.
Make the dispute specific
Compare the insurer's written explanation with your policy's exclusions and endorsements. Identify what's missing or disputed, then send focused supporting material, such as dated inspection photos, a contractor's itemized estimate, and records of temporary repairs. Ask for a reinspection if new evidence or a missed area could change the assessment. Keep copies of everything you submit and record the date and recipient.
If the process remains unresolved, you can consider asking a supervisor to review the file or contacting your state insurance regulator about the handling of the claim. A public adjuster may be worth discussing for a complex or substantial dispute, but understand the fee arrangement and services before signing an agreement. A roofing contractor can document roof conditions and prepare an estimate, but the homeowner remains responsible for understanding the policy and deciding how to respond.
For a structured approach to discussing a scope or estimate with the insurer, review this guide on negotiating with an insurance adjuster.
Keep other recovery options in order
Don't assume disaster assistance replaces the insurance claim. FEMA generally can't duplicate insurance benefits, and applicants may need to provide an insurance settlement or denial and records of expenses. Save receipts for emergency repairs, drying, temporary lodging, and materials while the claim is pending. Organized proof helps you explain what you spent and which costs remain unresolved.
Storm damage and long-term maintenance are not interchangeable. Preserve evidence of the roof's pre-storm condition as well as the damage you found afterward. If the insurer says the problem is wear or an exclusion, request the reasoning in writing and compare it with the policy and your records before deciding whether to challenge the result. Be wary of anyone who promises guaranteed claim approval or urges you to hand over control of the file before you understand the agreement.
Closing the Claim After the Roof Is Replaced
A new roof doesn't necessarily mean the insurance file is finished. If your policy provides recoverable depreciation, you'll need to send the insurer the required proof of completed work to request the withheld payment. Confirm the insurer's requirements and any deadline before construction begins, so you can collect the right records as the project progresses.
Choose a contractor based on clear documentation, appropriate licensing and insurance, workmanship terms, and a written scope. Ask how the crew will protect the property, handle cleanup, and document work that becomes visible during tear-off. A photo log of the roof before, during, and after installation can help connect the completed work to the claim file.
Send a complete completion package
Before making the final payment, walk the property with the contractor and check the agreed scope, cleanup, and any related repairs. Keep the final invoice, proof of payment, permits if required, installation photos, and warranty documents together. Then submit the insurer's requested completion records and keep a copy of your request and the response.
Claim-closing file
- Final invoice: Keep the itemized bill and proof of payment.
- Work records: Save permits, completion photos, and warranty documents.
- Depreciation request: Send the paperwork the insurer requires and track the response.
- Digital backup: Store claim correspondence, estimates, receipts, and photos in one backed-up folder.
Two States Exteriors LLC provides roof inspections, storm-damage documentation, and insurance-claim support for Kansas City property owners. If you need help organizing a roof inspection or planning repairs after a storm, contact Two States Exteriors LLC to discuss your property and next steps.


