
After a hot week in July, you notice small bubbles on the sunny side of your Kansas City roof. Some still have granules on top; others look like tiny craters. Then you remember the recent storm and wonder whether you need a repair, a replacement, or an insurance claim.
Blistered roof shingles are a symptom, not a complete diagnosis. The useful decision starts with whether the roof still keeps water out, continues with what's stressing the shingles, and only then considers whether hail caused separate damage. A raised spot alone can't answer those questions.
What Blistered Roof Shingles Are
A shingle blister works much like a bubble beneath paint on wood: pressure beneath the surface pushes the outer layer upward. The National Roofing Contractors Association glossary defines a blister as a surface swelling associated with an enclosed pocket of air, water, or vapor, and explains that its top can weather away, leaving a steep-sided pit that may reach the reinforcing mat.
Understanding the shingle's construction helps explain why that matters:
- Reinforcing mat: Fiberglass, or organic material in some older products, forms the shingle's structural core.
- Asphalt coating: The asphalt provides weather protection and holds the surface granules.
- Mineral granules: These shield the asphalt from ultraviolet exposure and provide the roof's visible color and texture.
The inspection photo shows the kind of close examination needed to distinguish surface changes.
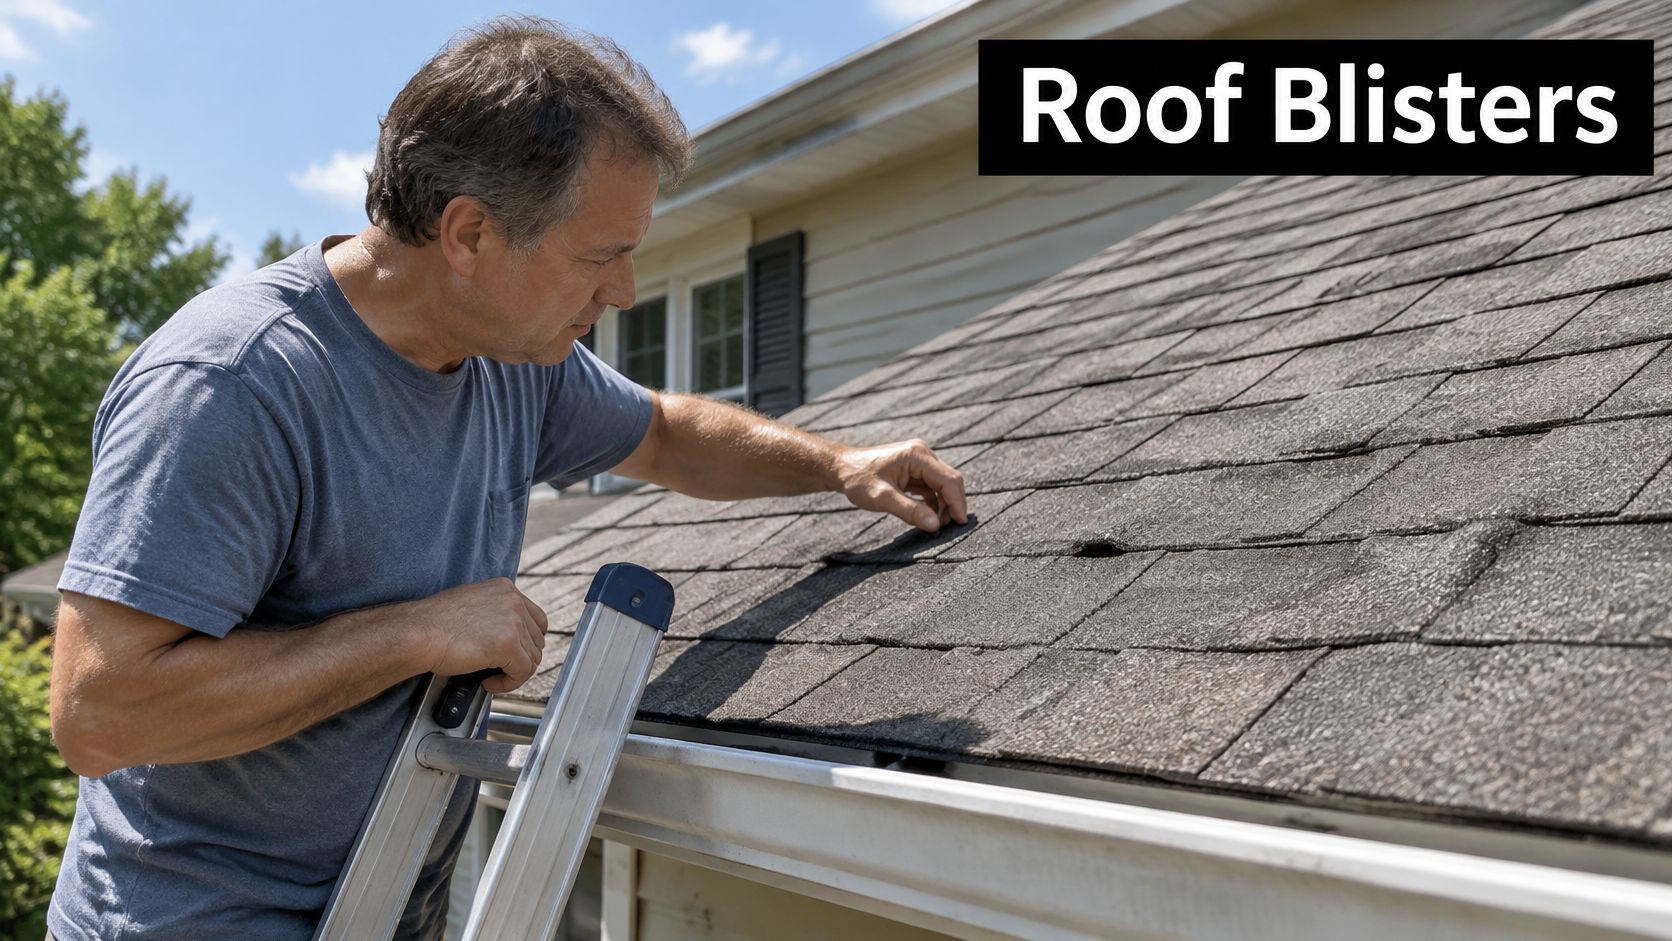
Raised bubbles versus open pits
An intact blister may still have a continuous granule-covered top. Once that top breaks or wears away, the exposed area loses protection. A pit reaching the mat deserves more attention than a stable bump with sound surfacing.
Ordinary granule loss can leave a relatively flat, bare patch without a raised rim. Hail bruising may involve displaced granules, cracking, or damage beneath the surface, rather than a bubble formed from within. Weathering can blur those differences, so appearance alone doesn't establish the cause.
Don't confuse a blister with a broad buckle, either. A long raised line across shingles can reflect movement in the roof assembly rather than pressure inside an individual shingle.
The first useful question is simple: Are the bubbles still intact, or have they opened?
Inspecting Your Roof Step by Step
Inspect the whole roof assembly, not just the bubbles. Building Science Corporation's report on asphalt shingles and roof moisture explains that shingles can absorb dew and rain, then release moisture inward through overlaps and vapor-permeable underlayment toward the decking when heated.
Use this overview to keep moisture and shingle condition in the same inspection.
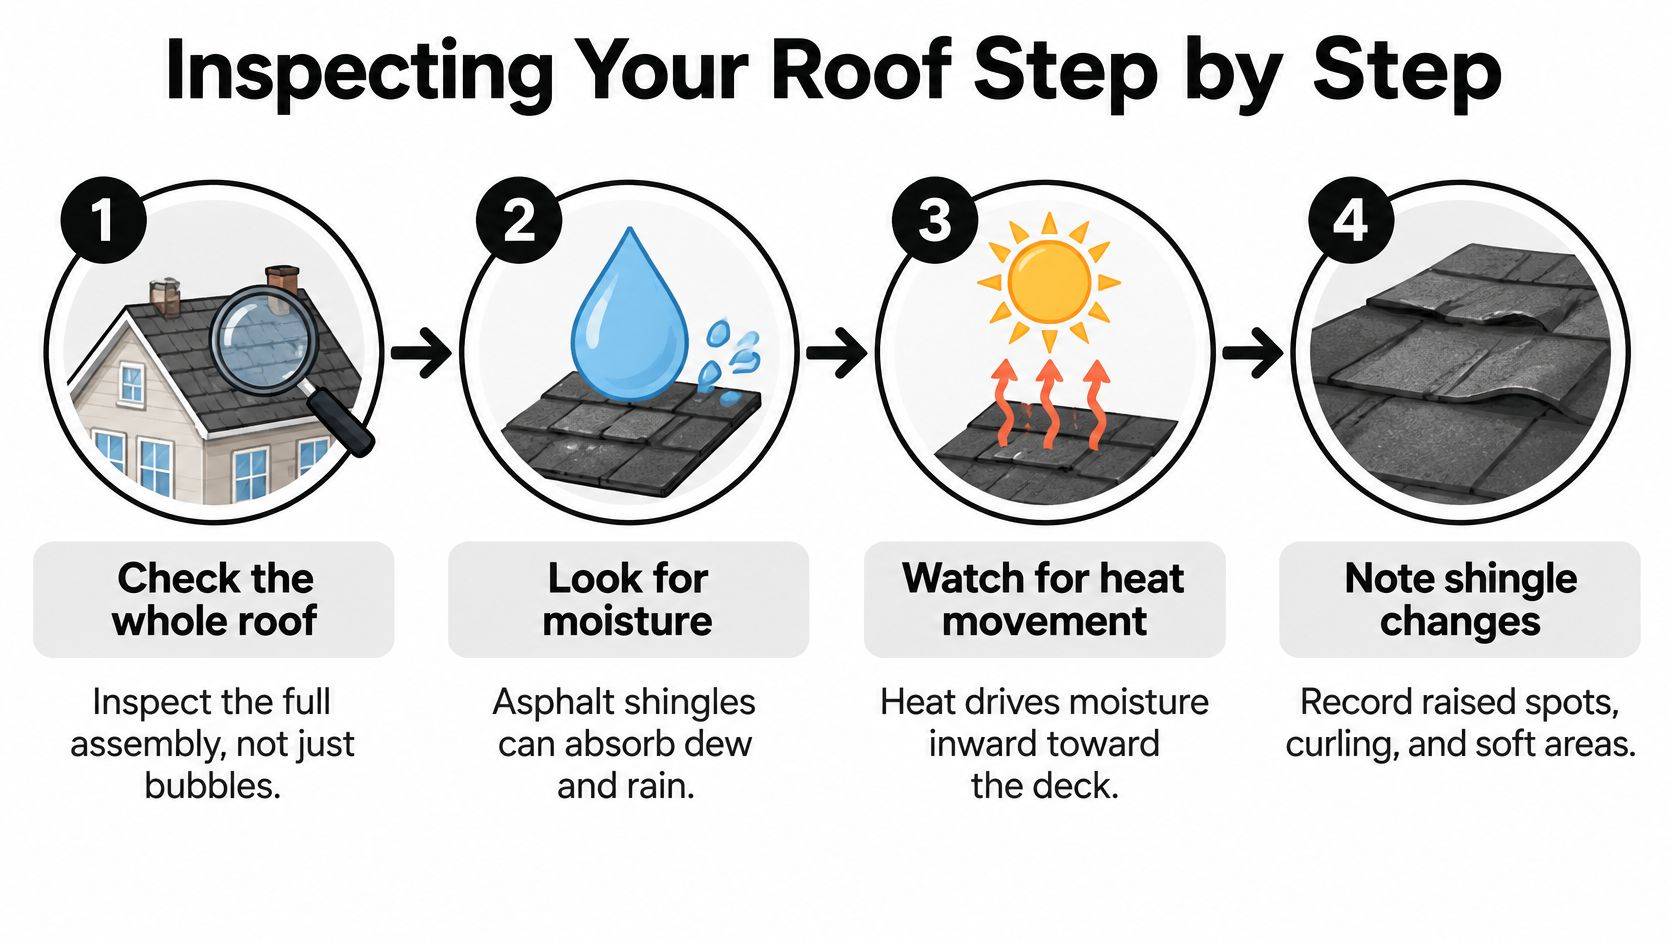
Gather evidence without damaging the roof
Photograph every slope from the ground. Morning light often makes raised surfaces easier to see. Use binoculars and your phone's zoom from several positions, noting whether defects cluster near penetrations, edges, or broad sunny areas.
Record distribution and representative size. Mark affected areas on a simple roof sketch. Ask the roofer to count defects in representative areas and photograph the widest diameter beside a ruler; don't climb onto the roof just to collect measurements.
Check for displaced granules. Inspect accessible downspout outlets and ground-level discharge areas. A contractor can check high gutters safely. Photograph accumulations, but don't assume loose granules alone prove blistering or hail.
Identify open areas. Look for dark pits, visible fibers, missing surface material, and broken blister tops. Ground photographs may reveal where closer examination is needed, but they usually can't establish pit depth.
Inspect accessible attic areas with a flashlight. Stay on a proper walkway or supported framing, never the ceiling drywall. Look for stained sheathing, damp insulation, rusty fasteners, and darkened areas near penetrations. Leave inaccessible or suspect structural areas to a professional.
Check ventilation paths and condensation. Look for insulation packed into soffit openings, blocked baffles, and moisture on the underside of the deck. A bathroom fan should discharge outdoors, not into the attic.
Have flashing and concealed layers evaluated. A roofer should inspect chimney transitions, pipe boots, valleys, and nearby underlayment where exposure is justified. Don't lift sealed shingle tabs yourself; doing so can create damage and complicate warranty evidence.
Collect installation records. Save the roof invoice, product name, warranty paperwork, previous repair descriptions, and dated photographs. These help distinguish a developing product pattern from a local repair problem.
Know the limits of a homeowner inspection
Staining doesn't automatically establish an active leak, and a dry attic during your visit doesn't rule out intermittent water entry. A roofer may need moisture measurements and a closer examination to connect surface damage with conditions below.
Inspection rule: Don't puncture bubbles, scrub away granules, or walk on hot shingles to test their condition.
The video below provides additional inspection context; use it as preparation, not a reason to access an unsafe roof.
Rating Blister Severity at a Glance
Judge severity by whether bubbles are intact or open, whether granules remain attached, whether the mat is exposed, and whether water has reached the attic. Those observations are more useful than the apparent size of a bubble in a photograph.
Blister severity levels and recommended actions
| Severity level | What you see | Shingle condition | Recommended action |
|---|---|---|---|
| Cosmetic | A few intact bubbles on a limited area | Granules intact, no mat exposed, no evidence of leakage | Photograph and recheck during scheduled inspections and after severe weather |
| Moderate | Clusters of intact blisters across slopes | Some gutter granules, but no visible open pits | Arrange an attic and ventilation assessment; establish a condition-based repair plan |
| Advanced | Open pits or broken blisters | Mat or bitumen exposed, with granules missing locally | Repair affected shingles promptly and inspect the decking |
| Critical | Water stains on attic framing or ceilings | Possible active leakage, soft decking, or extensive open pits | Call a roofer now and protect the interior |
| Widespread pattern at any level | Similar-size blisters across many shingles | Repeated pattern potentially associated with product or installation conditions | Obtain a full evaluation, warranty review, and repair-versus-replacement assessment |
Read the table by consequence
The cosmetic category is a monitoring decision, not a guarantee that the shingle will remain unchanged. It fits only when the protective surface remains sound and there's no evidence of moisture trouble.
Moderate blistering deserves investigation because the pattern may be developing even while the roof remains watertight. Granules in a gutter add context, but their presence doesn't identify which shingles shed them or why.
Advanced and critical conditions require different responses. Open pits call for surface repairs and an assessment beneath them; interior water requires leak control and protection of the building, regardless of what caused the visible bubbles.
A widespread pattern needs a separate decision
Uniform defects across a roof can justify a manufacturer review even when there's no immediate leak. They don't prove a defective batch, and they don't automatically justify replacement. Installation records, product identification, and the condition of unaffected shingles matter.
Don't average the roof's condition. A mostly intact roof can still need urgent work at a leaking penetration or a deteriorated deck area.
From the ground, use binoculars to ask: Do the raised areas still have continuous surfacing, or can I see broken tops and bare patches? If you can't tell, record the location rather than guessing.
What Causes Shingle Blistering
Think of a cake with large air holes beneath its crust. Heating expands the trapped gases and pushes against the surface. The analogy explains the pressure, although a shingle's asphalt coating and reinforcing mat behave differently from cake batter.
Manufacturing voids are a real mechanism, not merely a fallback explanation when no leak is found. A foundational ASTM technical study of asphalt-shingle blistering found that voids larger than 220 micrometers, together with their proportion among all voids, were critical factors in blister intensity after prolonged test-deck exposure.
That measurement is a technical indicator from a specific experiment, not a field replacement threshold. You can't inspect a roof with binoculars and use it to declare a product defective.
The diagram illustrates how internal pockets, heat, moisture, and attic conditions can interact.
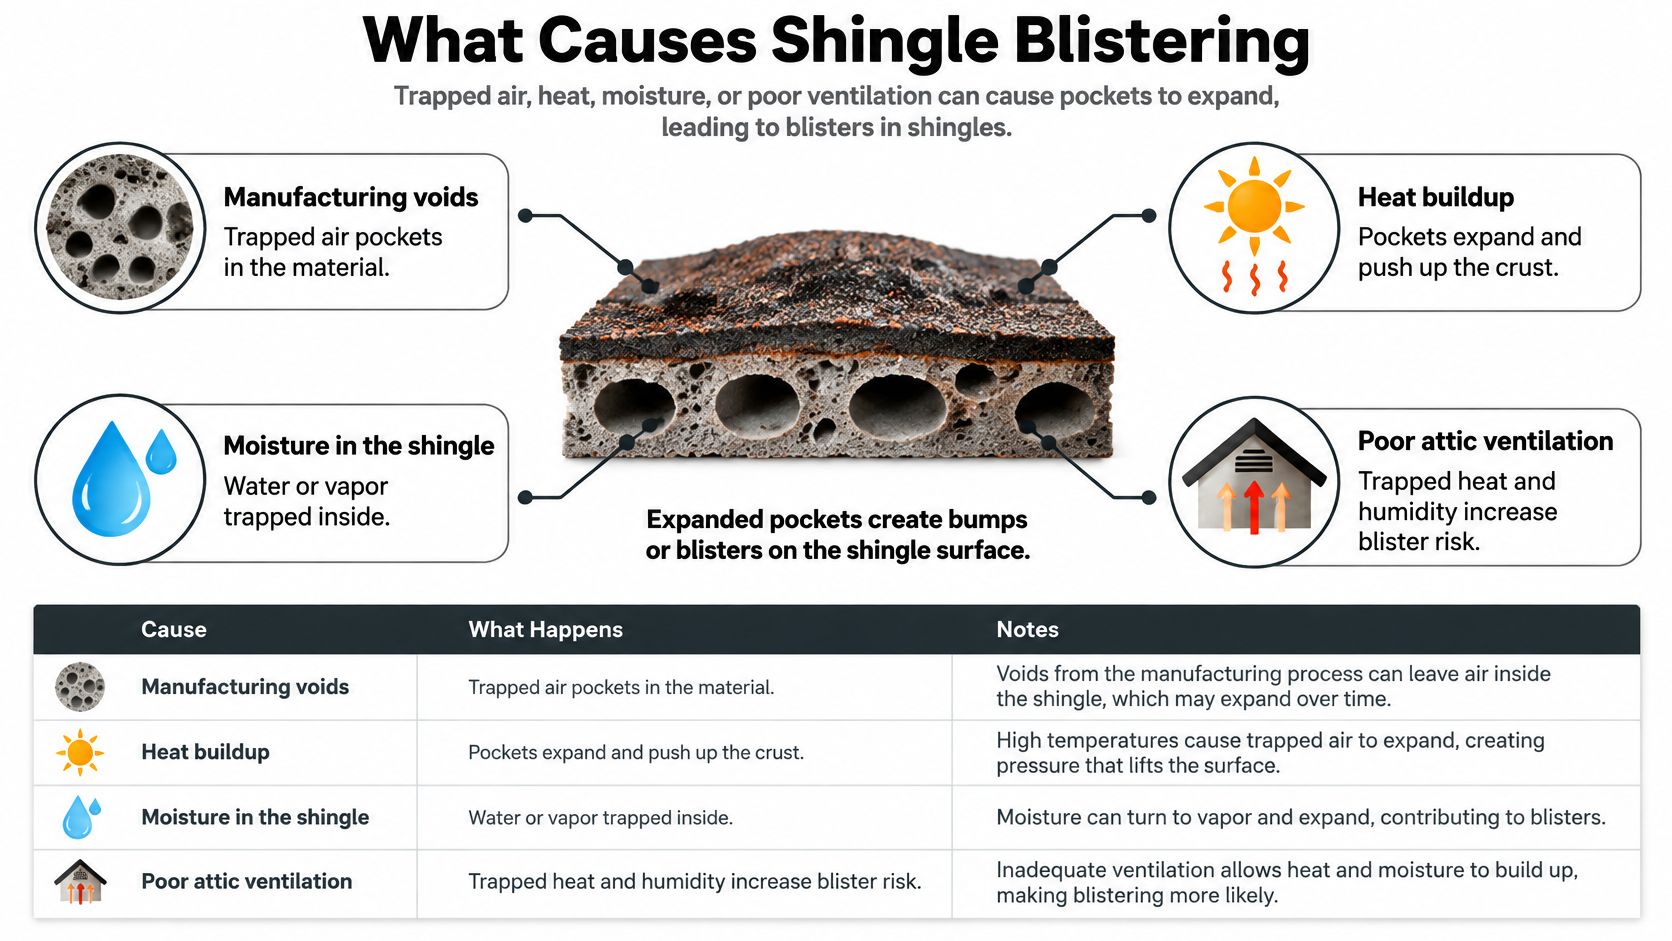
Separate the mechanism from the contributing conditions
The same ASTM study identifies manufacturing approaches intended to reduce large voids: a relatively coarse mineral stabilizer, a holding period after stabilizer addition, and holding asphalt at high temperature after oxidation. These are factory controls, not repairs a homeowner can make.
ASTM's roofing standards catalog also documents material testing and shingle-performance specifications. Blistering belongs in a material-and-assembly investigation, not an automatic verdict against either the installer or the attic ventilation.
Blistering causes and how to recognise them
| Cause | How it shows up | Clue to check | Typical timing |
|---|---|---|---|
| Manufacturing voids | Similar bubbles across many shingles | Product identification, installation records, repeated appearance | May become visible with repeated heating |
| Trapped moisture | Surface changes alongside condensation or damp decking | Moisture readings, staining, sources of indoor humidity | May worsen during wetting and heating cycles |
| Heat and UV exposure | More deterioration on heavily exposed slopes | Orientation, shading, loss of protective granules | Develops with exposure and coating deterioration |
| Ventilation gaps | Shingle changes alongside an overheated or damp attic | Blocked intake, restricted exhaust, interrupted airflow | Continues while the underlying restriction remains |
| Installation issues | Defects associated with overlaps, fasteners, or transitions | Nailing, adhesive use, underlayment, flashing details | May appear after installation or subsequent movement |
Apply the clues to Kansas City roofs
South- and west-facing areas often receive strong solar exposure, but slope orientation alone doesn't establish the cause. Kansas City's humid summer conditions, storms, and winter freezing can produce several overlapping roof problems.
Poor attic ventilation can contribute to heat and moisture stress, but adding exhaust vents won't repair factory voids. Review ridge vents versus box vents in terms of the complete intake-and-exhaust design, rather than choosing a vent solely because the shingles have bubbles.
Repair Options and What They Cost
Correct active moisture sources and ventilation defects before installing permanent replacement shingles, or coordinate that work as part of the same repair. Emergency leak protection comes first; you shouldn't leave water entering the house while waiting for a broader diagnosis.
Easton Roofing's explanation of roof blistering identifies trapped moisture and poor ventilation as recurring contributors. The repair decision still turns on the individual roof: whether it's watertight, whether the surface is deteriorating, and whether the surrounding assembly remains sound.
Compare the scope before comparing the price
There isn't a defensible Kansas City dollar range for these repairs in the cited material. A meaningful estimate needs the affected area, roof access, product identification, and deck condition. Attaching a price to “blister repair” without those details would imply more certainty than the diagnosis allows.
Repair options, cost considerations, and lifespan
| Option | Best when | Expected lifespan |
|---|---|---|
| Monitor and photograph | Intact blisters with sound surfacing and no leakage | A monitoring strategy, not a repair; reassess when conditions change |
| Seal or patch open pits | A contractor identifies a limited defect suitable for compatible temporary treatment | Short-term protection pending permanent work |
| Replace individual shingles | Open pits or broken shingles are isolated and surrounding shingles can be handled safely | Governed by replacement compatibility, adjacent shingle condition, and correction of the cause |
| Add or repair attic ventilation | An assessment confirms inadequate airflow contributing to heat or moisture stress | Requires continued clear airflow; it doesn't restore damaged shingles |
| Deck repair with shingle replacement | Sheathing is deteriorated or unsuitable for fastening | Governed by the repaired assembly and replacement roofing |
| Slope replacement | Damage is concentrated on a roof plane and transitions can be detailed properly | Governed by the selected roofing system and installation |
| Full roof replacement | Broad deterioration makes local repairs impractical | Governed by product, workmanship, exposure, and maintenance |
A temporary patch isn't the same as replacing a damaged shingle. A roofer may use a compatible asphalt roofing cement for a limited emergency repair, but smearing cement over intact bubbles traps the unresolved condition and obscures evidence. Don't cut out blister tops yourself.
What moves the quote
Ask contractors to separate these cost drivers:
- Access and pitch: Steep roofs and taller buildings require more fall protection, staging, and handling.
- Decking damage: Specify how concealed sheathing repairs will be priced and authorized.
- Permits and disposal: Confirm what's included rather than assuming.
- Shingle selection: Compare the exact manufacturer and product line, rather than an architectural-shingle label.
- Repair boundaries: Include flashing, underlayment, ventilation work, and tie-ins where needed.
Basic strip shingles, architectural shingles, and impact-resistant products aren't interchangeable bids. Impact resistance can be useful in a hail-prone location, but it doesn't eliminate blistering risk or make the roof hail-proof.
For isolated damage, a properly scoped shingle roof repair may preserve a serviceable roof. For brittle, broadly deteriorated shingles, removing individual pieces can damage adjacent material and make patching poor value.
Before authorizing removal on a newer roof, ask the installer and manufacturer what documentation they require. Compare written estimates line by line, including exclusions and who handles any warranty submission.
Blistering, Hail Damage and Insurance Claims
Every raised spot noticed after a storm isn't hail damage. A storm may prompt you to look closely at defects that were already developing.
Blisters commonly form clustered raised areas, while hail may leave localized granule displacement, bruising, cracking, or impact marks. Lighting, roof age, weathering, and foot traffic can make those appearances overlap. Evaluate pattern, granule loss, mat or substrate damage, age, and attic conditions together.
A professional inspection should explain the evidence rather than label every blemish storm damage.
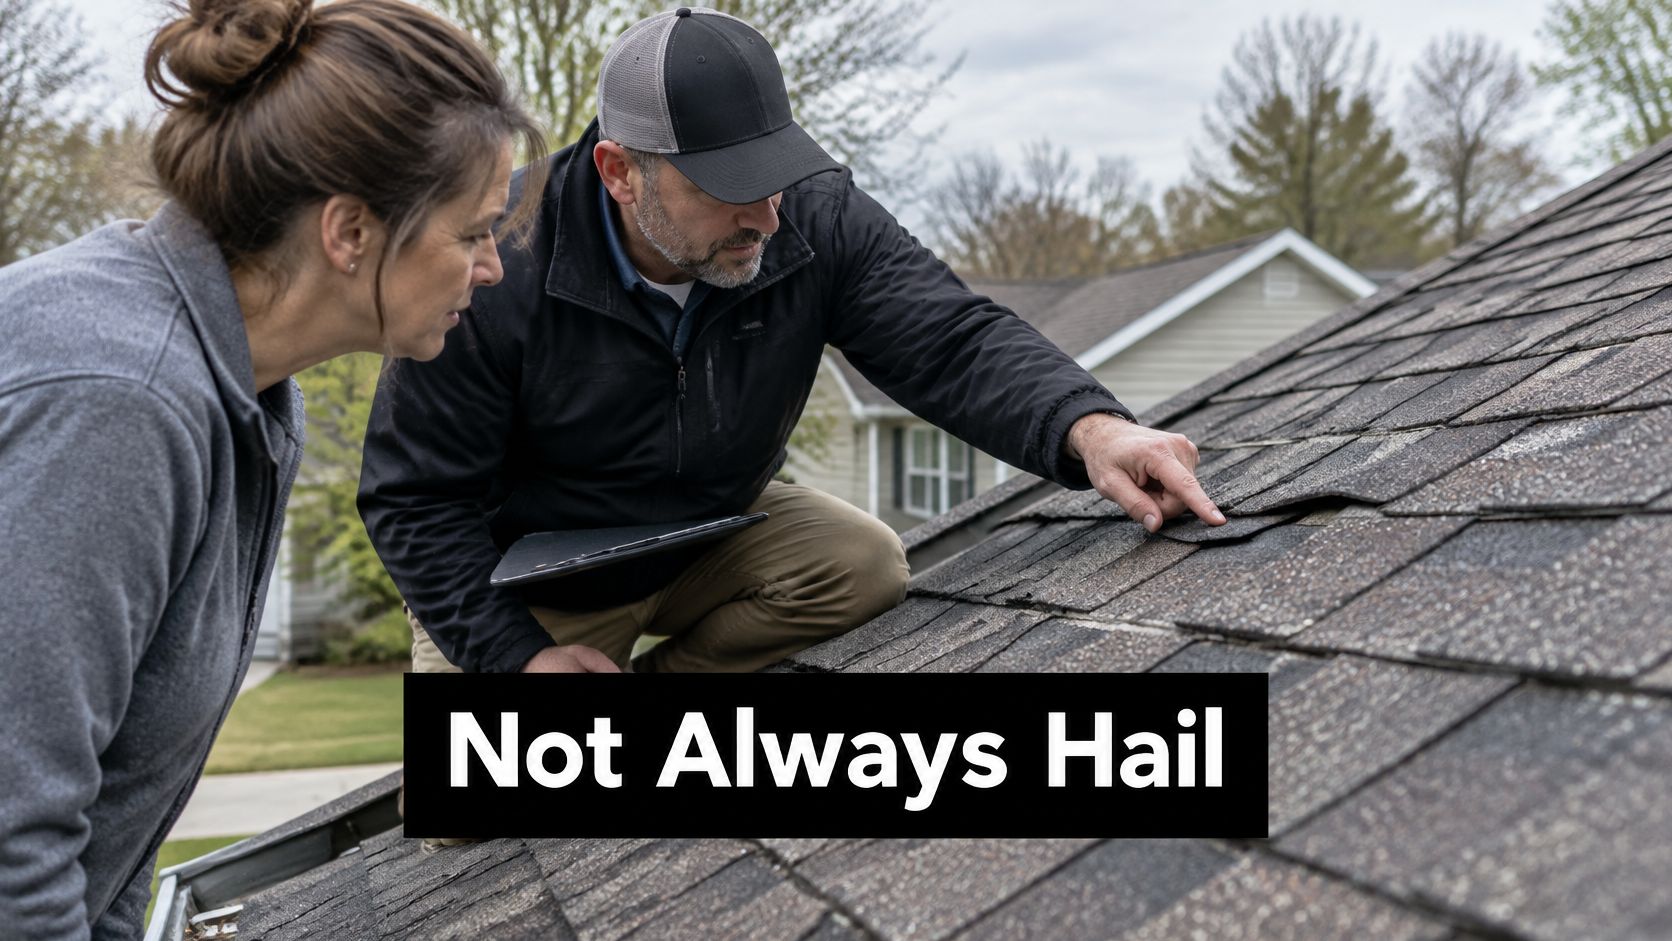
Build a storm record before drawing a conclusion
- Identify what's present. Ask whether the roof has blisters, impact damage, or both. A useful report distinguishes locations and damage types.
- Check the storm history. Save available weather records for the property and surrounding area. A regional hail report supports context, but doesn't prove roof damage at your address.
- Preserve dated photographs. Include wide slope views and close-ups taken safely by the inspector.
- Keep the maintenance history. Prior repairs, attic observations, and earlier photographs can help establish what changed.
- Read the policy promptly. Check notice requirements, deductibles, exclusions, and settlement wording without delaying necessary emergency protection.
Evidence-based impact assessment matters. IBHS reported evaluating 24 impact-resistant shingle products in its 2025 ratings, representing approximately 95% of impact-resistant shingles sold annually. Those product ratings aren't a substitute for examining damage on an installed roof.
Separate roof condition from coverage
A blistering-only claim is different from a documented impact claim. Policies commonly distinguish sudden covered events from wear, deterioration, and material defects, but your policy and insurer's determination control the outcome.
For background on age, cause, and coverage, Copeland Insurance Agency helps homeowners find out when roof replacement qualifies. Pair that policy context with a roof-specific assessment of hail damage to asphalt shingles.
A contractor can document physical damage. The insurer determines coverage under the policy.
An independent inspection is especially useful when the proposed scope jumps from a few raised spots to full replacement without explaining why.
Preventing Blisters in Midwest and Kansas City Weather
You can't correct internal manufacturing voids through maintenance, but you can reduce avoidable stress on the roof assembly. Midwest summers bring heat and humidity; storms wet roof surfaces and test flashing; winter conditions can expose air leaks and ice-dam vulnerabilities.
The most useful prevention work improves moisture control and protects existing surfacing. Buying another roof vent without checking the airflow path is less useful than identifying where air and water move.
Start with the attic and drainage
- Balance intake and exhaust. Have a roofer calculate ventilation for the actual attic configuration and applicable requirements. Keep soffit baffles open and avoid mixing exhaust systems without a deliberate design.
- Control indoor moisture. Confirm that bath fans and clothes dryers terminate outdoors. Have obvious attic air leaks around penetrations evaluated without covering fixtures or interfering with required clearances.
- Track conditions consistently. Use a digital thermo-hygrometer to record attic temperature and relative humidity during hot weather and after wet periods. Compare readings under similar conditions instead of treating an isolated hot reading as proof of failure.
- Keep drainage clear. Remove leaves and debris from gutters and downspout outlets when accessible safely. Have high or difficult sections serviced rather than leaning from a ladder.
Protect the roof you already have
- Manage nearby branches. Arrange trimming where branches rub shingles or repeatedly drop debris into valleys. Use an insured tree professional where limbs overhang the house.
- Avoid aggressive cleaning. Pressure washing can remove protective granules. Discuss algae or staining treatment with the shingle manufacturer before applying cleaners.
- Maintain penetrations properly. Replace deteriorated pipe boots and repair flashing details. A thick bead of exposed caulk isn't a substitute for correctly integrated flashing.
- Choose replacement materials deliberately. Compare impact-rated shingle lines, installation requirements, warranty terms, and compatibility with the roof design.
Ask the contractor to establish a post-repair baseline with photographs and written findings. Recheck after a full summer of exposure and after severe weather, with earlier attention if new pits, stains, or concentrated granule loss appear.
Preventive work won't flatten existing blisters. Its purpose is to reduce contributing conditions and make changes easier to recognize.
Decide When to Call a Kansas City Roofer
Call promptly for active leakage, open pits exposing the mat, suspected soft decking, or a widespread repeating pattern. Monitoring is reasonable only when the protective surface is intact, the attic is dry, and there's no evidence of continuing deterioration.
For clustered bubbles with granule loss, arrange an inspection rather than assigning yourself an arbitrary repair deadline. The written findings should explain urgency, what can remain in service, and what would trigger a larger scope.
Turn observations into a written plan
- Save dated slope photographs. Keep originals and identify the roof area in each file.
- Record attic conditions safely. Note stains, dampness, condensation, and recent weather without entering unsupported areas.
- Request written findings. Ask the inspector to distinguish confirmed damage, suspected causes, and concealed conditions that remain unknown.
- Compare equivalent scopes. Match materials, flashing work, deck allowances, cleanup, and warranty responsibilities.
- Protect claim deadlines. If storm damage is suspected, review notice requirements promptly and preserve evidence before permanent removal.
Ground photographs and accessible attic observations are useful homeowner tasks. Roof walking, probing weakened decking, and disturbing sealed shingles belong with someone equipped to do them safely.
Confirm how urgent calls are handled
Ask who receives an after-hours leak report, what information they need, and whether temporary protection is available. Mercateer's explanation of an answering service for roofers offers context for how contractors can capture urgent calls, but answering the phone isn't the same as dispatching a crew.
Among local options, Two States Exteriors LLC serves the Kansas City Metro area in Kansas and Missouri, providing roof repair and replacement, free on-site inspections, and insurance-claim support. Ask for a documented diagnosis and a scope that addresses both the damaged shingles and any contributing assembly problems.
For blistered shingles, Two States Exteriors LLC offers an on-site inspection to help determine whether monitoring, targeted repair, or replacement makes sense. Visit Two States Exteriors LLC to request an assessment and discuss the roof condition, repair scope, and any storm-related documentation you need.