
Your crew just stripped the shingles, the deck is open, and rain is moving in tonight. What protects the house between tear-off and the new roof covering isn't a tarp tossed over the ridge. It's a dry in roof done in the right order, with laps that send water downhill.
What Dry In a Roof Means and Why It Matters
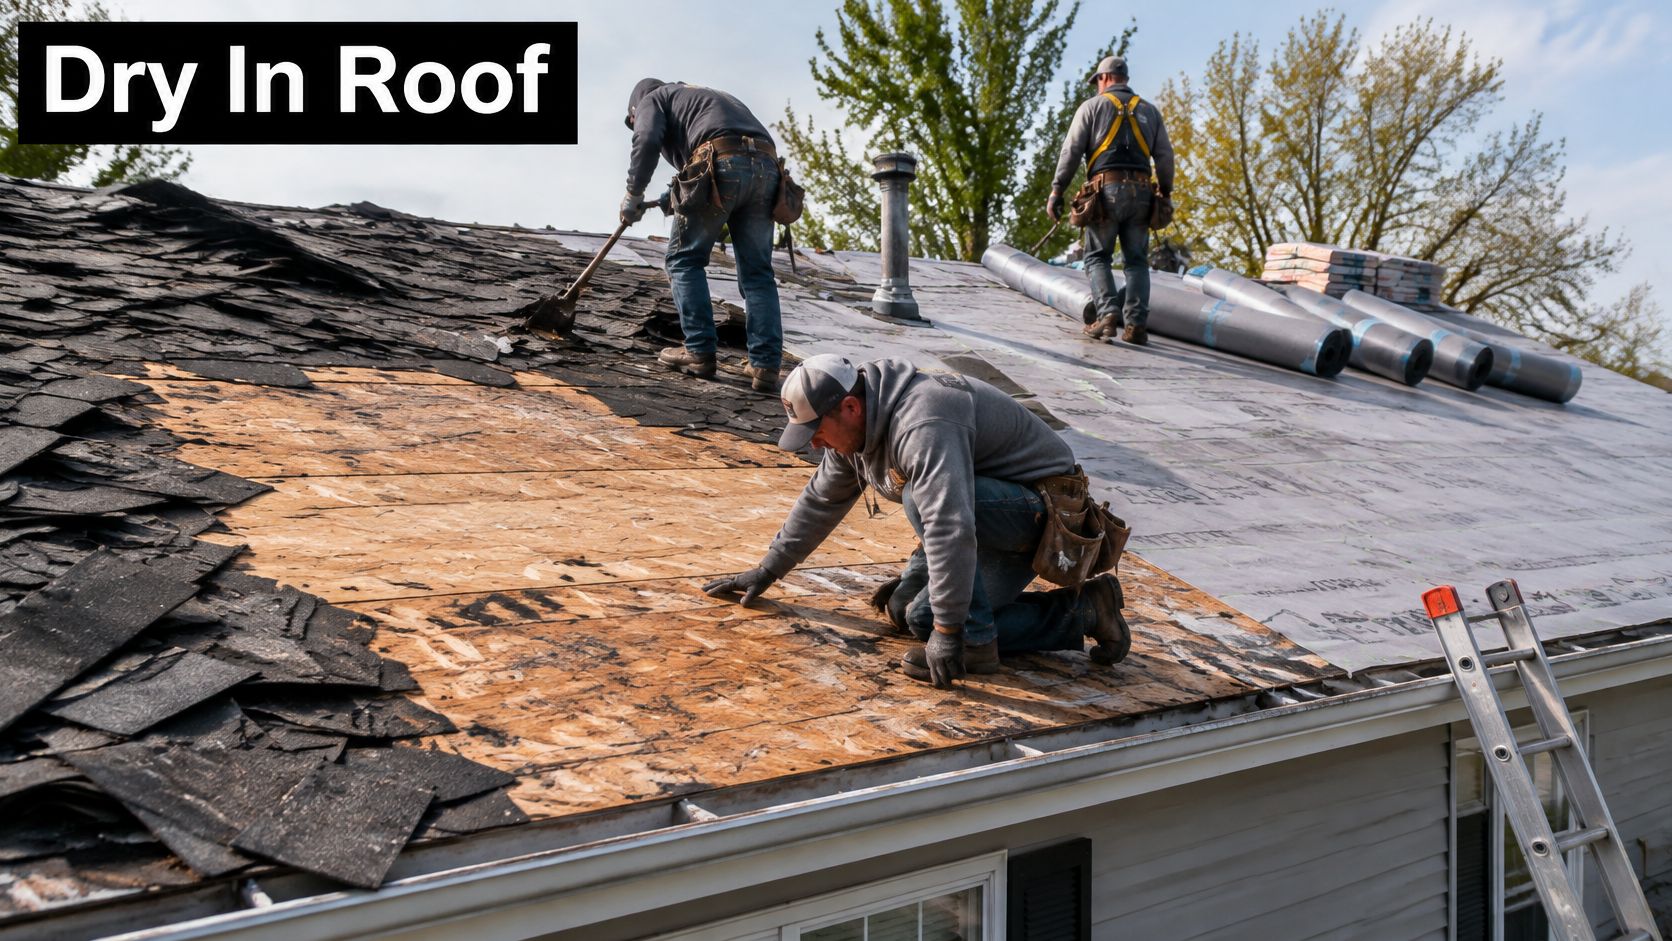
Say a crew tears off a storm-damaged roof on a Friday and rain is forecast for Saturday. The house stays dry only if the underlayment, tape, and flashing work together overnight. To dry in a roof means creating a temporary weather-resistant enclosure with underlayment and membrane before the final covering goes on.
That word temporary matters. A dry-in isn't watertight in the way a finished roof is, and it isn't meant to sit exposed for the rest of the season. Sunlight breaks down exposed underlayment, wind lifts loose laps, and foot traffic and dropped tools puncture it. After hail or storm damage, that exposed layer may have to carry the house for days or weeks, which is exactly when small defects turn into leaks.
Moisture damage also hides. A National Center for Biotechnology Information building-science review reports that an estimated 75 to 80% of building-envelope problems are caused, at least partly, by moisture, and in a study of 291 Finnish houses, approximately one-third of moisture problems were concealed within assemblies and required invasive investigation. You can't count on a ceiling stain to tell you the whole story.
What a Complete Dry-In Looks Like
A complete dry-in has four visible parts. The deck is repaired first, underlayment runs from low to high, flashings are integrated into that layer, and penetrations are sealed with gravity laps, not just surface caulk. If any one part is missing, you've got a covered roof, not a dry one.
A dry-in buys you weather protection for a limited window. It doesn't buy you permission to stop paying attention.
Climate sets how unforgiving that window is, and a look at seasonal roof challenges in New Hampshire shows how rain, snow, and freeze-thaw cycles each stress temporary protection in different ways. Before shingles cover anything, ask your contractor to walk you through the sequence and show you dated photos of the deck, laps, and flashings. If they can't show the work, you can't verify it once it's buried.
Choosing Underlayment and Ice and Water Shield by Roof Slope
Slope changes the answer before brand names do. The Asphalt Roofing Manufacturers Association steep-slope underlayment guide notes that current code guidance requires two layers of mechanically fastened underlayment, or an approved self-adhering system, for many roof slopes between 2:12 and 4:12, while steeper roofs use different laps and patterns. That's why one section of your roof may get a single layer and a low-slope addition gets two.
Don't assume one regional standard covers every address. Municipal guides set different rules for slopes above 4:12 versus 2:12 to 4:12, so in mixed Kansas and Missouri jurisdictions, I'd confirm the controlling requirement with the permitting office before material shows up. Four Seasons Roofing's underlayment guide is a useful primer on product types, and our own breakdown of what roof underlayment does under the covering covers how it functions in the assembly.
Dry-In Underlayment Options and Where Each Fits
| Option | Where it fits | Key spec | Watch for |
|---|---|---|---|
| One layer of 30-pound felt | Conventional asphalt shingle roofs | 2-inch minimum overlap, 6-inch end lap | Reverse laps and short end laps |
| Two layers of 15-pound felt | Conventional asphalt shingle roofs, slopes 2:12 to 4:12 | Two full layers, mechanically fastened | Both layers must lap and fasten per code |
| Self-adhered modified-bitumen tape (ice and water shield) | Deck joints, eaves, rakes, valleys, penetrations | At least 4 inches at deck joints; 4 to 6 inches in high wind | Wrinkles and fishmouths at install |
| Fully adhered membrane over the whole deck | High-wind and heavy-rain exposure | Whole-deck coverage gives redundancy | Trapping moisture under a wet deck |
| Synthetic underlayment | Set by the manufacturer for each product | Follow published substrate, temperature, fastening and exposure limits | Treating all products as interchangeable |
A few practical rules follow from that comparison:
- Start with the vulnerable zones: Put self-adhered membrane at eaves, rakes, and valleys first, because that's where water concentrates and wind drives it uphill.
- Match thickness to traffic: Choose a thicker, reinforced membrane where crews will walk, stage bundles, and drag hoses across it.
- Check the deck condition: Don't assume two products with similar names bond the same way to a dusty, cold, or damp substrate.
More adhesive isn't automatically better. The membrane, fasteners, laps, flashing, and final covering have to work as one code-compliant assembly, and a premium membrane over bad laps still leaks. Pick the system for your slope and exposure, then install it exactly to its published limits.
How to Dry In a Roof Step by Step
The sequence below follows the drainage plane. Each step assumes the one before it is finished, because you can't lap correctly over a deck that hasn't been repaired yet.
The four opening moves set up everything that follows:
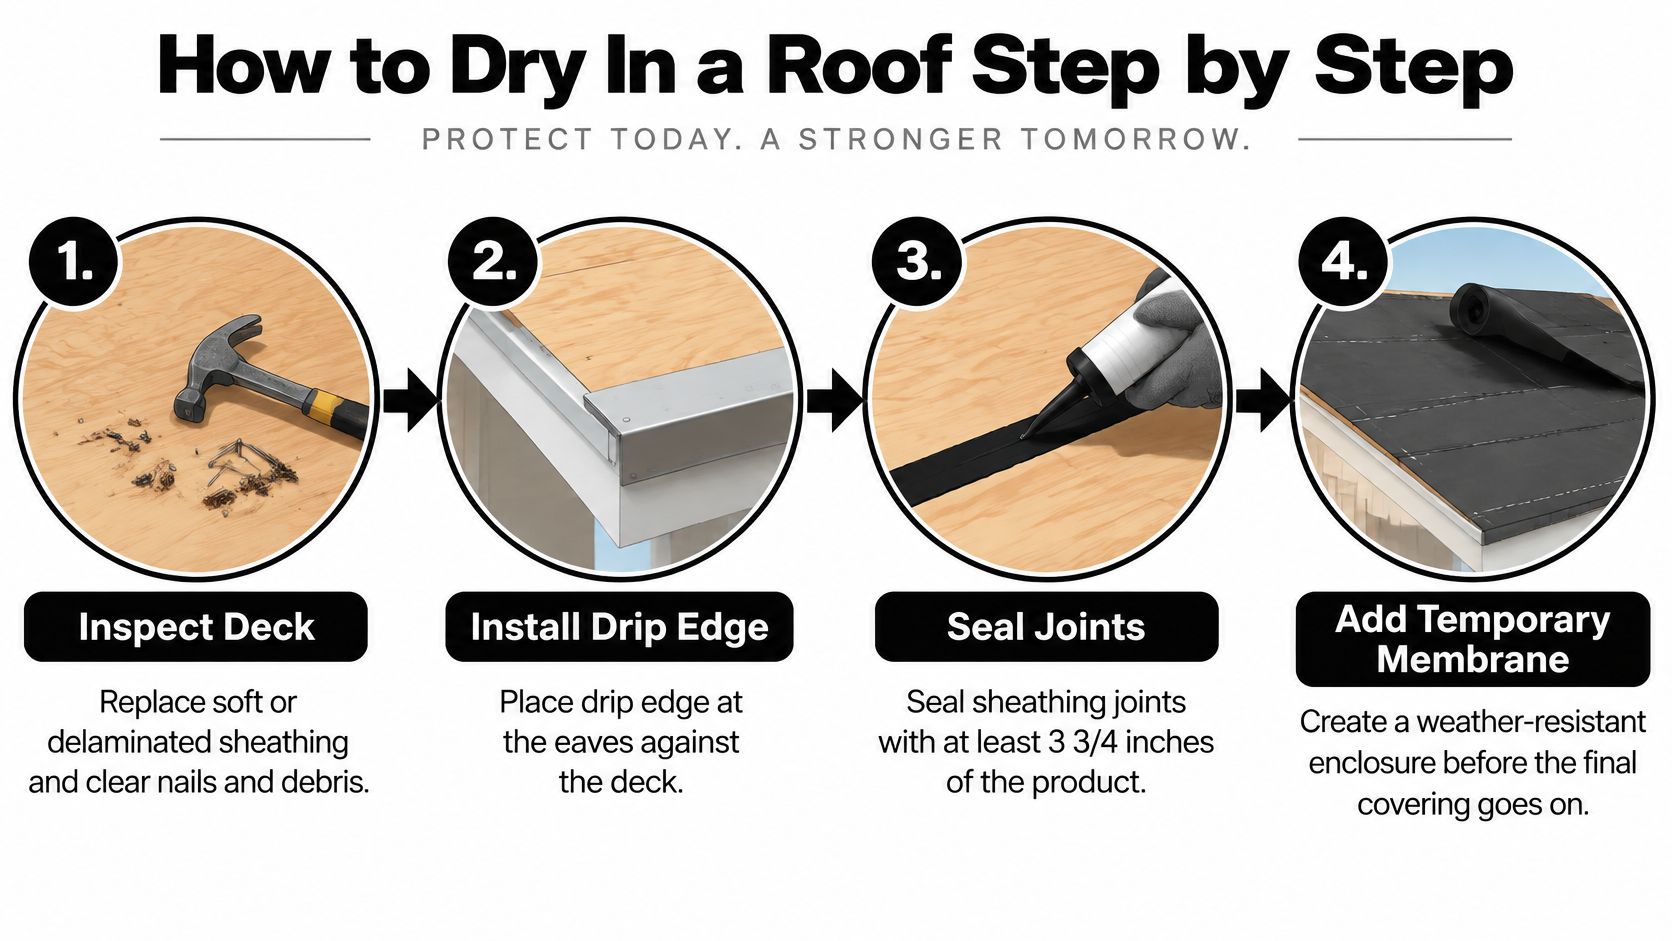
- Inspect and repair the deck. Walk every sheet, replace soft or delaminated sheathing, and clear old nails and debris so nothing telegraphs through the membrane. Covering a bad deck doesn't fix it, it just hides it until the new roof sags or fasteners miss solid wood.
- Install drip edge at the eaves against the deck. The metal goes down before underlayment at the eave so water sheds into the gutter instead of curling back onto fascia. Our guide on installing drip edge flashing covers placement and fastening in detail.
- Seal the sheathing joints. The U.S. Department of Energy roof repair guidance specifies sealing sheathing joints with at least 4-inch self-adhered modified-bitumen tape, which keeps wind-driven rain out of the seams if the outer layer is breached. Skipping this step leaves a straight path into the attic at every panel edge.
- Run underlayment shingle-fashion from the low point upward. Use one layer of 30-pound felt with a 2-inch minimum overlap or two layers of 15-pound felt, per that same DOE guidance. The common slip is a reverse lap, where the lower course sits on top and funnels water underneath instead of over.
Laps, Penetrations and the Photo Hold Point
- Keep end laps at least 6 inches. That minimum applies unless a full ice-and-water-type membrane covers the deck. Short end laps are where wind-driven rain works sideways into the assembly, especially on long courses.
- Integrate valleys, rakes, penetrations and flashings. Every upper layer laps over the layer below it. At a pipe penetration, run the downslope piece at least 6 inches over the underlayment, then overlap its top edge with the upslope piece, so gravity does the sealing instead of caulk alone.
- Photograph everything before it's covered. Shoot deck repairs, laps, flashing integration, and sealed penetrations while they're still visible. Those photos are your quality-control record once shingles bury the evidence.
For a visual walkthrough of underlayment going down over a repaired deck, this video shows the pace and sequencing of the work:
Product choice still matters within this sequence, and choosing underlayment for hail-prone homes is worth reading if your roof takes regular storm hits. In high-wind or hail-prone work, select the water-control layer from the manufacturer's published substrate, temperature, fastening, and exposure limits rather than treating products as interchangeable.
The single test: From eave to ridge, water should run downslope across every layer without meeting a seam that points the wrong way.
Common Dry-In Mistakes and How to Fix Them
Wind-driven rain rarely enters through the middle of the field. It concentrates at edges, penetrations and transitions, where flow converges and wind pressure peaks. Sealing the field while leaving those spots mechanically weak is the most common dry-in error, and covering a wet or contaminated deck runs a close second because it traps construction moisture under the membrane. Along eaves and rakes in wind-prone areas, a self-adhered membrane resists driven water better than a fastened sheet because it leaves no fastener holes, and self-adhered strips over sheathing joints seal the gaps a fastened sheet bridges but never closes.
Dry-In Leak Symptoms, Causes and Fixes
| Symptom | Likely cause | Fix |
|---|---|---|
| Water at a pipe collar after rain | Upslope piece laid over the downslope piece, or caulk used alone | Re-lap downslope piece over the underlayment, then add metal flashing |
| Leak along a valley | Membrane not continuous through the valley | Run one continuous membrane and integrate flashing through the valley |
| Wet sheathing after a storm | Covered a wet or contaminated deck | Dry the deck, remove contamination, then cover |
| Lifting or wrinkled membrane | Fishmouths and wrinkles during install | Cut, seal and roll seams flat |
| Water at a roof-to-wall transition | Flashing not integrated under siding or wall cladding | Integrate flashing into the wall line and check it after rain |
| Stains at deck joints | Unsealed sheathing joints | Cover joints with 4- to 6-inch self-adhered tape |
Membrane spec matters here, too. Thickness and reinforcement are real specification choices, not branding: a heavier, reinforced sheet tolerates foot traffic and resists punctures, while a thin membrane on a busy deck gets scuffed and torn before the shingles ever arrive. If the schedule calls for days of open exposure or repeated trips across the deck, choose the membrane for durability, not convenience.
After the first wind-driven rain, go into the attic or check the ceiling near each penetration and valley. A small stain there is the earliest, cheapest warning that a lap has failed. Catching it while the deck is still open turns a tear-out into a patch.
Pre-Covering Checks and Go or No-Go Decision
A dry-in that looks intact from the street can still be hiding wet sheathing underneath. That's why the decision to install the final covering shouldn't rest on appearance. Run these five checks in order, and treat any failure as a stop, not a note for later.
The first two checks, moisture and exposure, decide whether you're even in the window to cover:
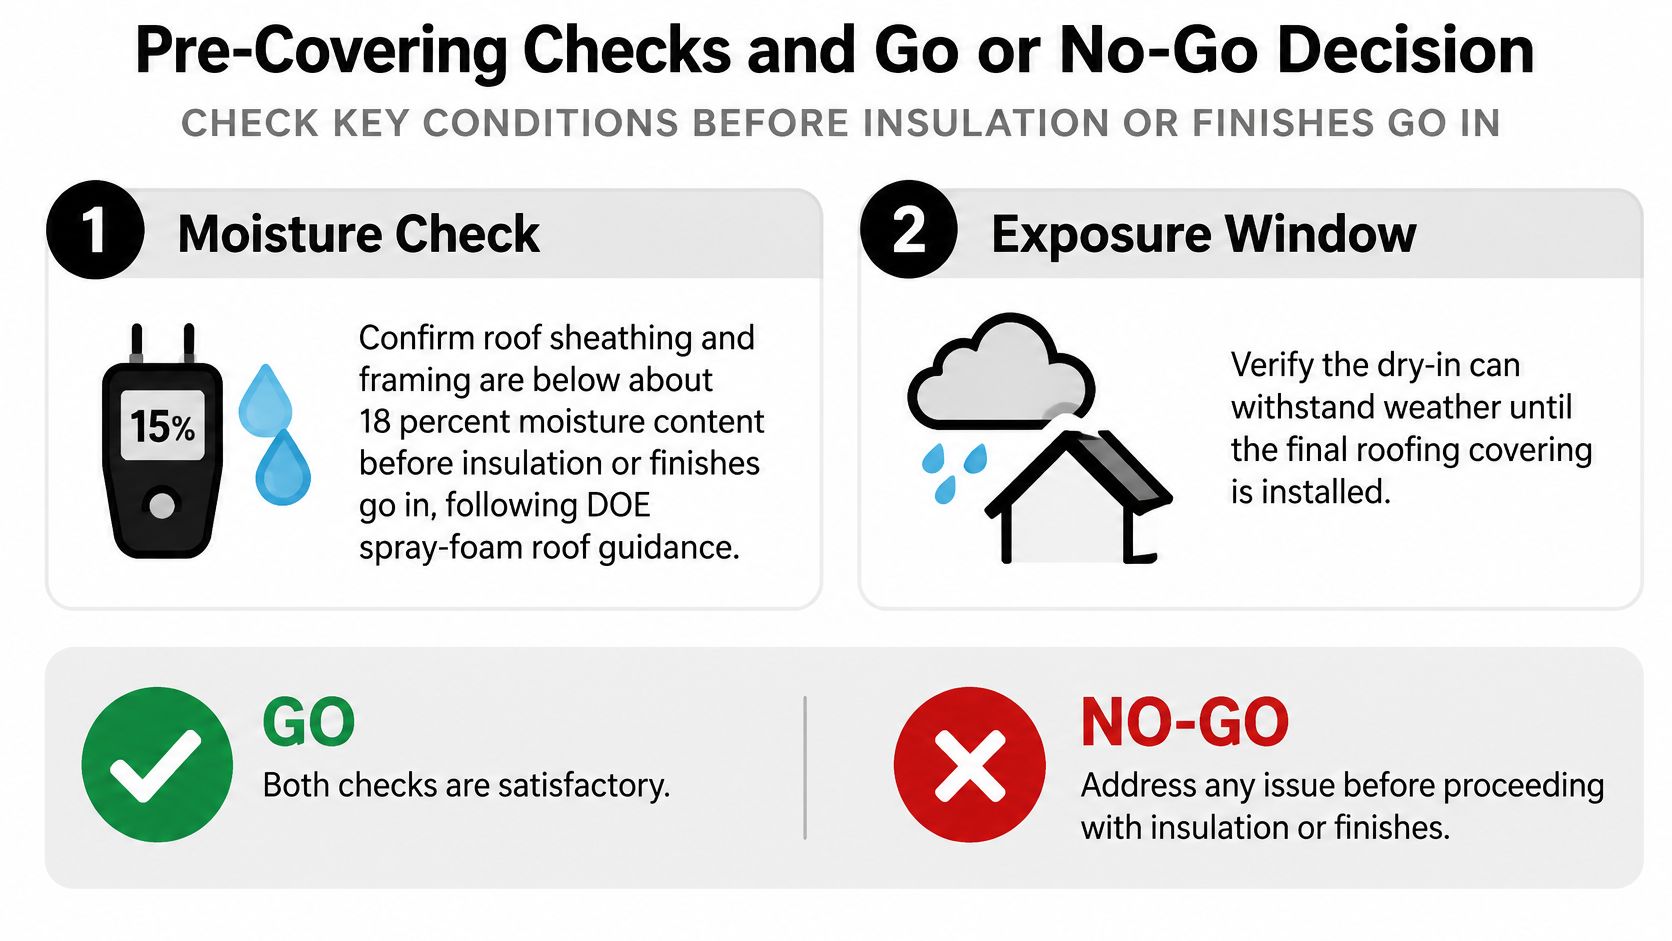
- Moisture check. The NRCA roofing guidelines document reflects U.S. Department of Energy guidance for spray-foam roof assemblies recommending keeping roof sheathing and framing below 18% moisture content before insulation installation. I'd use that figure as your go or no-go line with a pin meter at suspect sheets, valleys, and low eaves, because covering wet wood traps construction moisture under insulation and finishes.
- Exposure window. Write the membrane install date on the deck or in the project file and compare it against the manufacturer's published exposure limit. Ultraviolet radiation, wind, foot traffic, and punctures all shorten that window, so a membrane that's been walked on for two weeks isn't the same as one covered in two days.
- Storm check. After any heavy rain or hail, inspect for punctures, lifted laps, and wet staining at the deck, then check the interior ceiling near each penetration and valley. Underlayment's job is to block wind-driven rain and snow that pass through joints in the primary covering and to protect the building until that covering is installed, so storm damage to the temporary layer has to be repaired before it's buried.
- Detail check. Verify that valleys, eaves, rakes, pipe penetrations, skylights, and wall intersections are lapped downslope and sealed. These are the same locations that carry concentrated flow, so a quick hand check of each seam beats a visual pass from a ladder.
- Photo record. Keep dated photos of deck repairs, laps, flashing, and sealed penetrations taken before cladding covers them, filed with the project paperwork. If a leak shows up later, those photos narrow the search fast.
Pre-Covering Checks and Pass Criteria
| Check | Pass criterion | Action if it fails |
|---|---|---|
| Deck and framing moisture | Below about 18 percent before insulation or finishes | Dry the assembly and recheck before covering |
| Membrane exposure window | Within the manufacturer's published limit from install date | Schedule final covering now |
| After heavy rain or hail | No punctures, lifted laps or wet staining | Repair and re-inspect the same day |
| Valleys, eaves, rakes, penetrations, skylights, wall intersections | Lapped downslope and sealed | Re-lap or flash before cladding |
| Photo record | Repairs, laps, flashing and penetrations photographed before cover | Keep with the project file |
Holding the Roof When the Schedule Slips
Delays happen, especially when emergency stabilization and full replacement run on different schedules after a storm. If the final covering is pushed back, secure the membrane against wind uplift at edges and laps, keep foot traffic off exposed underlayment, and plan a fresh inspection before the next forecast storm. Our roof replacement timeline guidance explains how these stages sequence so you can judge whether a delay is routine or a risk. We also perform annual or semiannual roof inspections, which is a sensible cadence for catching the same edge and penetration failures on a finished roof.
A visually intact dry-in layer doesn't prove the assembly underneath is dry. Only a moisture reading does.
The rule is simple. The dry-in is ready for final covering only when all five checks pass. If any item fails, or water has reached the interior, stop, stabilize the leak, and bring in a licensed local roofer for emergency repair before anything else goes on the roof.
We offer emergency roofing services and operate 24/7 to handle roofing repairs or installations promptly, so a failed check at the end of a workday doesn't have to wait until morning. Walk the roof yourself, or have your contractor walk it against this list with you, and file the photos with the project before the first shingle lands.
If your roof is sitting in dry-in after storm damage, or you're planning a tear-off and want the temporary protection verified before the final covering goes on, Two States Exteriors LLC can inspect the deck, laps, and flashings and handle emergency stabilization or full replacement across the Kansas City metro. Visit the site to request an inspection and get a clear go or no-go on covering your roof.