
You hear dripping before you see the stain. Rain is still hitting the windows, a ceiling corner looks darker than it did earlier, and you're trying to decide whether to grab a bucket, call a roofer, or find a ladder.
Emergency leaking roof repair starts with safety and documentation, not a tarp. Protect people from electricity and falling ceiling material, record what you can safely see, and contain the water. Roof access and temporary waterproofing come after those decisions, not before them.
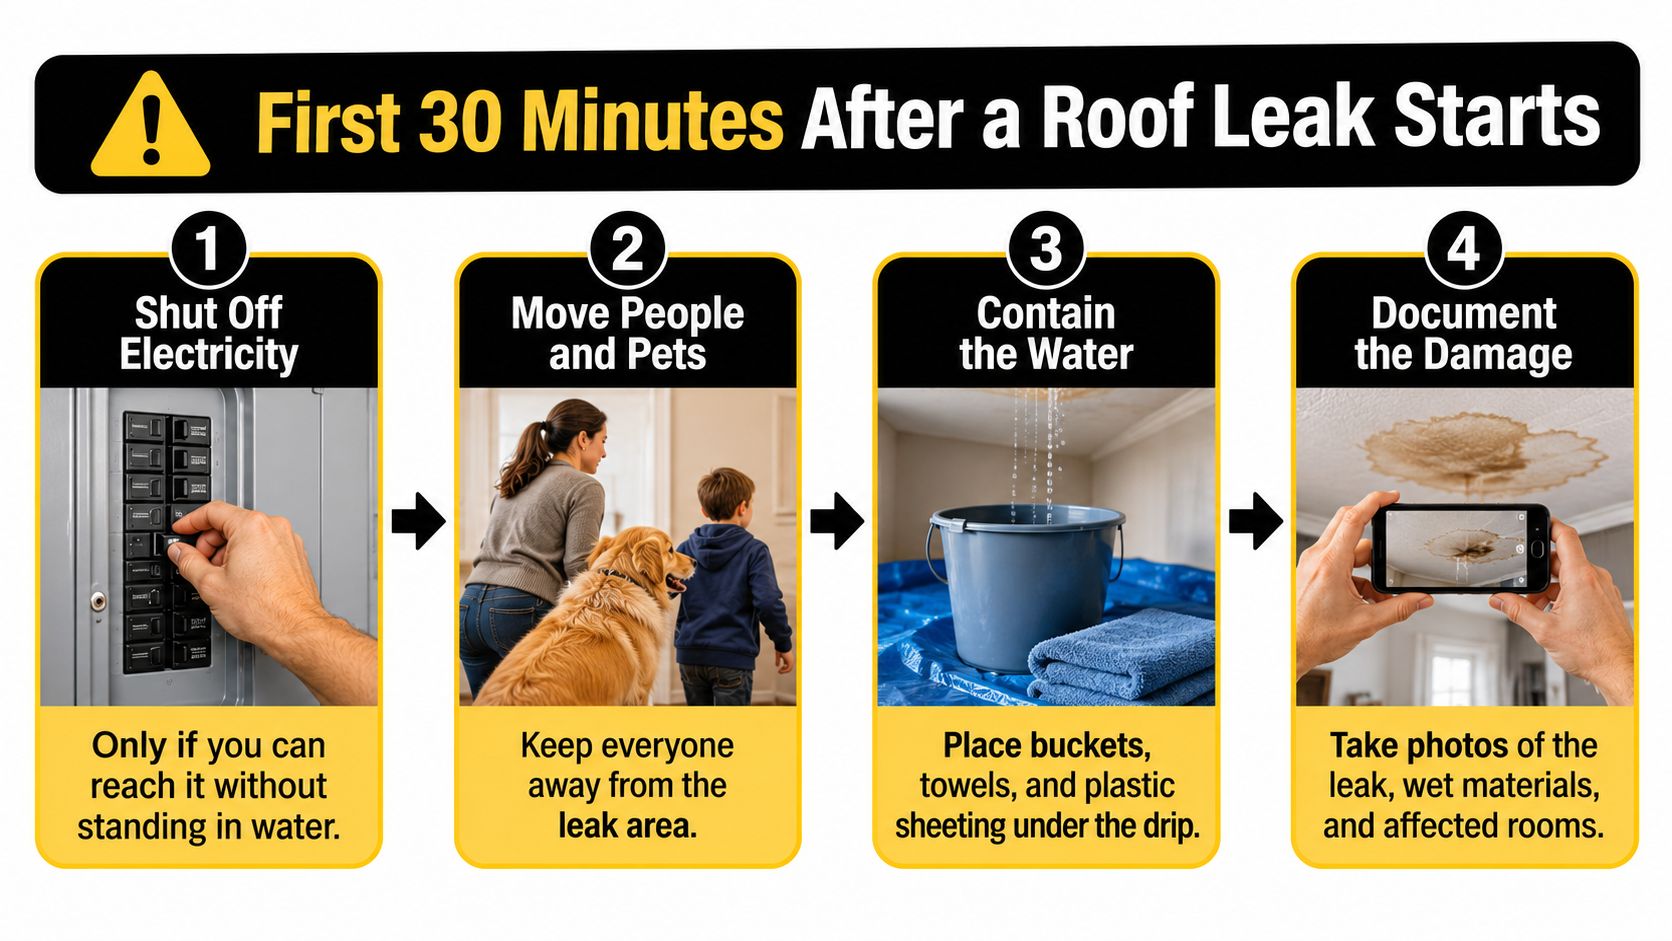
First 30 Minutes After a Roof Leak Starts
Work in this order. People and power come first, evidence comes next, and damage control follows wherever it's safe. Don't delay evacuation or electrical isolation to take pictures.
Isolate electrical hazards. Shut off circuits serving wet lights, outlets, or affected rooms, but use the breaker panel only if you can reach it along a dry route without touching wet equipment. If the panel or approach is wet, stay away and contact an electrician or emergency services if there's immediate danger.
Move people and pets out. Clear any room beneath a bulging, sagging, or cracking ceiling because wet ceiling material can fall without warning. Don't stand underneath to investigate or puncture the bulge yourself.
Contain water without entering the danger area. Where the ceiling is stable and electricity is isolated, place a bucket or plastic bin under the drip, with a towel inside to reduce splashing. Move rugs, electronics, and furniture from the water path, taking quick photographs first when that won't delay protection.
Record the damage before cleanup. Photograph the room, then the stain, active drips, wet walls, and damaged belongings from a safe position. Save the original files rather than relying on screenshots or edited images.
Inspect without climbing. From safe indoor locations and the ground, look for missing shingles, displaced flashing, dented gutters, and roofing debris on the lawn. These are clues for the roofer, not proof that you've located the entry point.
Arrange safe temporary protection. Tell the emergency roofer about access, roof shape, ongoing weather, and any suspected soft decking. Don't climb onto a wet roof to decide whether it needs a tarp.
The OSHA roof-repair factsheet requires employers to assess structural integrity and specifies fall protection for steep roofs greater than 4:12 and qualifying low-slope roof edges 6 feet or more above a lower level. A homeowner with a ladder hasn't established those protections.
Keep the Immediate Priorities Visible
Use this sequence while someone else places the emergency call, if another adult is available.
For background on how local conditions affect diagnosis, Ventura County Roof Cleaners' guide to understanding local roof leak issues offers a regional perspective. Use it as context, not as a substitute for assessing your Kansas City property.
Your immediate checklist: power safe, people clear, water contained where accessible, photos saved, and an emergency call placed. Don't wipe away stains or start cosmetic repairs before documenting them.
Stay Off the Roof and Know When to Call a Pro
| Situation | Safe to do yourself | Call a pro now |
|---|---|---|
| Slow drip, ceiling unchanged | Place a bucket, move items, photograph | Call the same day if it continues |
| Ceiling bulging or sagging | Clear the room and keep people out | Call immediately; ceiling material or compromised framing may fail |
| Water near lights or outlets | Shut off the circuit from a safely accessible, dry panel | Coordinate an electrician and roofer |
| Storm damage on a roof steeper than 4:12 | Ground-level photos only | Roofer with fall protection |
| Low-slope roof with an edge 6 feet or higher | Nothing on the roof | Roofer with fall protection |
| Water spreading into a wall cavity | Isolate affected circuits safely; lay towels outside the hazardous area | Roofer and water-remediation professional as soon as possible |
Those steep-roof and high-edge categories require professional fall-protection planning. Guardrails, nets, or personal fall-arrest equipment aren't interchangeable with having someone hold a ladder, and a shallow pitch doesn't establish structural safety.
A sagging ceiling is a warning, not an ordinary drip. You can't determine from below whether only drywall is affected or whether supporting components are compromised.
Storm damage also isn't always visible from the yard. NOAA's national disaster summary records 203 U.S. billion-dollar severe-storm disasters from 1980 through 2024, including damaging wind and hail events. An apparently intact roof still needs assessment when water appears after a storm.
For examples of the broader exterior-restoration work a storm may require, review storm damage repairs by SuperiorPRO, rather than assuming every problem ends at the shingles.
Practical rule: If reaching the suspected opening means taking a ladder onto a wet or storm-damaged surface, stop and call.
Trace the Ceiling Stain Back to the Leak Source
The stain marks where water appeared, not necessarily where it entered. Use these symptoms as starting points, not confirmed diagnoses.
| Symptom | Likely source | Where to check |
|---|---|---|
| Stain directly below a vent or pipe | Pipe boot or vent flashing | Attic around the penetration |
| Wet streak along a rafter | Underlayment defect or nail pops upslope | Trace wet wood up the roof slope |
| Leak beside a chimney or wall | Step or counter flashing | Flashing joints and mortar lines |
| Drip where two roof planes meet | Valley metal or open seam | Valley and gutter overflow points |
| Leak only in wind-driven rain | Lifted shingles or damaged ridge | Shingle edges and ridge caps |
| Stain far from any penetration | Water moved along framing | Follow the wet trail uphill to its highest visible point |
Follow the Wet Trail Without Disturbing It
Only inspect an attic if access is dry, stable, and clear of electrical hazards. Stay on a secure walkway or supported platform, never ceiling drywall or insulation-covered areas where footing is unknown.
With a flashlight, locate wet framing and follow it upslope visually. Photograph the highest visible wet point and nearby roof penetrations before anyone removes materials; don't reach into wet insulation or disturb wiring.
Give those photographs to the roofer, who can check the corresponding flashing transitions, valleys, ridge details, chimney joints, gutters, and storm-created punctures. The OSHA roof-inspection guidance emphasizes structural assessment, protected access, and identifying unsupported areas during recovery work.
If the source is unclear, Erica's Plumbing, Air Conditioning & Restoration explains ways to find the source of ceiling leaks, including considering causes other than roofing. For a suspected roof entry point, arrange a roof leak detection assessment.
Sealing the ceiling stain from inside won't close the exterior opening. The traced water path determines where a temporary cover belongs, not the location of the bucket.
Temporary Tarping Only When It Is Safe
Temporary mitigation limits additional damage; permanent repair restores the roof assembly. The Maryland Insurance Administration's natural-disaster guide recommends protective measures such as covering exposed roofs and warns that permanent repairs made before insurer consultation may not be reimbursed. That's useful guidance, but confirm requirements under your own policy.
A homeowner's limit is a cover that can be placed from stable ground or an established safe access point without stepping onto damaged roofing or approaching an unprotected edge. Low pitch alone doesn't make a roof safe. Steep surfaces, soft decking, and exposed edges belong to an equipped roofing crew.
What a Proper Temporary Cover Requires
These are installation checks to discuss with the roofer, not instructions to climb during a storm.
- Cover beyond the suspected entry point. Extend the sheet onto sound supporting areas and beyond the ridge where feasible so runoff can't enter at its upper edge.
- Maintain downslope drainage. Arrange the cover so water runs off rather than collecting in pockets.
- Restrain the edges continuously. Battens distribute restraint better than isolated exposed nails that can loosen or tear through the sheet.
- Fasten only into sound support. Damaged or unsupported decking can't reliably hold the attachment.
- Mark unsafe areas. Identify soft sections as no-step zones and restrict access beneath and around the work.
- Arrange follow-up checks. Wind uplift and trapped water can undermine a cover after installation.
The image shows a temporary covering operation, not permission to attempt roof work in rain.
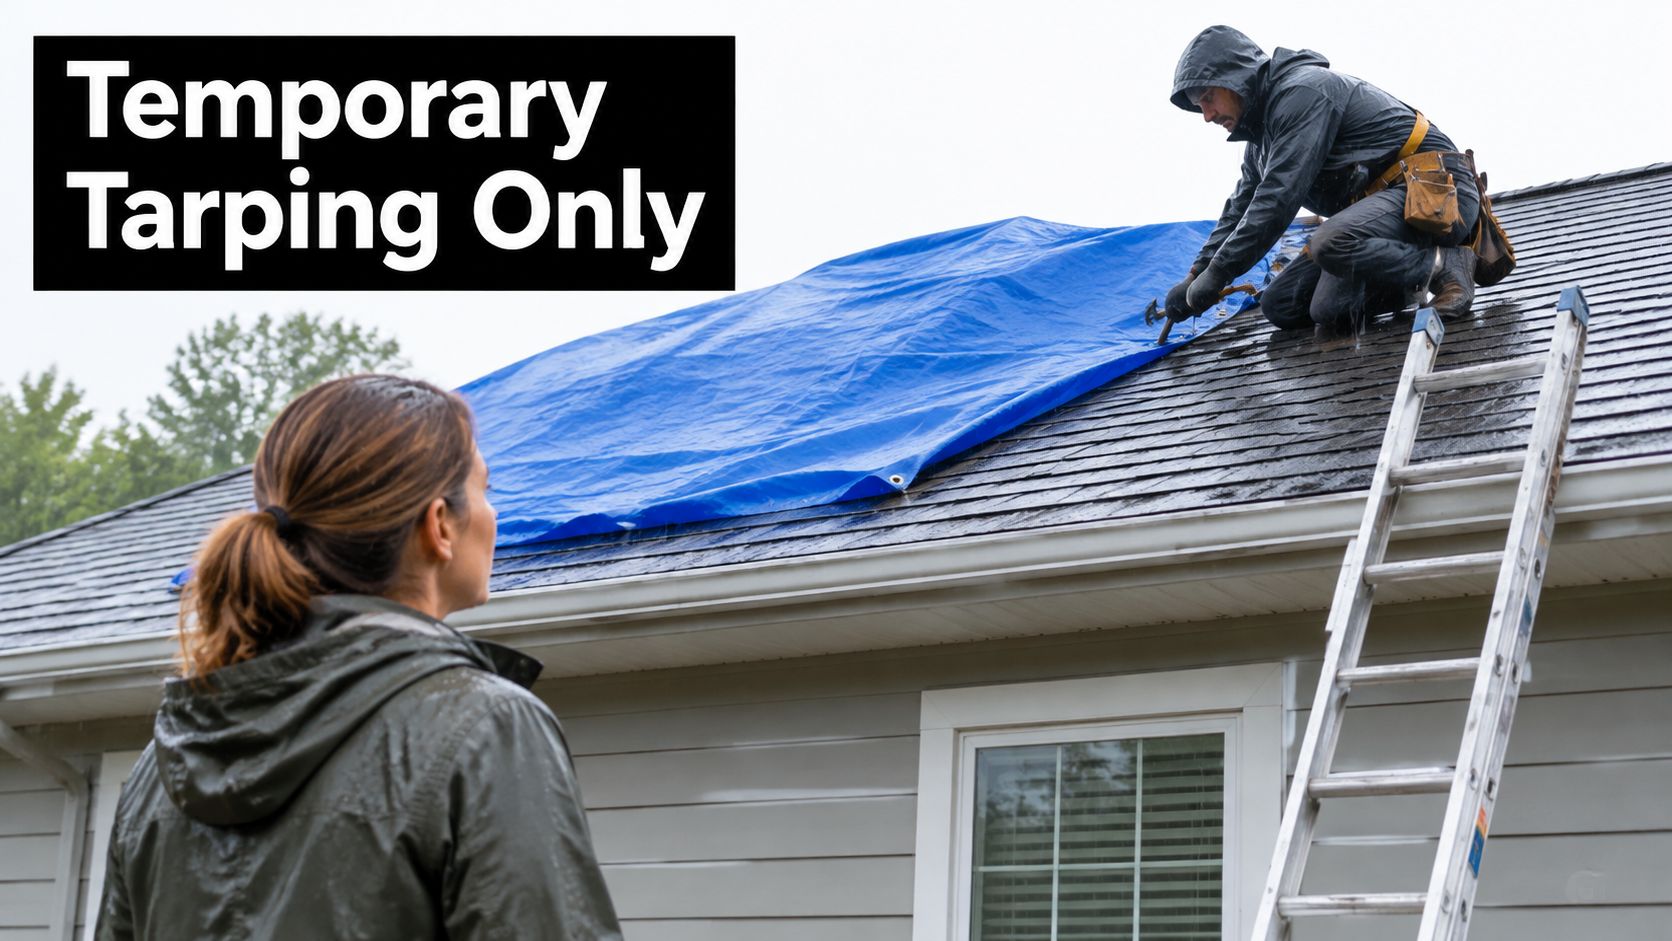
A loose tarp without edge restraint can shift; a cover across ventilation openings creates another problem. Use emergency roof tarping information to prepare questions about access, attachment, and the permanent-repair plan.
Keep receipts for the tarp, battens, collection containers, and labor. A temporary cover needs a documented scope and a follow-up plan, not just a promise that it should hold.
Documenting Damage and Keeping Claim Costs Separate
Waiting for an adjuster while water enters can worsen interior damage. Finishing permanent work without photographs or an agreed scope can create a different problem: uncertainty over what was damaged and why the work was necessary.
FEMA's assistance guidance explains that insured applicants seeking disaster assistance must first file with their insurer and provide the settlement or denial letter; FEMA can't duplicate insurance benefits. Assistance isn't a reason to postpone necessary stabilization, and eligibility shouldn't be assumed.
Build a Record That Matches the Work
- Stabilize the leak safely. Record what was authorized, who performed it, and which conditions required urgent action.
- Document the affected property. Capture time-stamped photographs and video of wet materials, damaged contents, and inaccessible areas.
- Notify the insurer and affected occupants. Keep written records of instructions, claim references, tenant notices, and access arrangements.
- Separate scopes and invoices. Keep temporary mitigation charges apart from permanent roof work and interior restoration.
- Preserve evidence appropriately. Ask the adjuster before discarding damaged materials, but don't retain hazardous debris inside occupied rooms or delay necessary drying.
Use wide photographs to establish location and close-ups to show condition. If a remediation professional takes moisture readings, request the measurement locations and repeat readings at those same spots so the record is comparable.
For contents, list the item, approximate age, estimated value, and supporting receipts if available. Landlords should maintain a separate file for each unit; commercial managers should separately record affected inventory, closures, and operational restrictions.
Keep the damage record and the repair scope connected, but don't combine unrelated losses into one unexplained total.
A roof leak insurance claim checklist can help organize the submission. Ask for separate answers about emergency stabilization, interior losses, business interruption, and eventual roof replacement. Each involves different evidence and potentially different coverage terms, and the insurer determines coverage under the policy.
What Emergency Leak Repair Costs Right Now
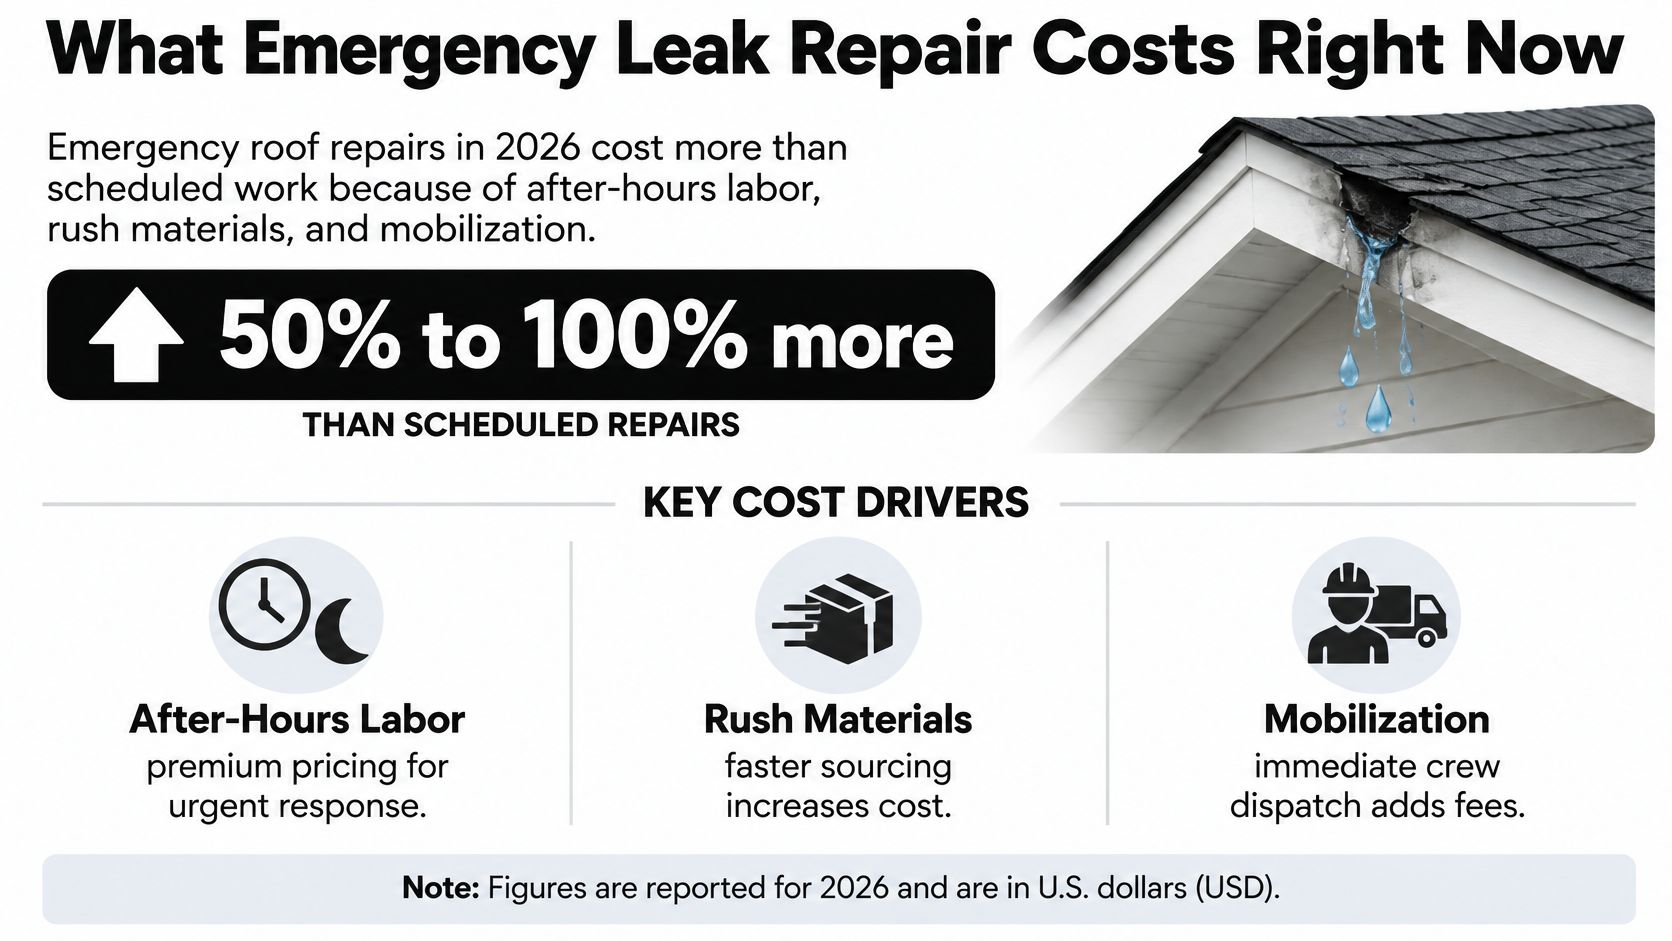
Urgency adds cost. RoofPredict reports that emergency roof repairs in 2026 cost 50% to 100% more than scheduled work, citing after-hours labor, rush materials, and mobilization.
| Source and year | Reported range or premium | Reference point |
|---|---|---|
| Homefixx, targeted roof-leak repair by licensed roofers, 2026 | $350 to $1,200 nationally | Median about $650 |
| LegalClarity, leaking-roof repair, 2026 | $350 to $1,900 | National average about $1,150 to $1,170 |
| This Old House, emergency roof-leak repair, 2025 | $379 to $1,755 | Emergency pricing can reach twice regular repair |
| HousingWire reporting Bold North data, emergency repairs, 2025 | Average above $1,200 | Preventive maintenance approximately $100; broader home repairs, not a roof-only comparison |
| RoofPredict, emergency versus scheduled work, cited above | Emergency-service premium | After-hours labor, rush materials, mobilization |
These are reported benchmarks, not a Kansas City quote, and they don't all describe the same scope. The broader home-repair comparison shouldn't be treated as a roof-maintenance price.
The main emergency pricing drivers are summarized below.
Read the Scope Before Comparing Totals
An isolated flashing or penetration repair involves different work from opening an assembly and replacing damaged decking. Interior drywall, insulation, drying, difficult access, and emergency dispatch can add separate charges; don't assume they're included in a roof-repair range.
Request a written estimate with distinct lines for emergency stabilization, permanent repair, and interior work. Ask whether dispatch, materials, disposal, return visits, and concealed-damage allowances are included. A lower total isn't a better deal if it leaves the roof only temporarily covered.
Call 24/7 Emergency Roof Help With Documentation Ready
If the leak involves the safety warnings in the decision table, make the call rather than attempting more investigation. You don't need a complete diagnosis before requesting help, and you shouldn't enter an unsafe room to finish your records.
Use the company's contact options to explain that you have an active leak.

Have the information you already collected ready:
- Property location and access: Give the address, building type, safe entry route, and any restricted areas.
- Damage record: Share photographs and any moisture log already available. Don't delay the call to obtain readings.
- Insurance details: Provide the insurer's name and claim number if you have one.
- Event timeline: Describe when the leak began, the weather at the time, and whether water is still entering.
At Two States Exteriors LLC, we operate 24/7 for roofing repairs or installations and offer emergency residential and commercial roofing services, including repairs needed for insurance claims and hail or storm damage. Emergency availability doesn't mean every roof can be accessed immediately in unsafe weather.
Confirm the Response Plan on the Call
Ask when a crew can arrive and whether that window can be confirmed in writing. Clarify whether the initial visit will involve tarping, another temporary repair, or assessment before work can safely proceed.
Also ask whether the estimate separates stabilization, permanent repair, and interior work, and what photographs or written findings the crew will provide for your insurer. Confirm arrival times and claim-support steps directly, rather than assuming a particular response or reimbursement outcome.
The video below provides additional company context.
Make the emergency call today with your address, current leak conditions, and available photographs ready.
Two States Exteriors LLC offers emergency roofing services and roof repairs for insurance claims, helping homeowners and businesses address leaking roofs. Visit Two States Exteriors LLC to request help, describe the active leak, and confirm a safe response plan.